Frequently Asked Questions
Frequently Asked Questions
Introduction
You can use this application from both computer browser or android application. To login for the first time after you have installed the android application, you will need internet connection. After you have logged in, you can use it offline or online. Please keep in mind that, you can save patient data in the application without internet. But the notification can not be sent without it! You can send notification manually or it will be sent automatically after 24 hours of saving the data subject to condition that internet connection is available and app is open. So please try to stay connected to internet when you use it.
From your PC's browser, go to the link or type http://notifytb.icddrb.org.
You can download the android application from Google Play Store & the IOS application from Apple Store.
For any queries, please feel free to contact.
Cell: 01730380080
E-mail: notifytb.bd@gmail.com
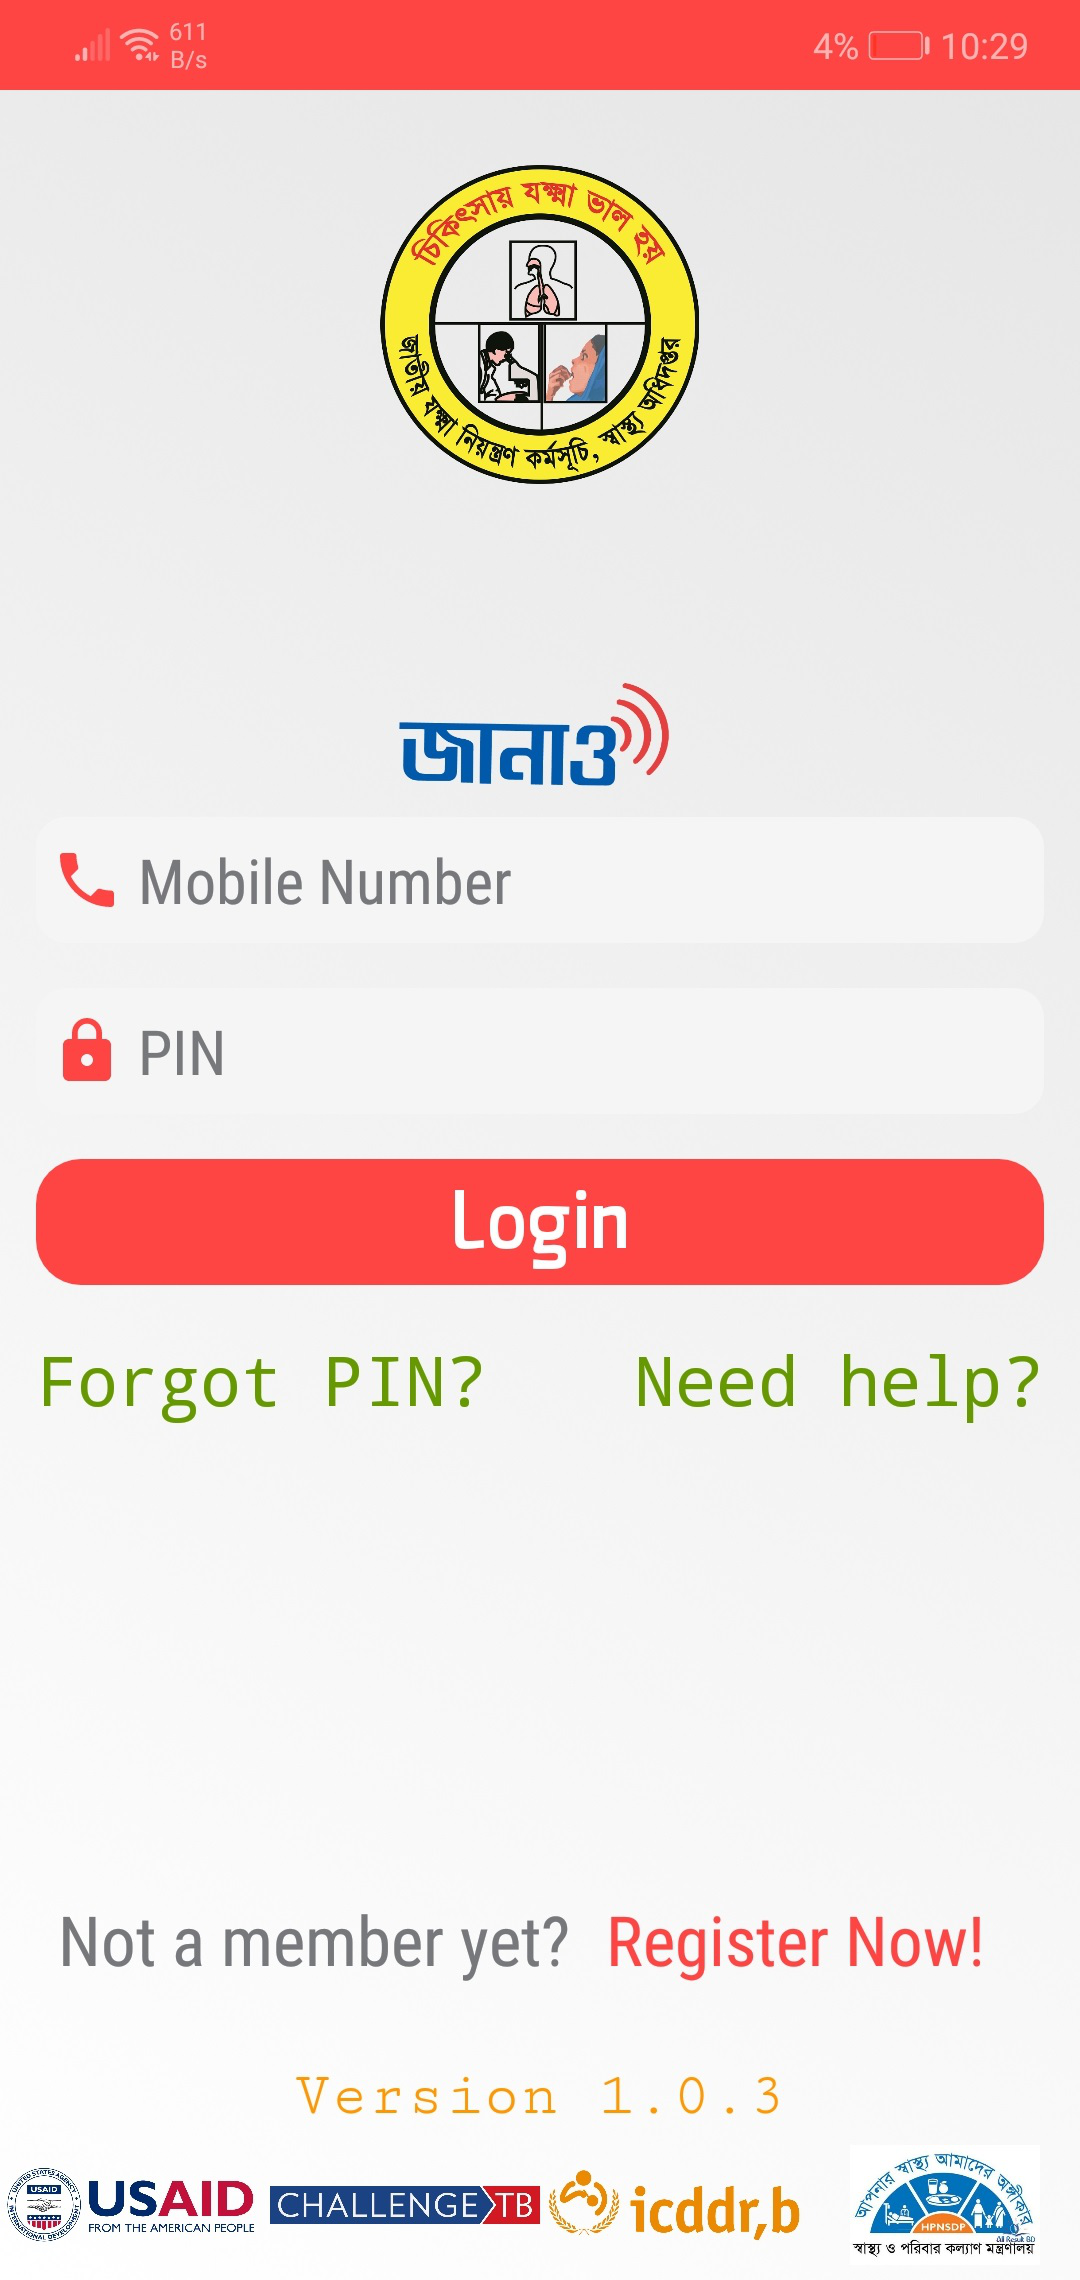
After you have installed the application you will see a screen like the below picture
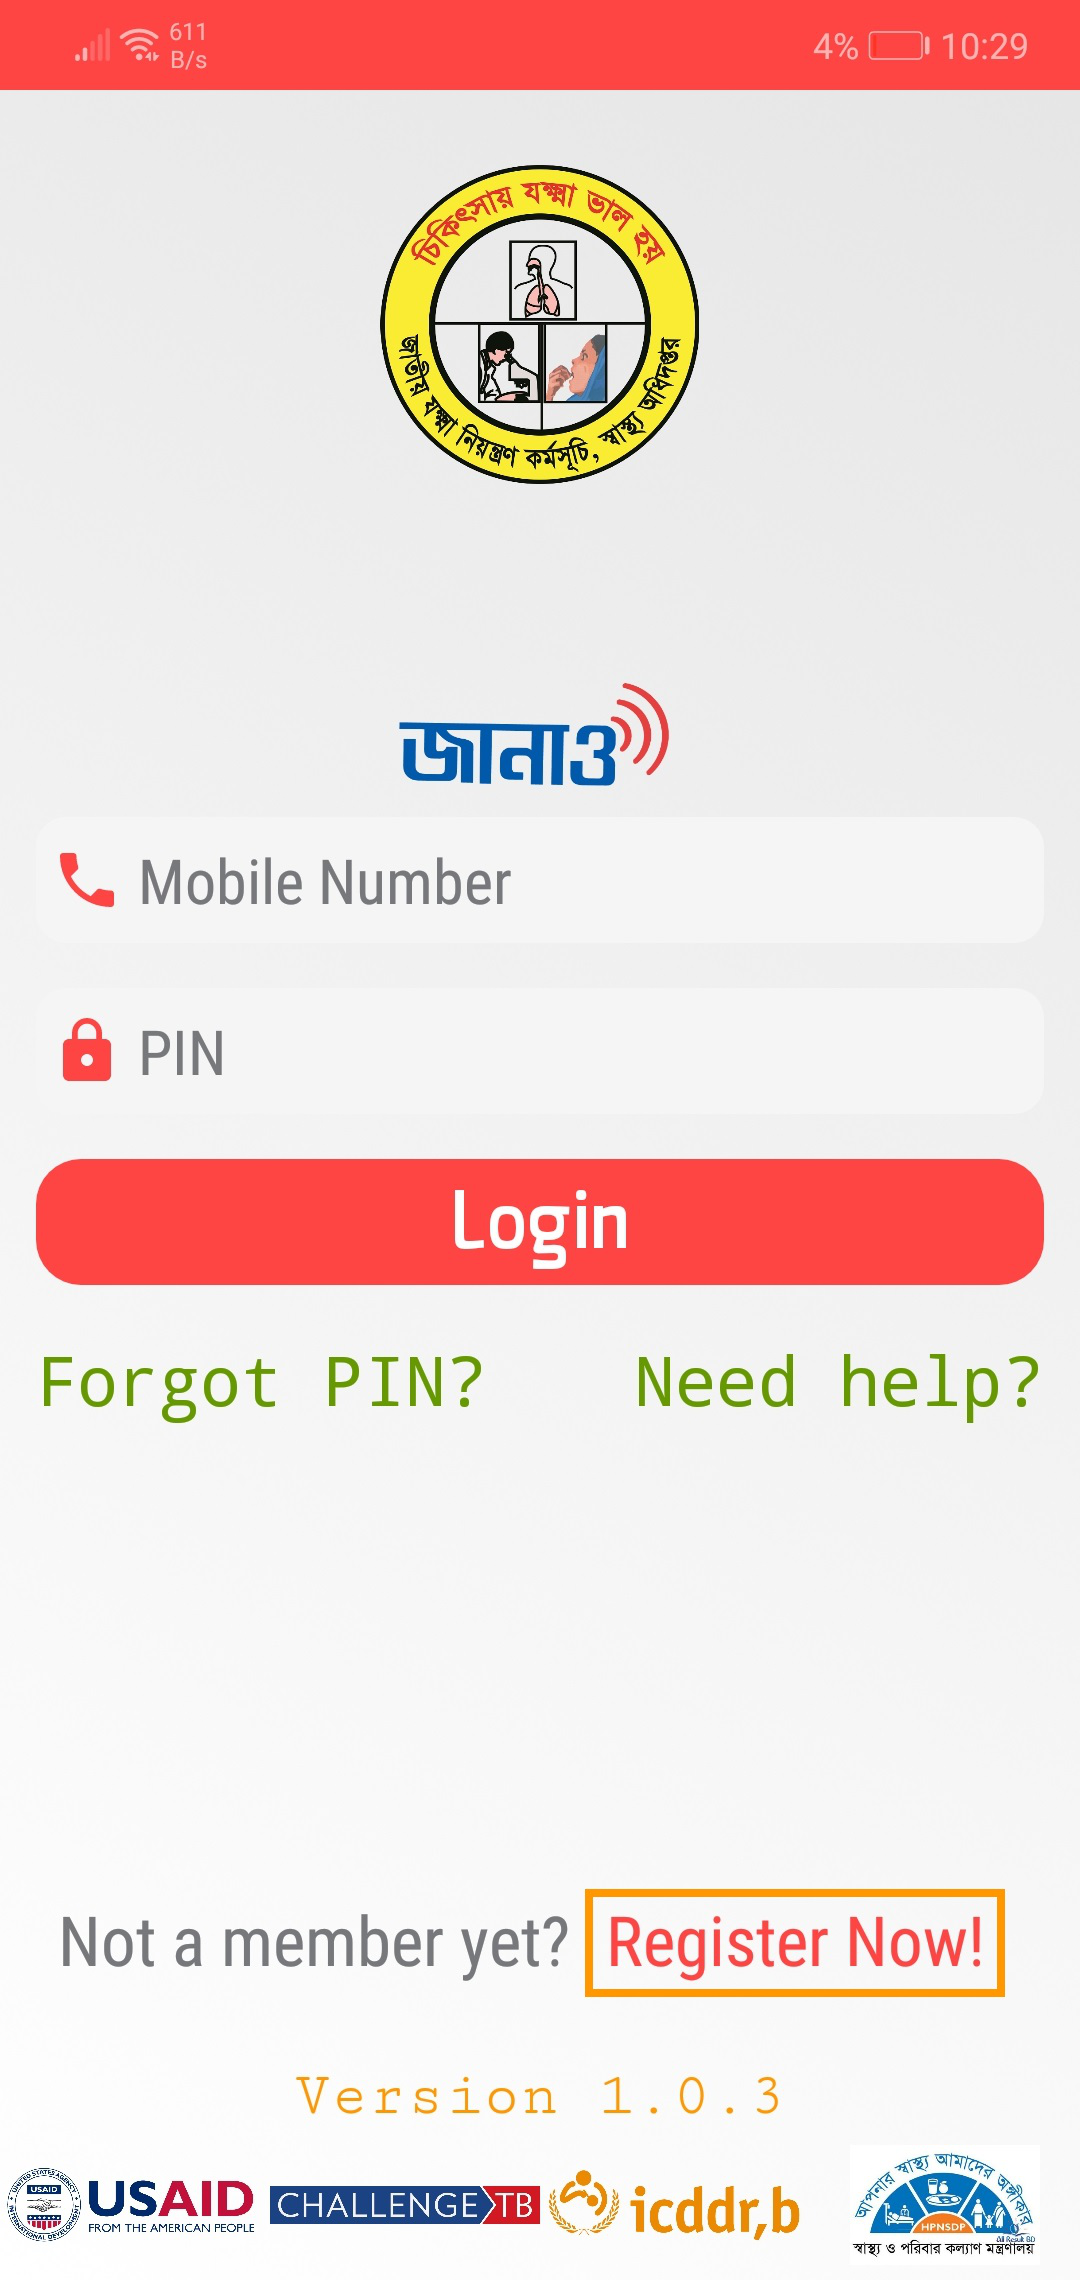
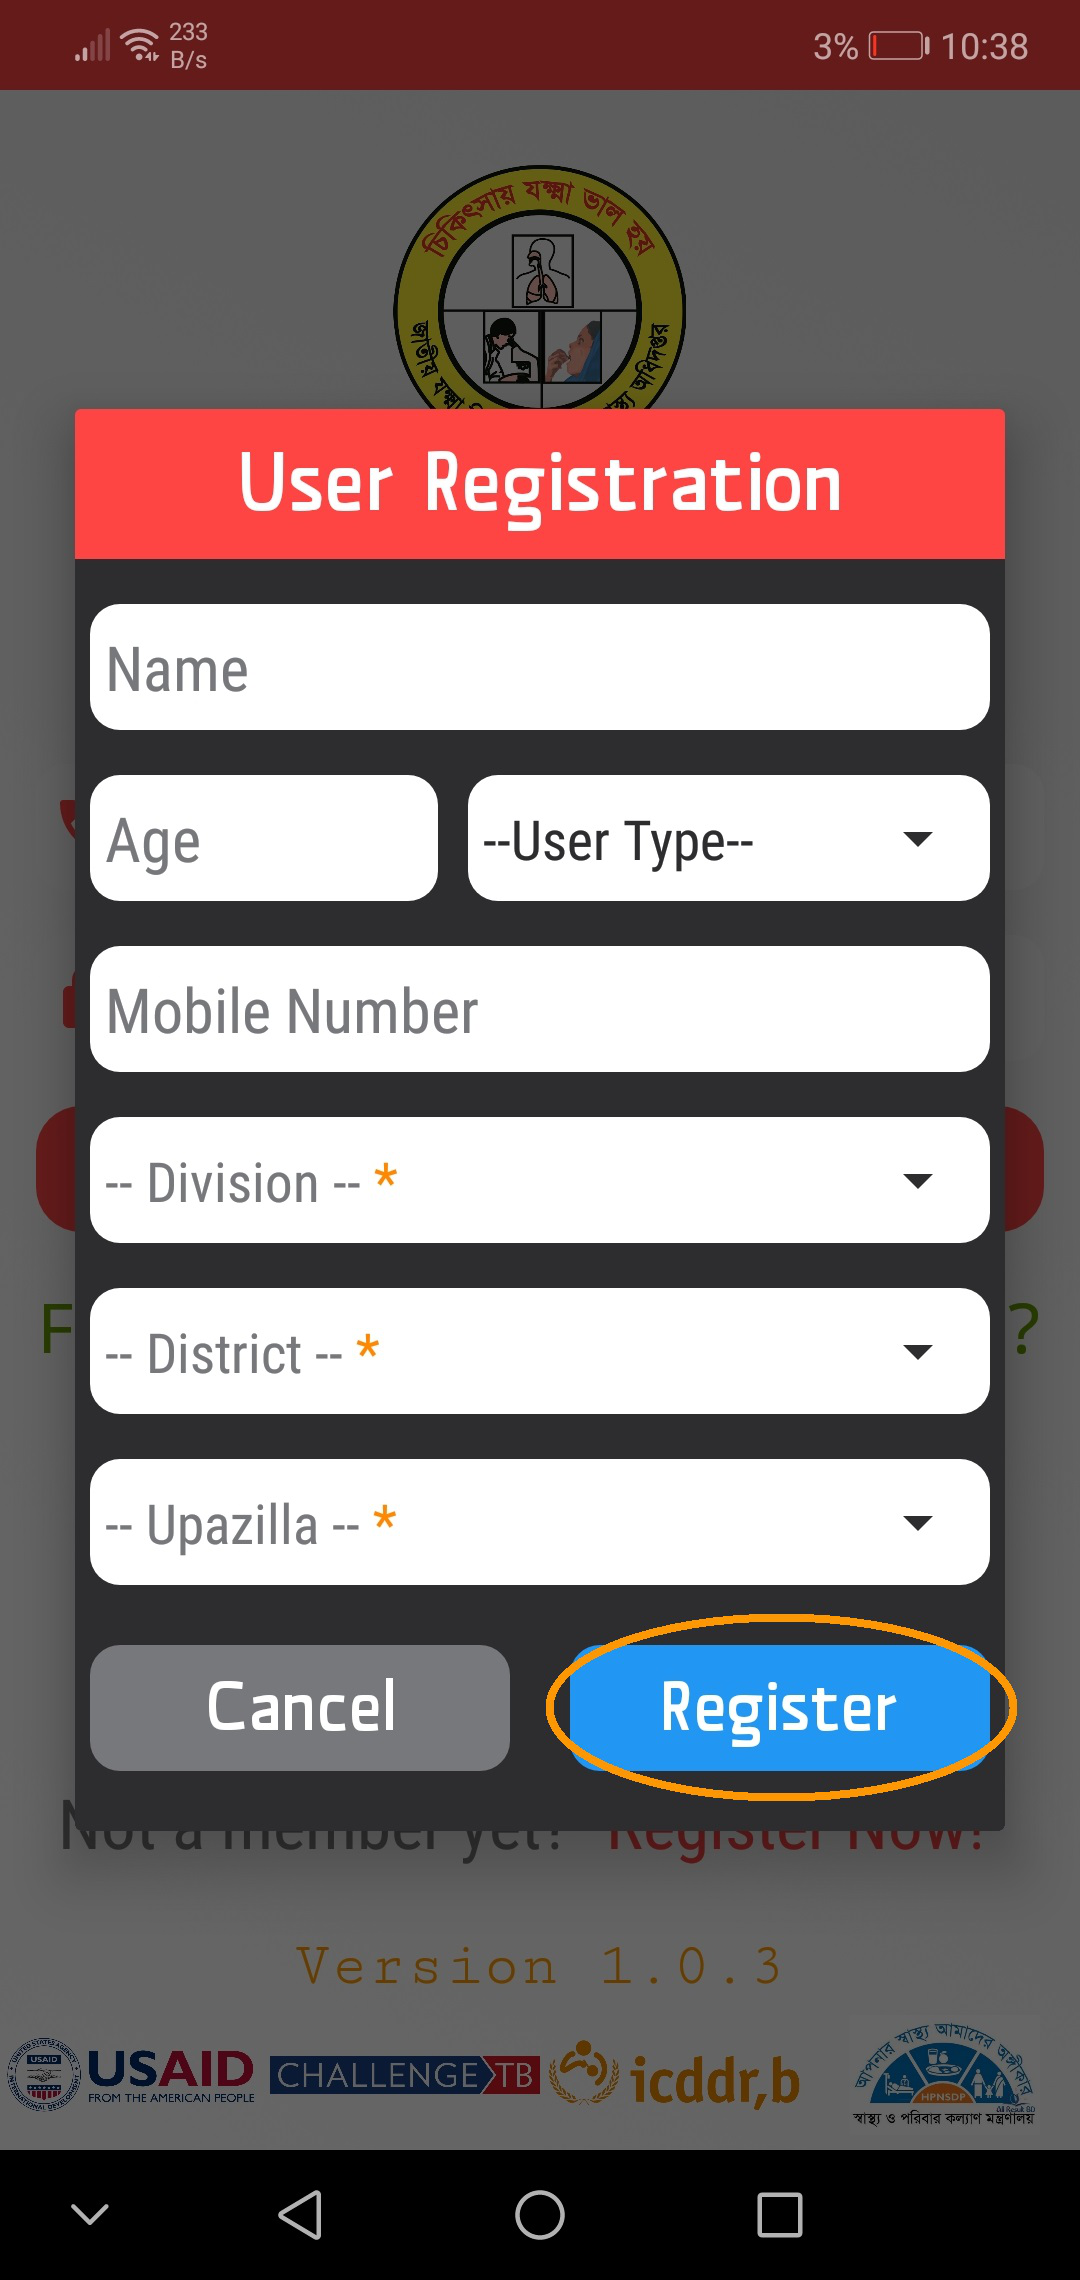
If you are a new user, click on the Register Now button and you will see a form appears with some fields. Fill in the form and hit Submit. Your account will be created upon some verification process. Wait for the SMS that will be sent to your given phone number with a PIN code of 4 digits. Enter your phone and the PIN you just received through SMS and hit Login
If you are already registered, just type your phone number and PIN in the given fields and hit Login button. If your phone number and PIN are right, you will redirect to the home page like below. Please note that to login for the first time to the application after you have installed, you will need internet connection. After you have logged in, you can use it offline or online.
If you forget your PIN, you can recover that from your mobile very easily. Just press Forgot PIN? in the lower part of the app's login screen. You will see a pop up window like this one below.
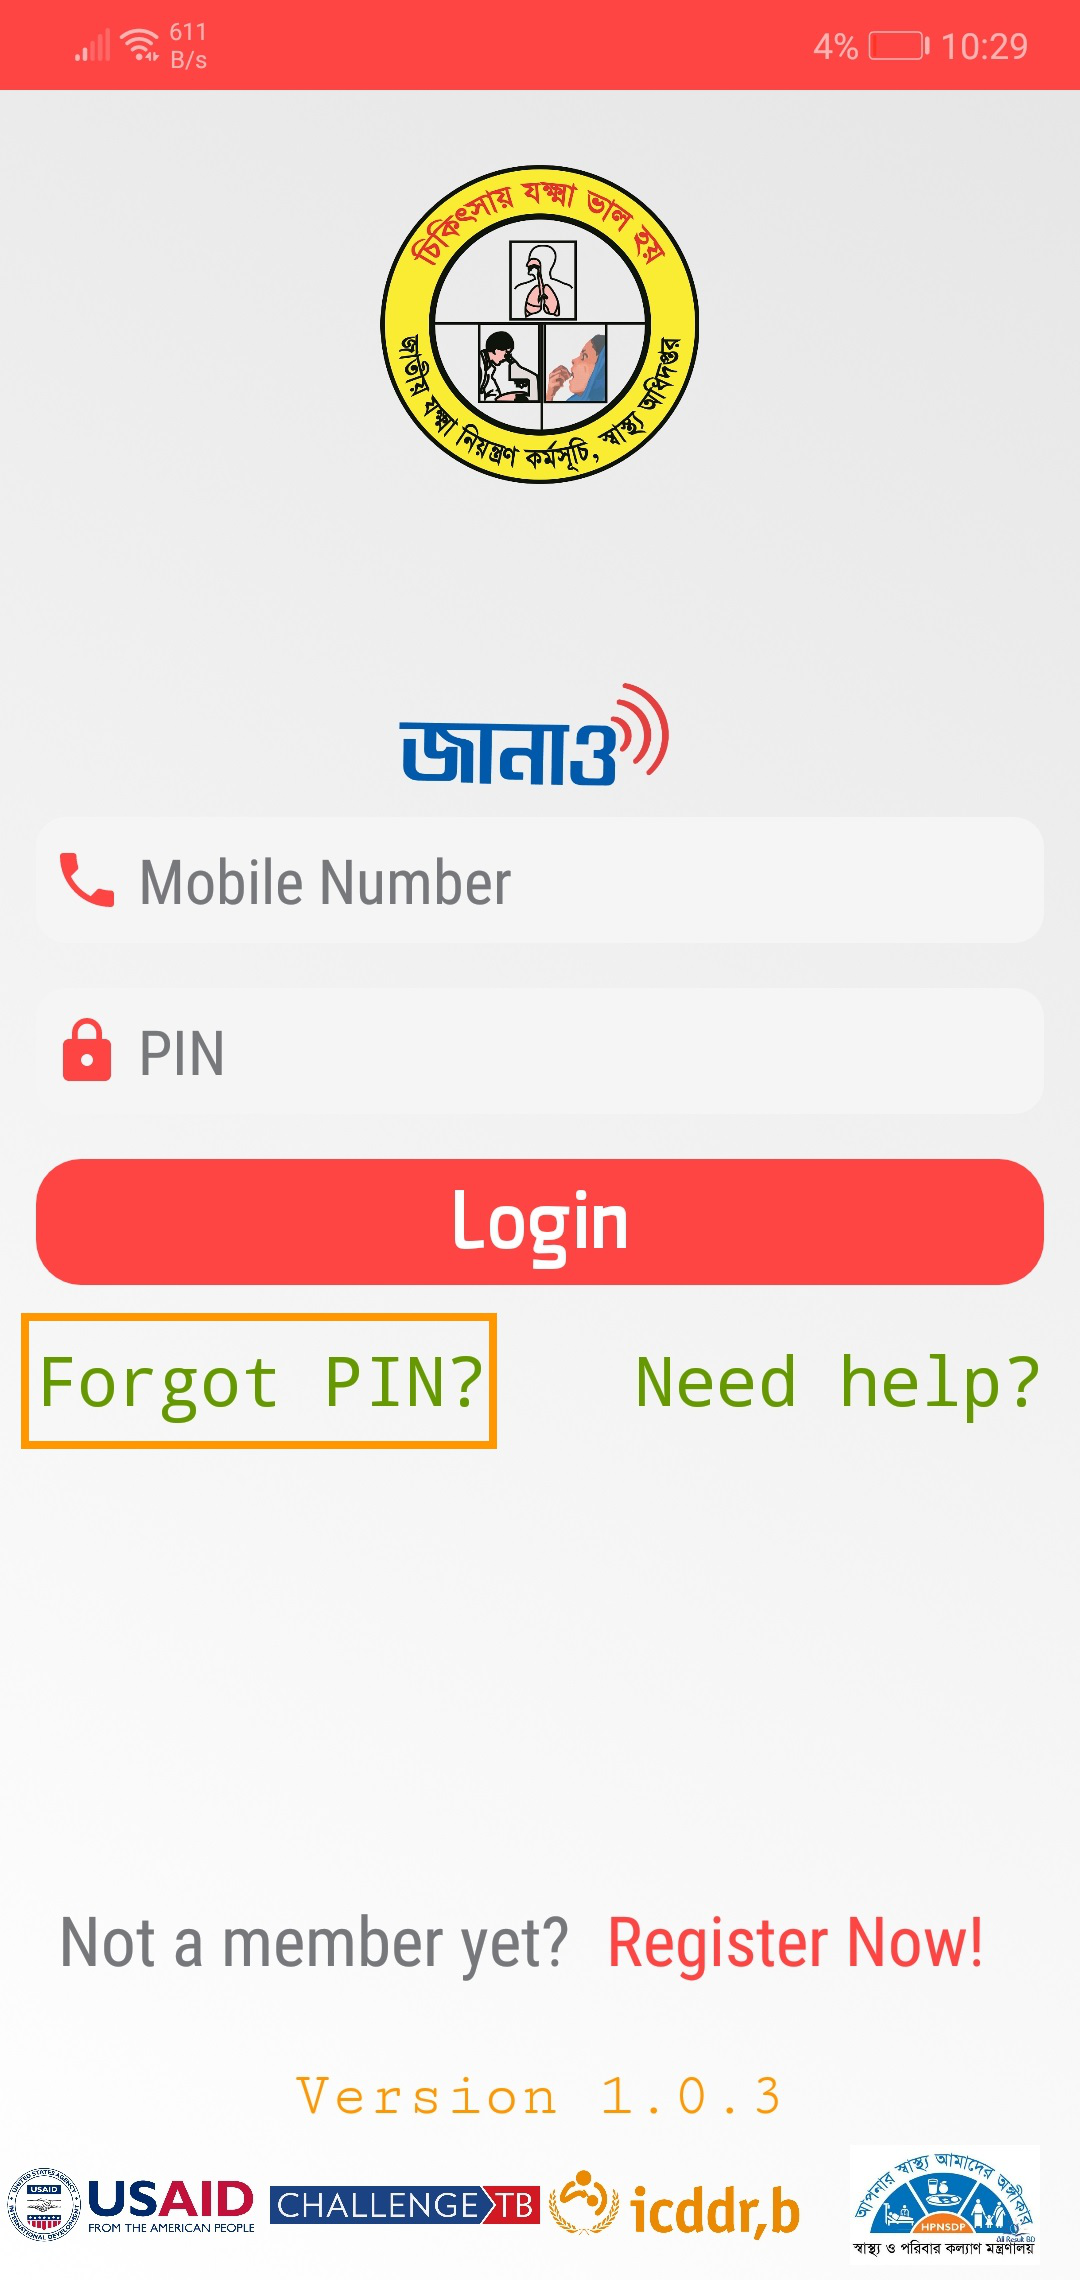
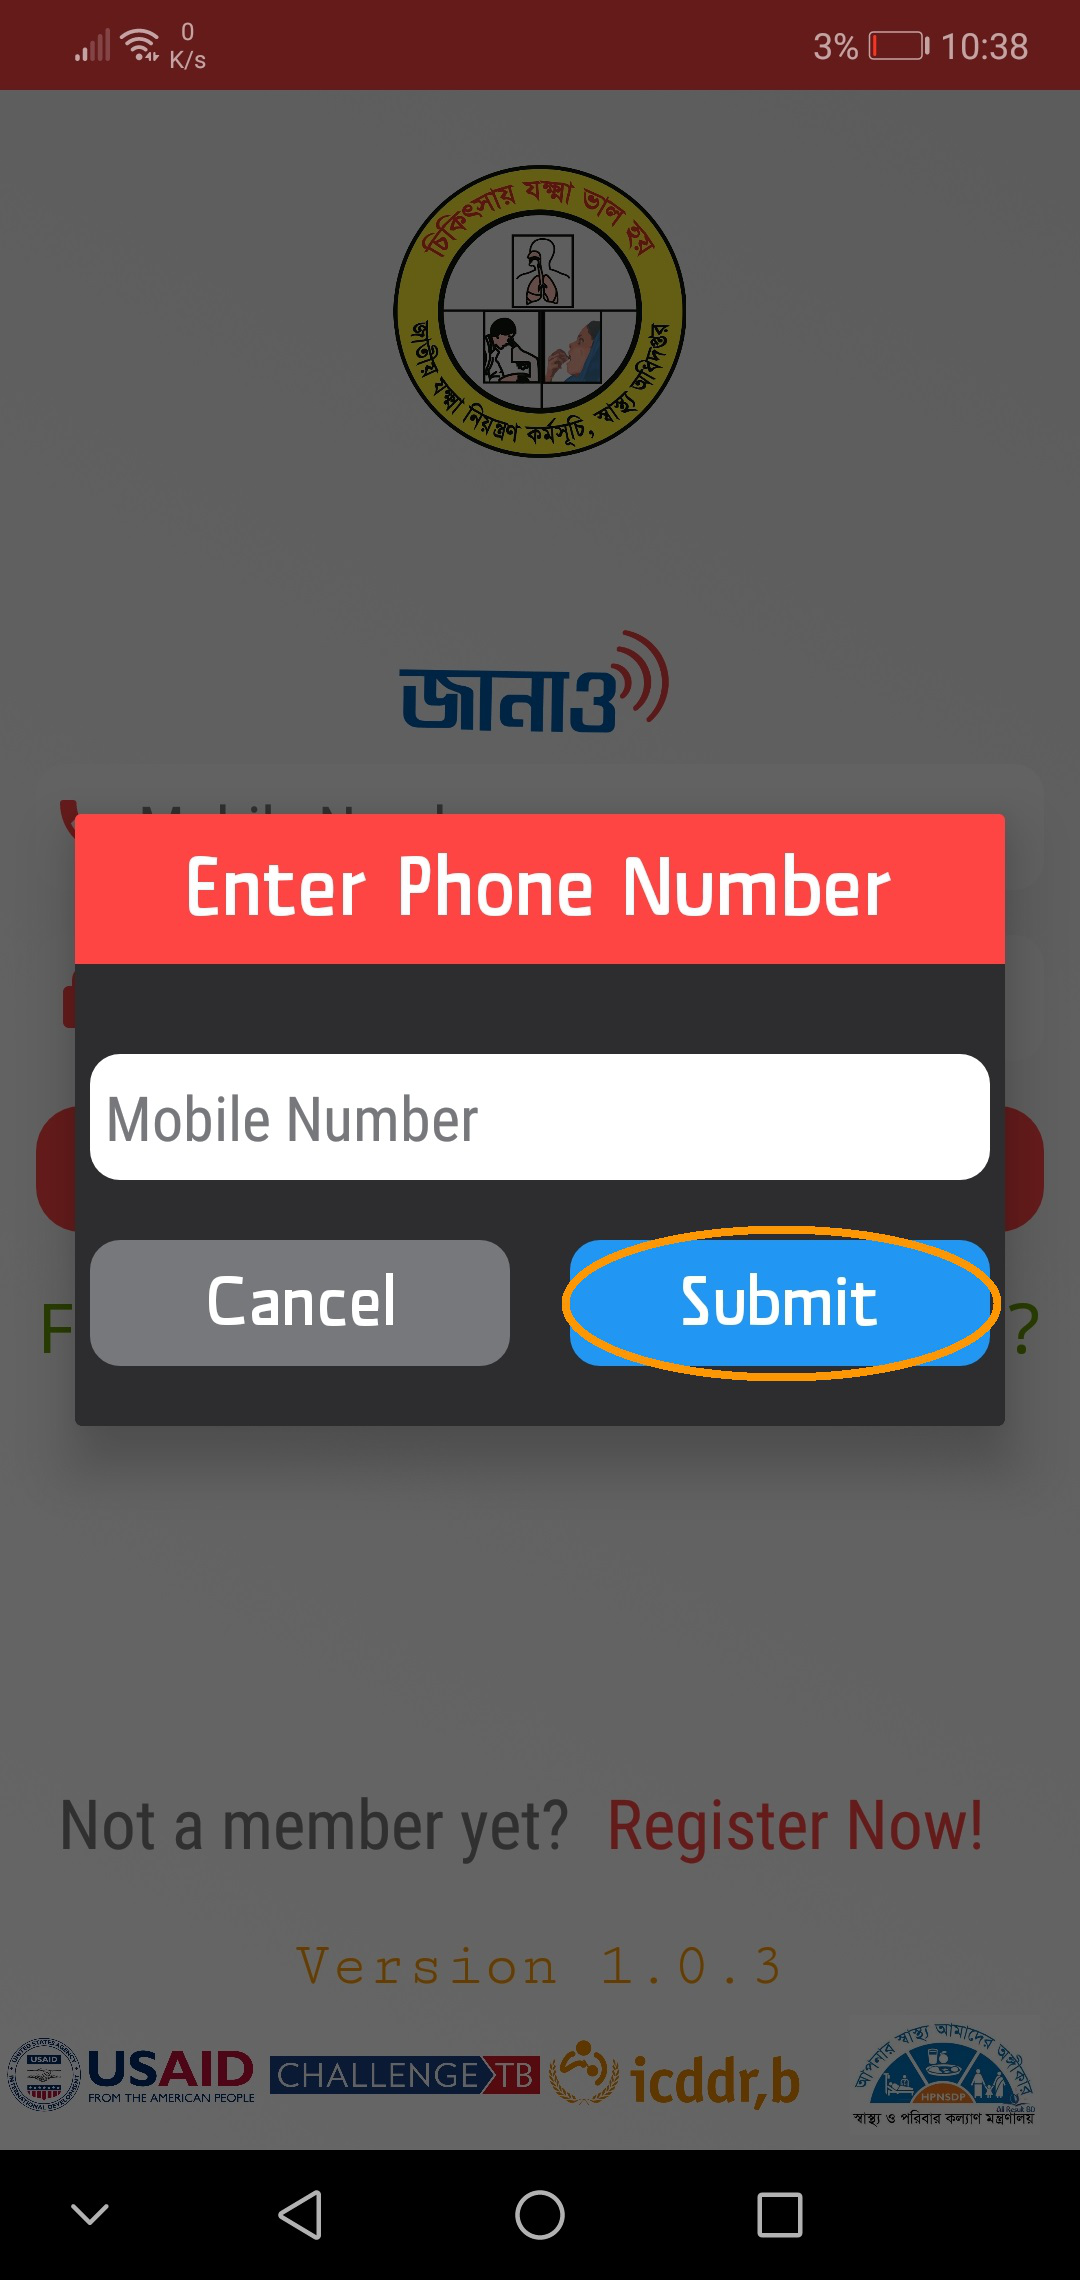
Type your registered phone number and hit Submit. If your phone number is correct you will receive your PIN number in your phone as message shortly.
There is a menu icon in the upper right corner. Click on that. Go to Profile. You will see a screen with your profile info. You can edit your info pressing the Edit profile info button.
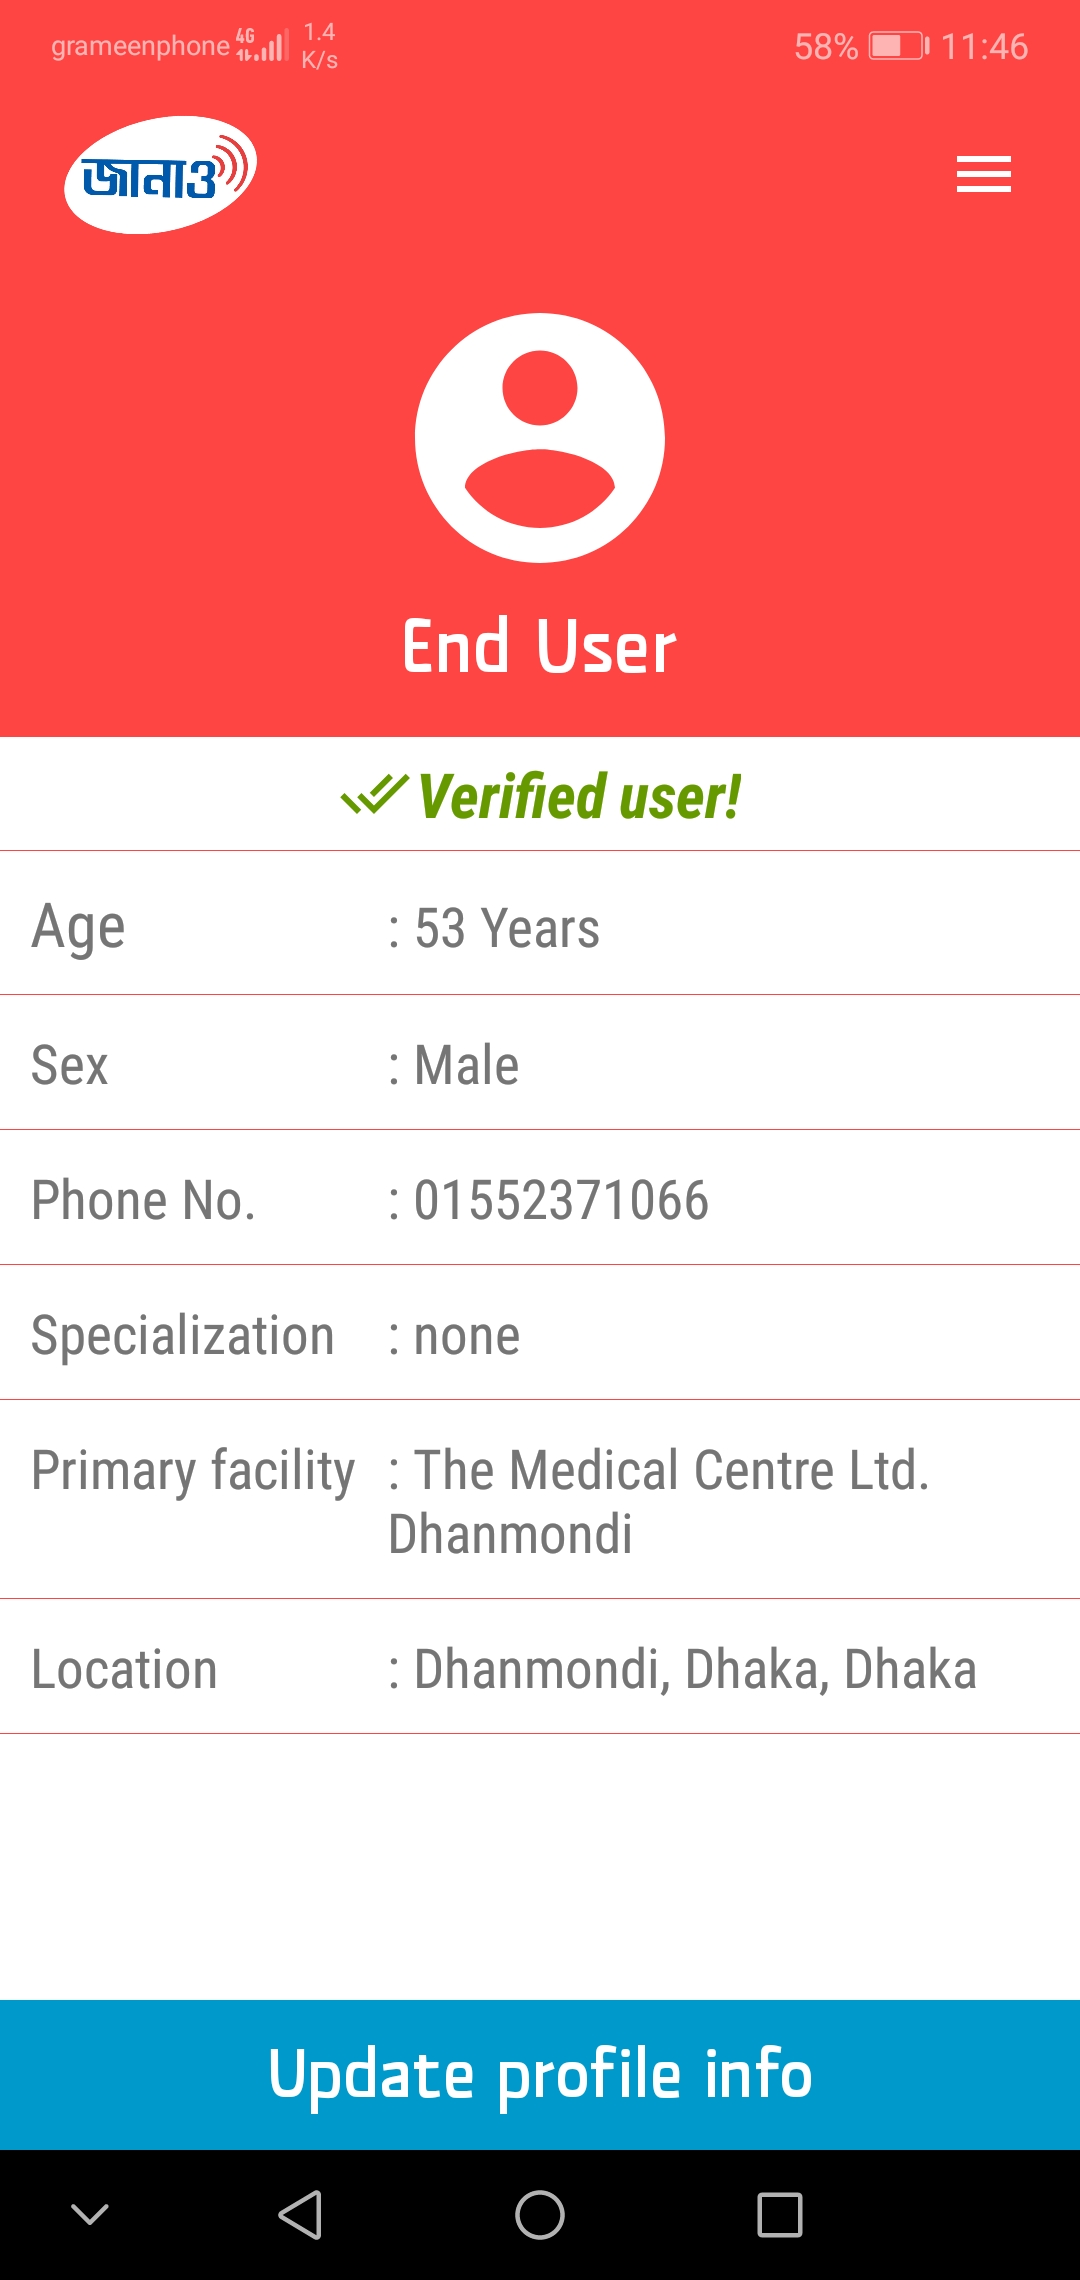
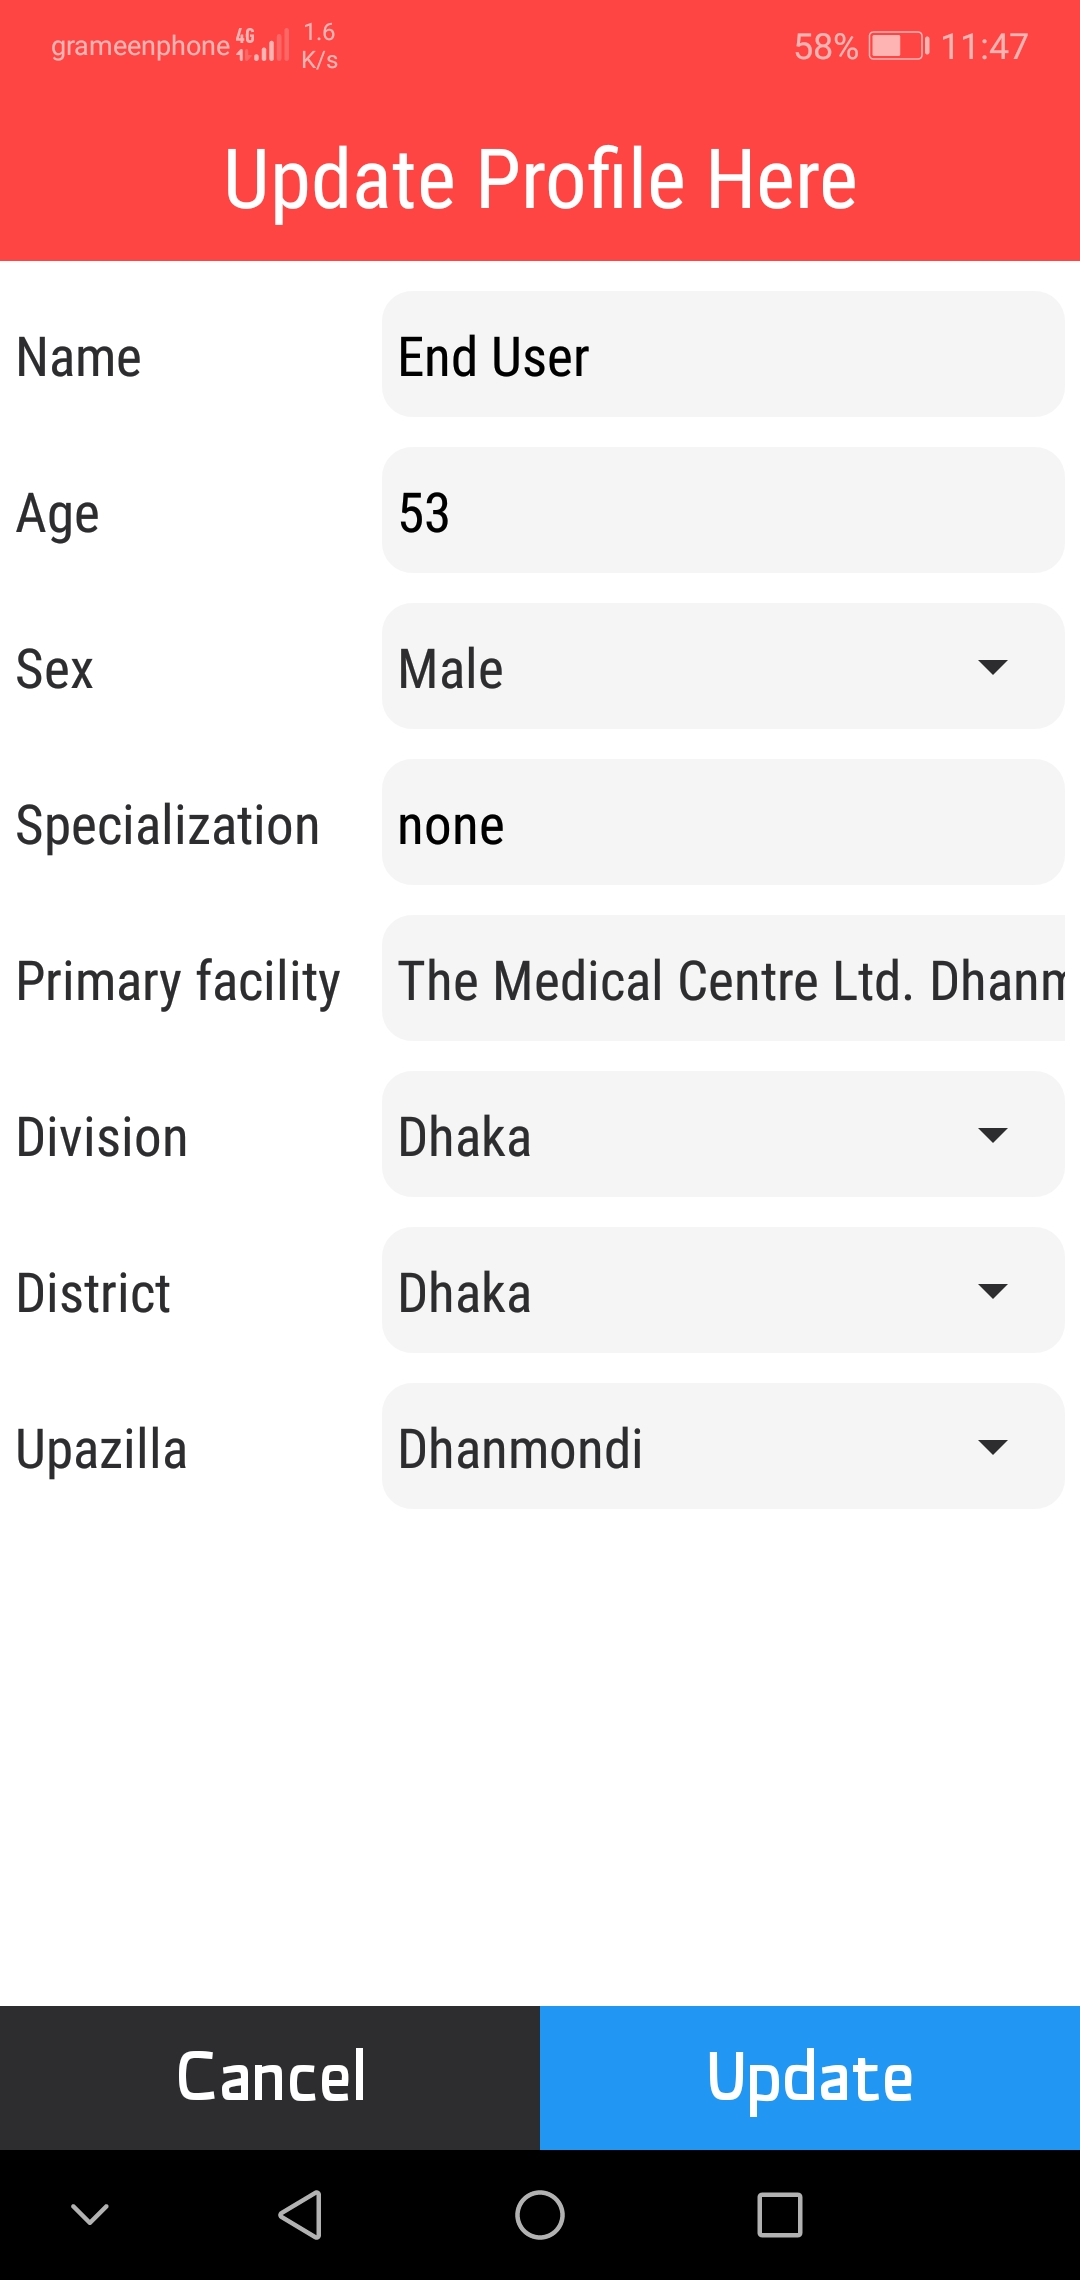
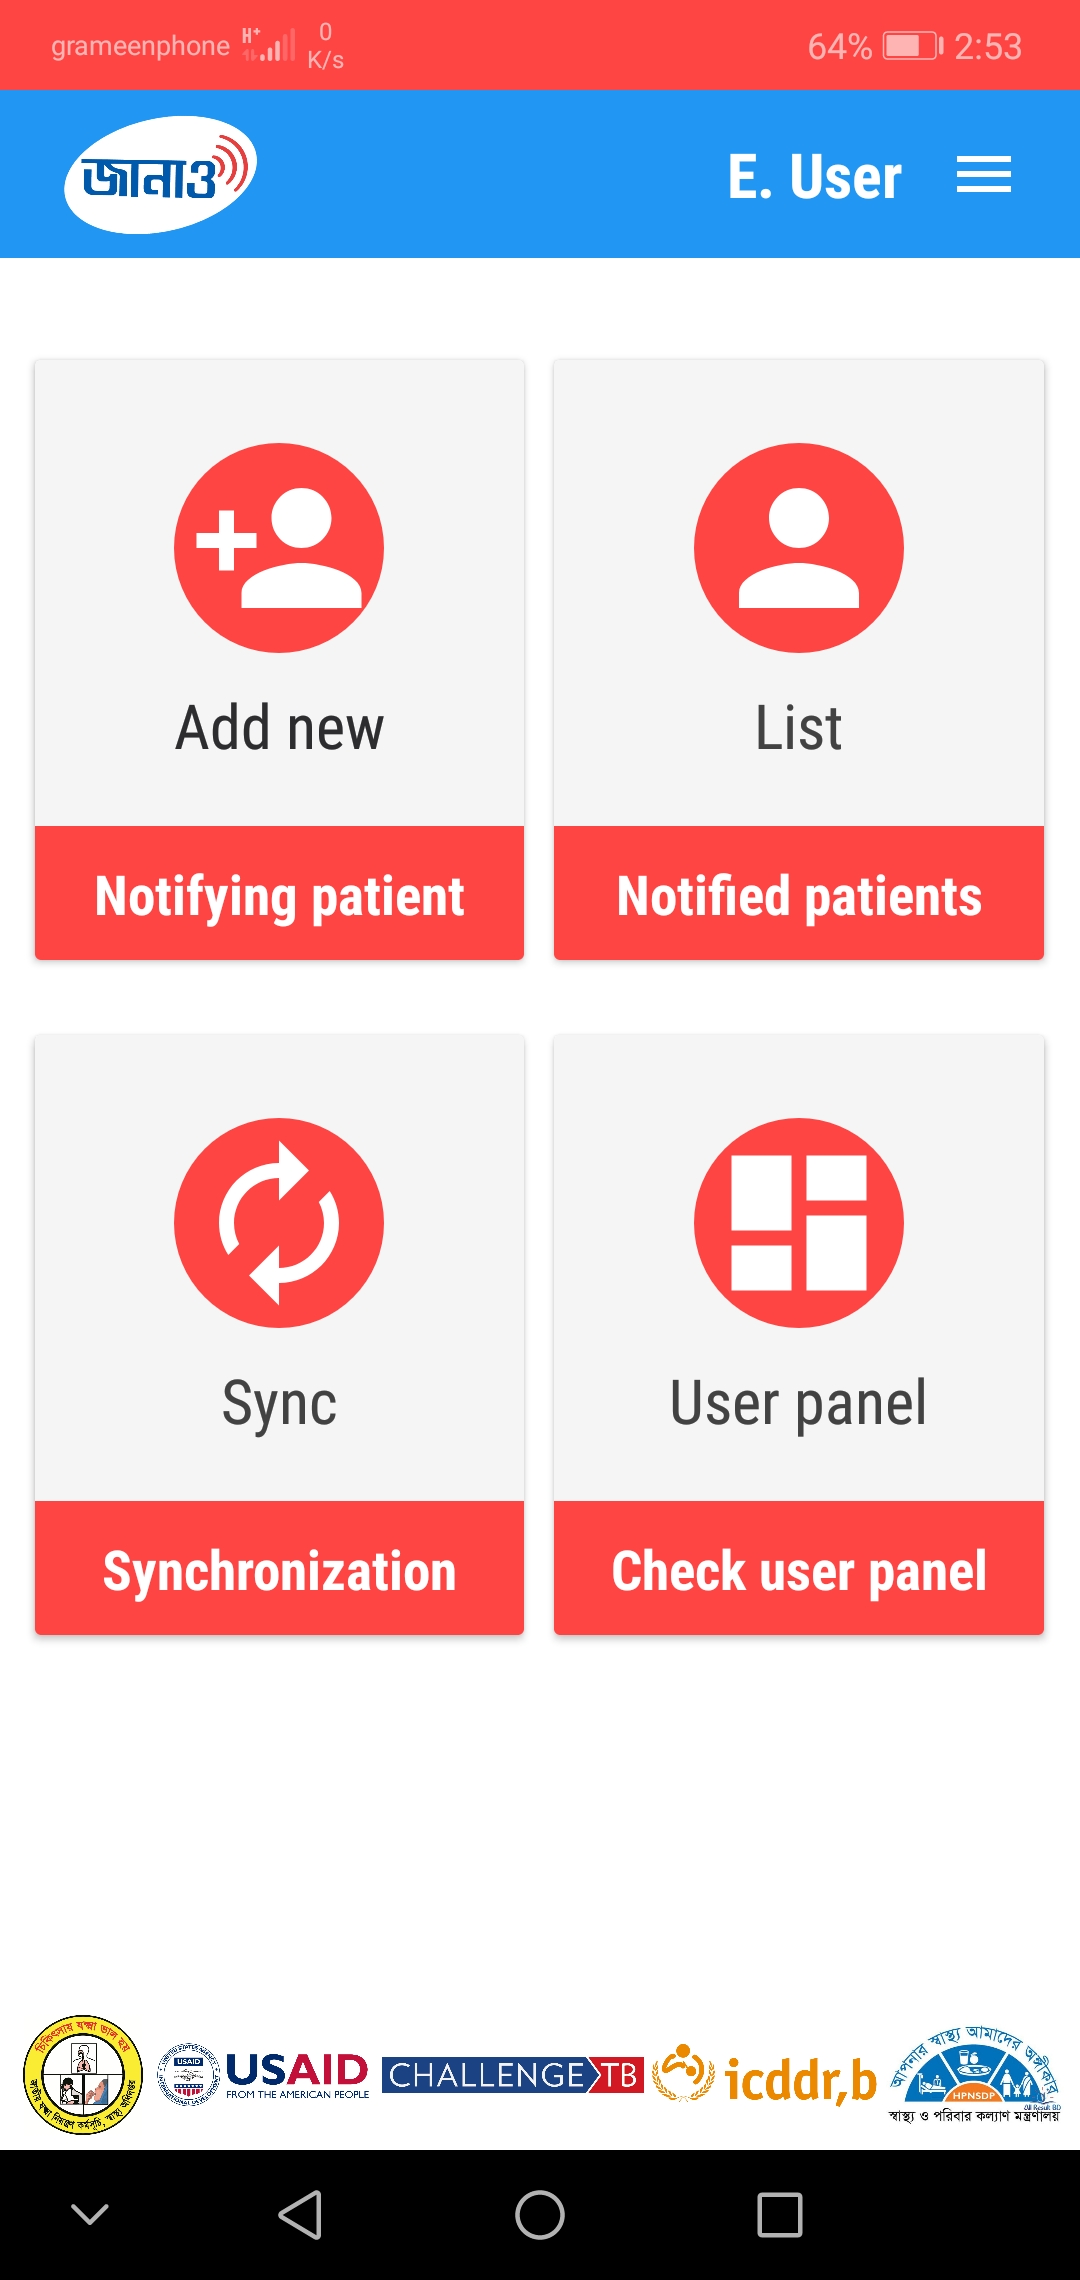
After successful login, you will see four options in your application like below picture. This is your home screen. Click on the Add new option which is in the upper left side of the screen.
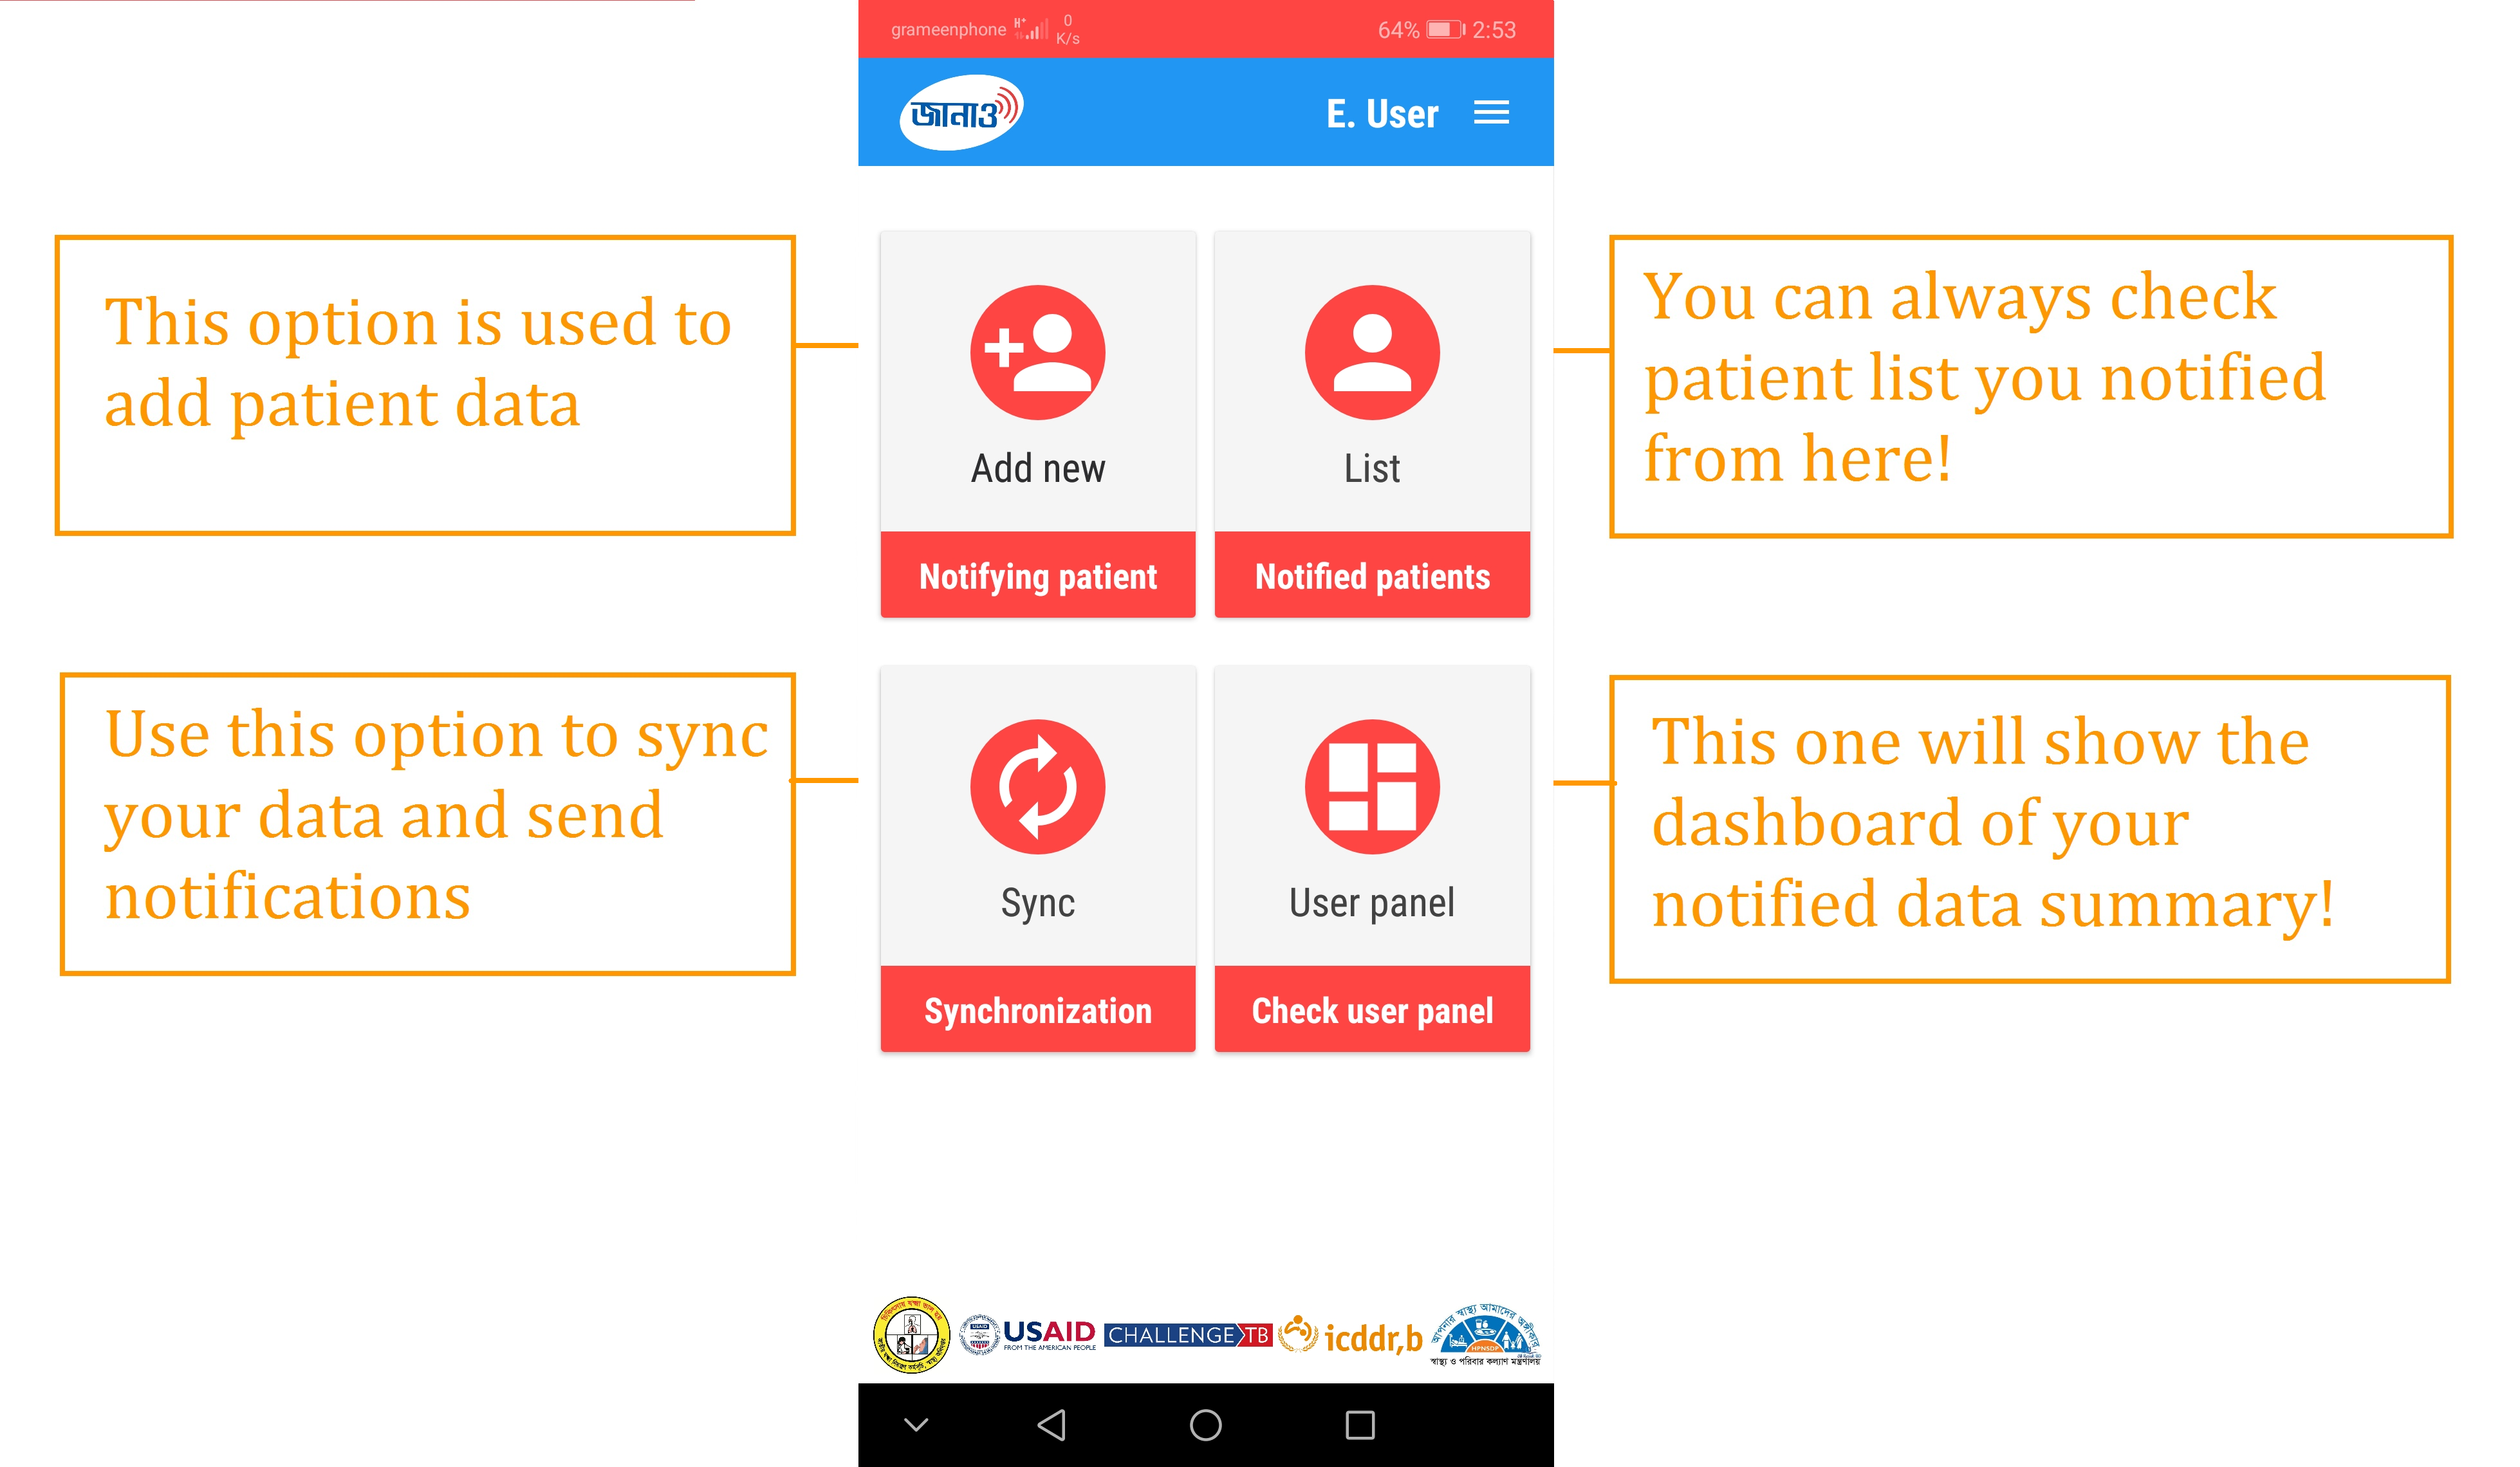
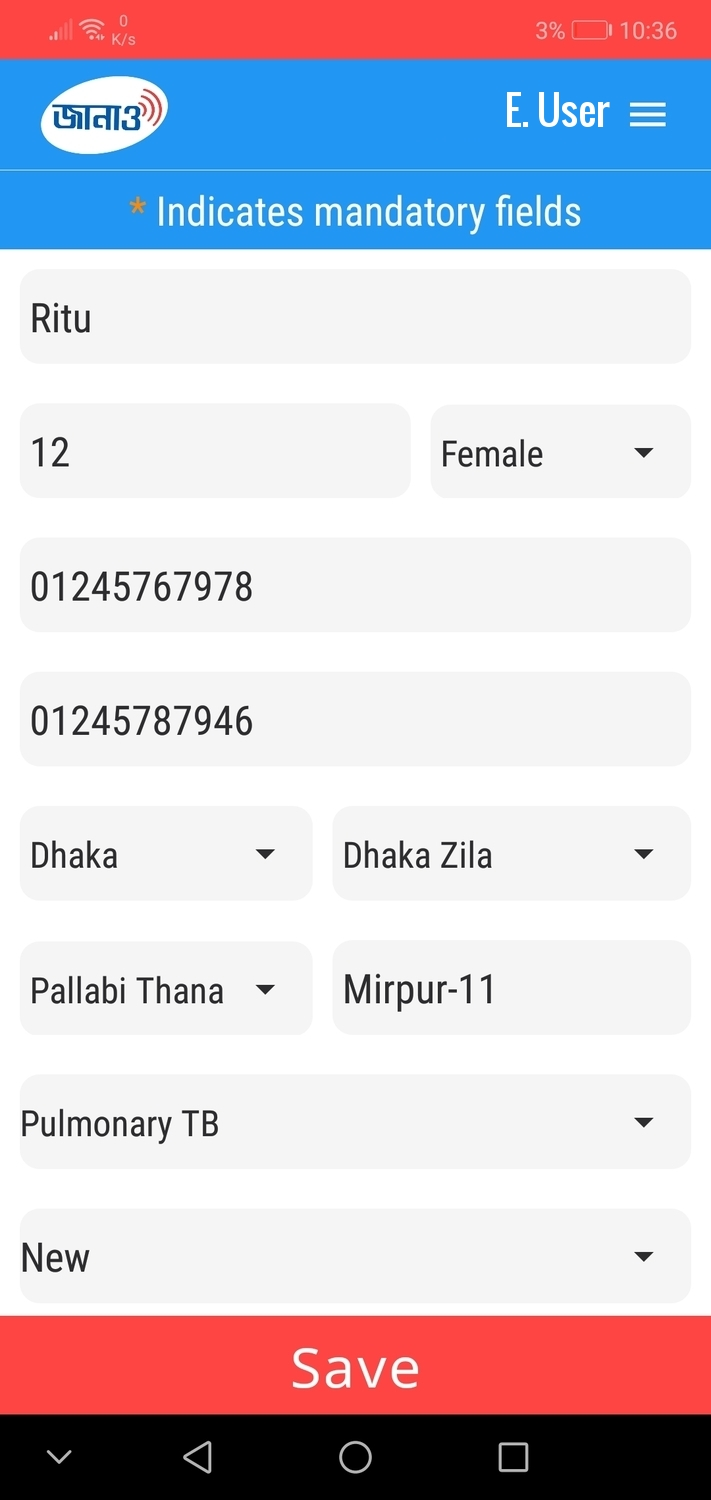
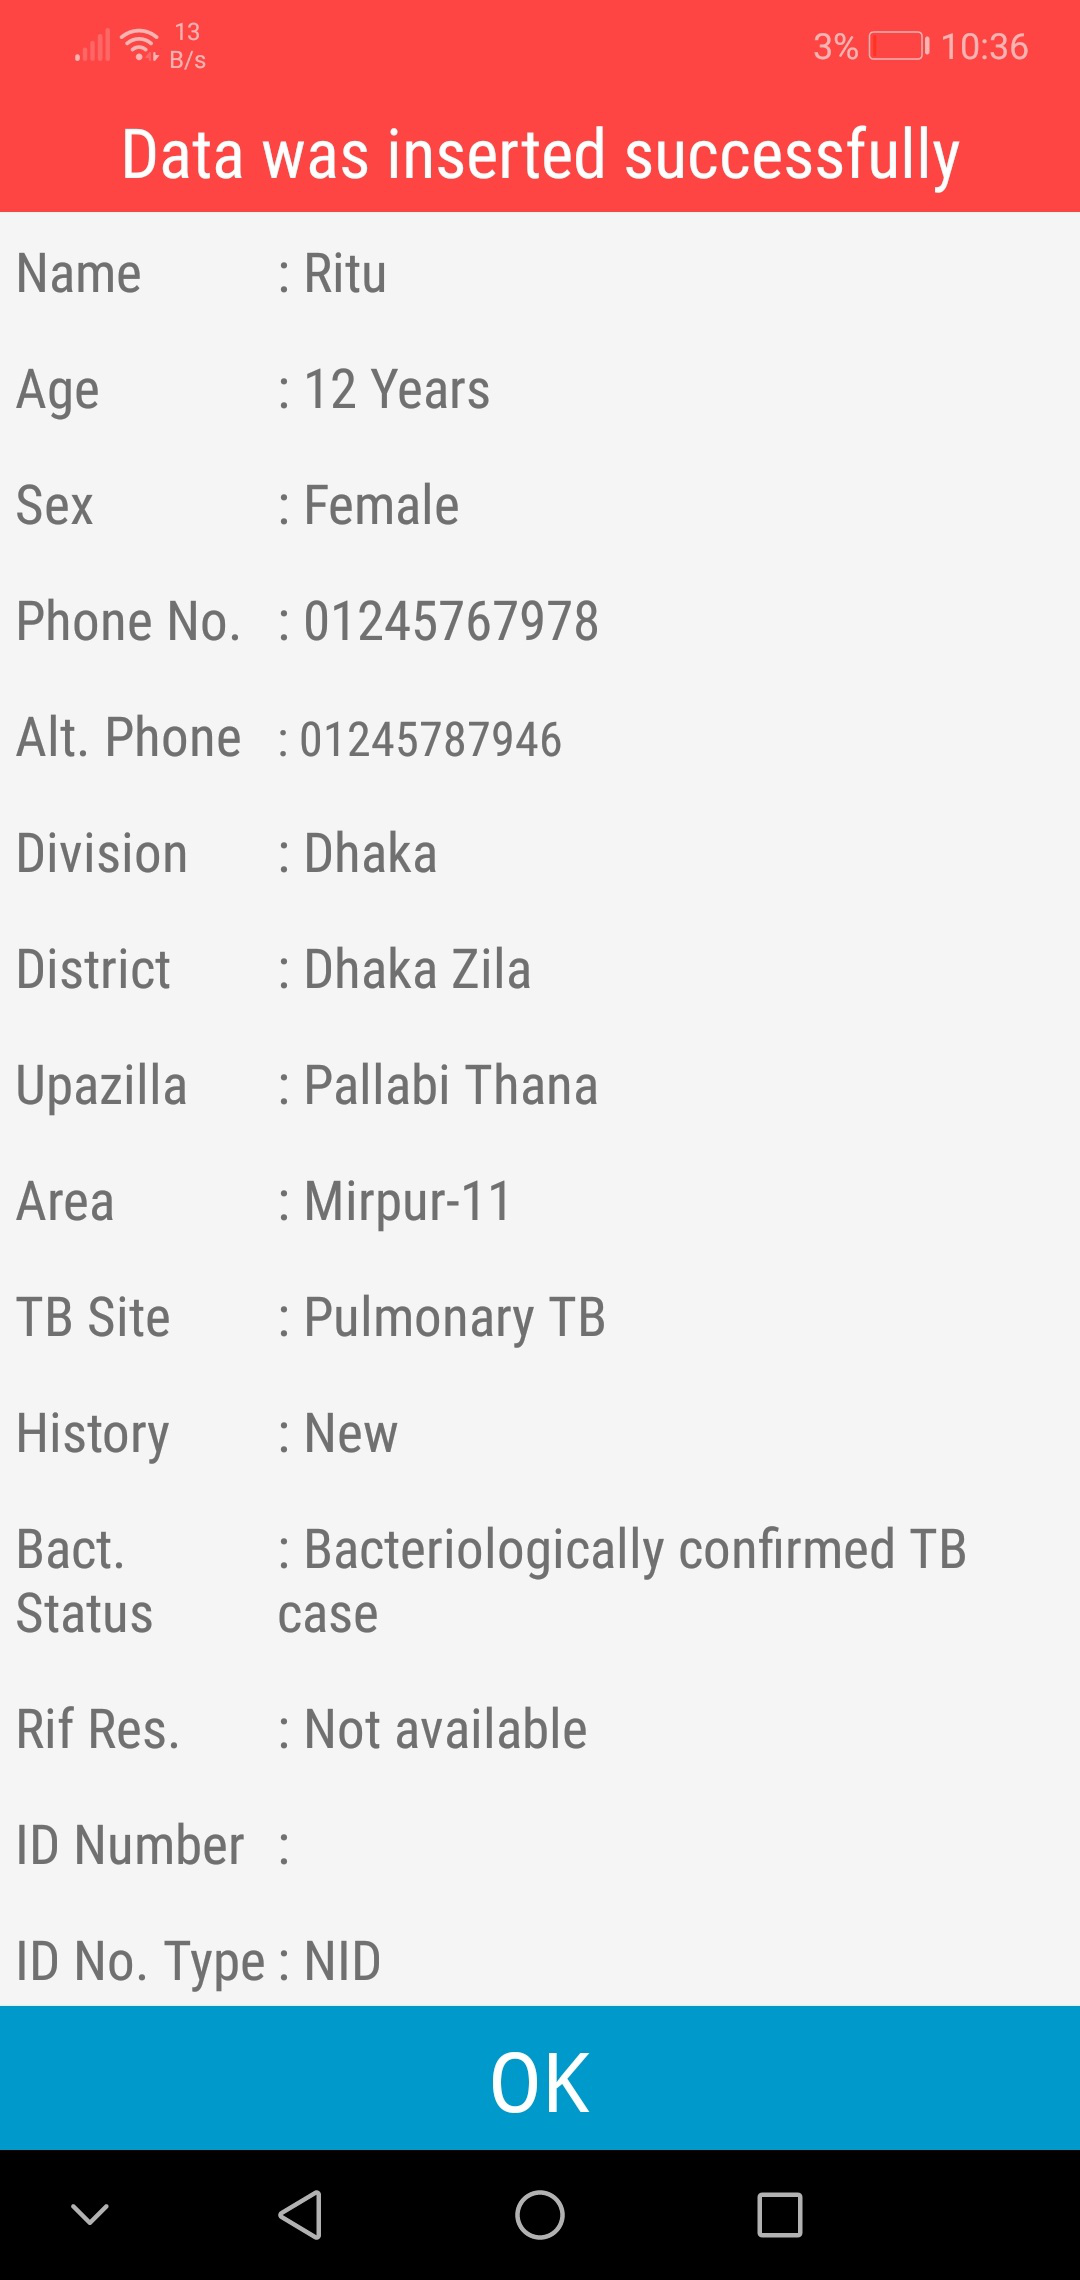
You will see a form having some fields to insert patient details. Please fill in that form with correct information and hit Save. You will see a view page where you can check your data and press Ok. Your data will be saved.
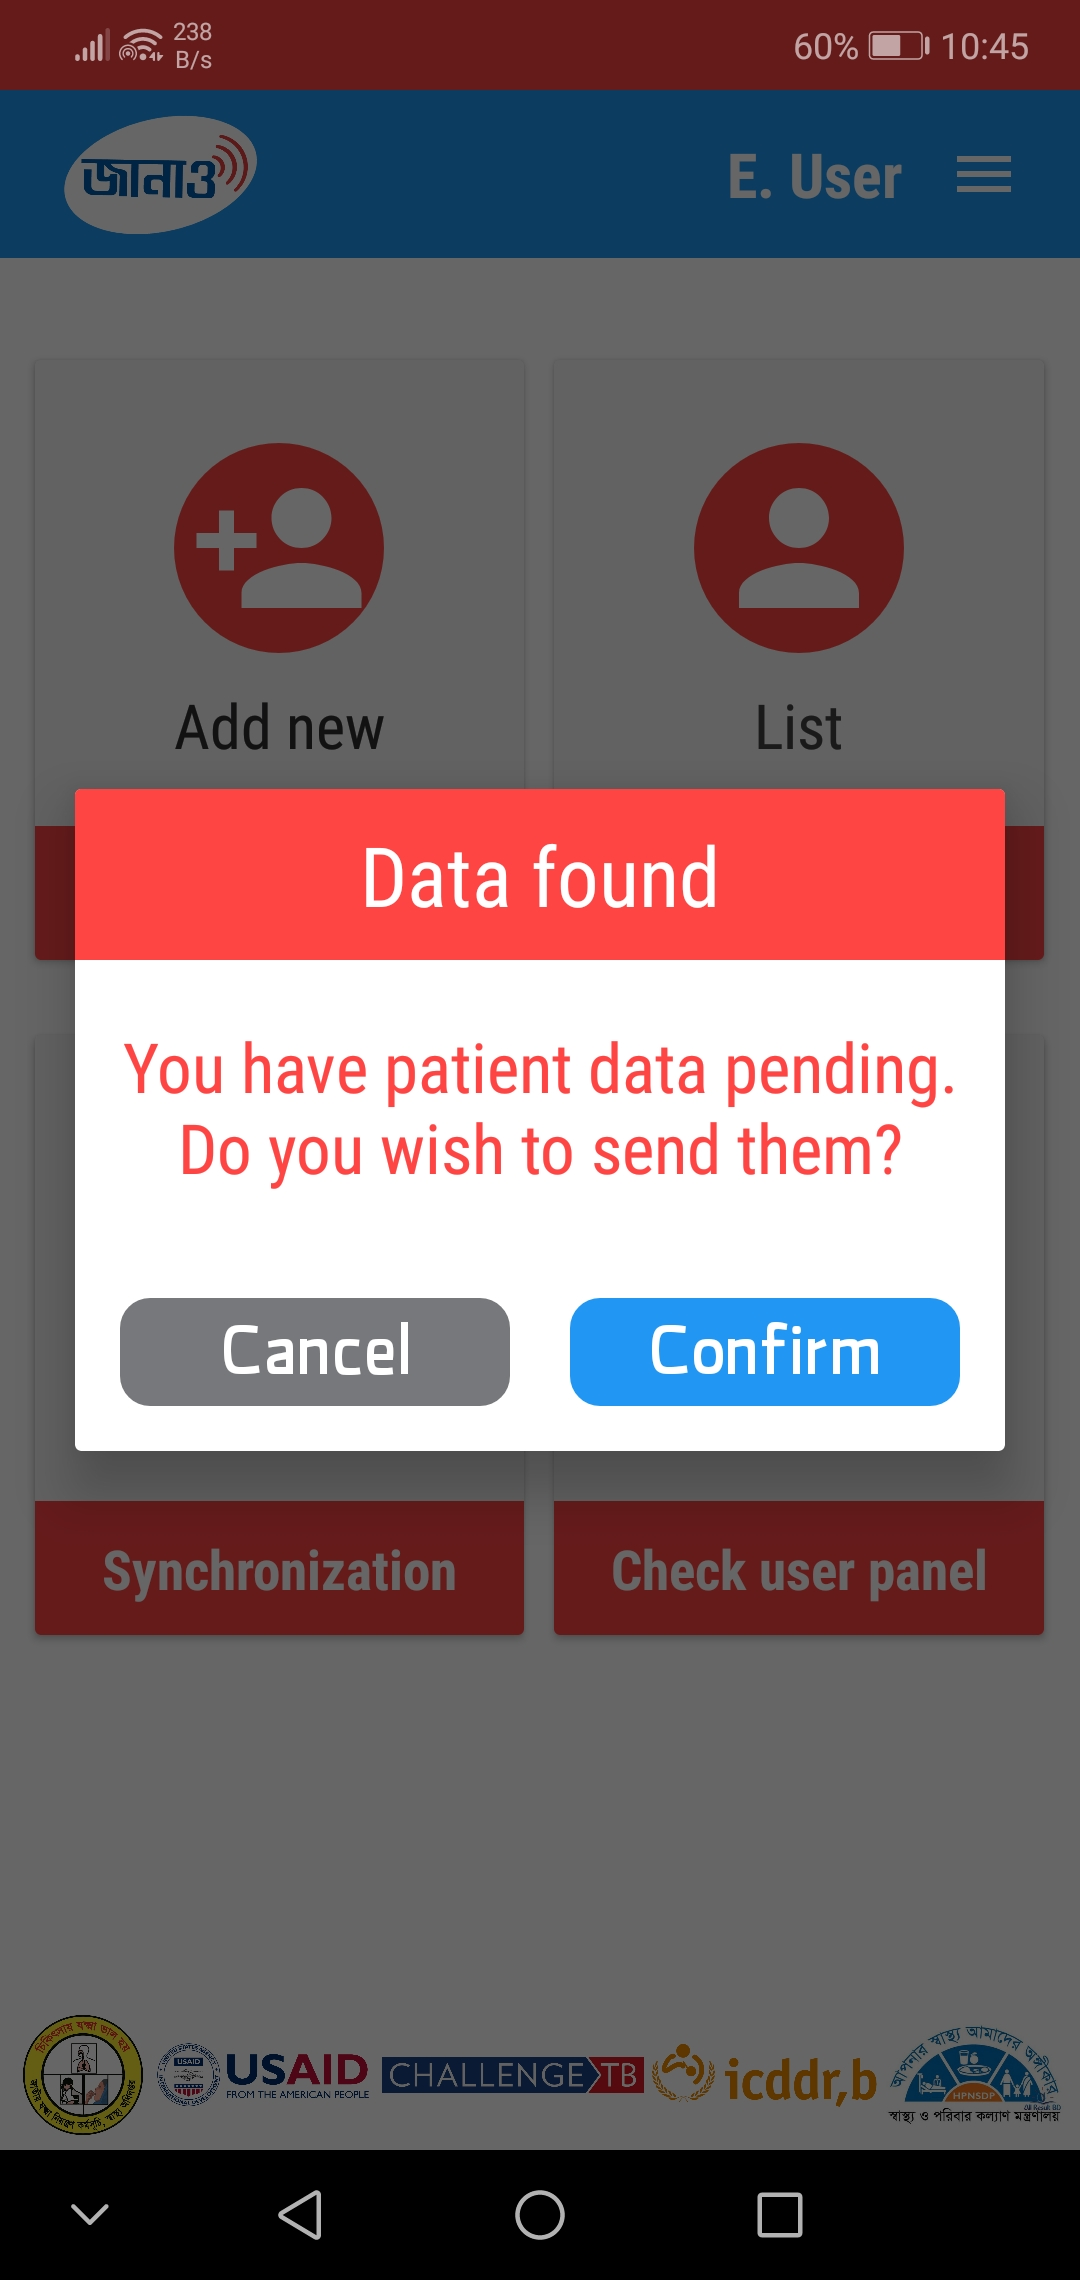
If you want to send notification, click on the Sync option from your home screen. You will be asked to confirm. Press Confirm.
In the home screen go to the List option. You will see a list containing all the patient data you notified.
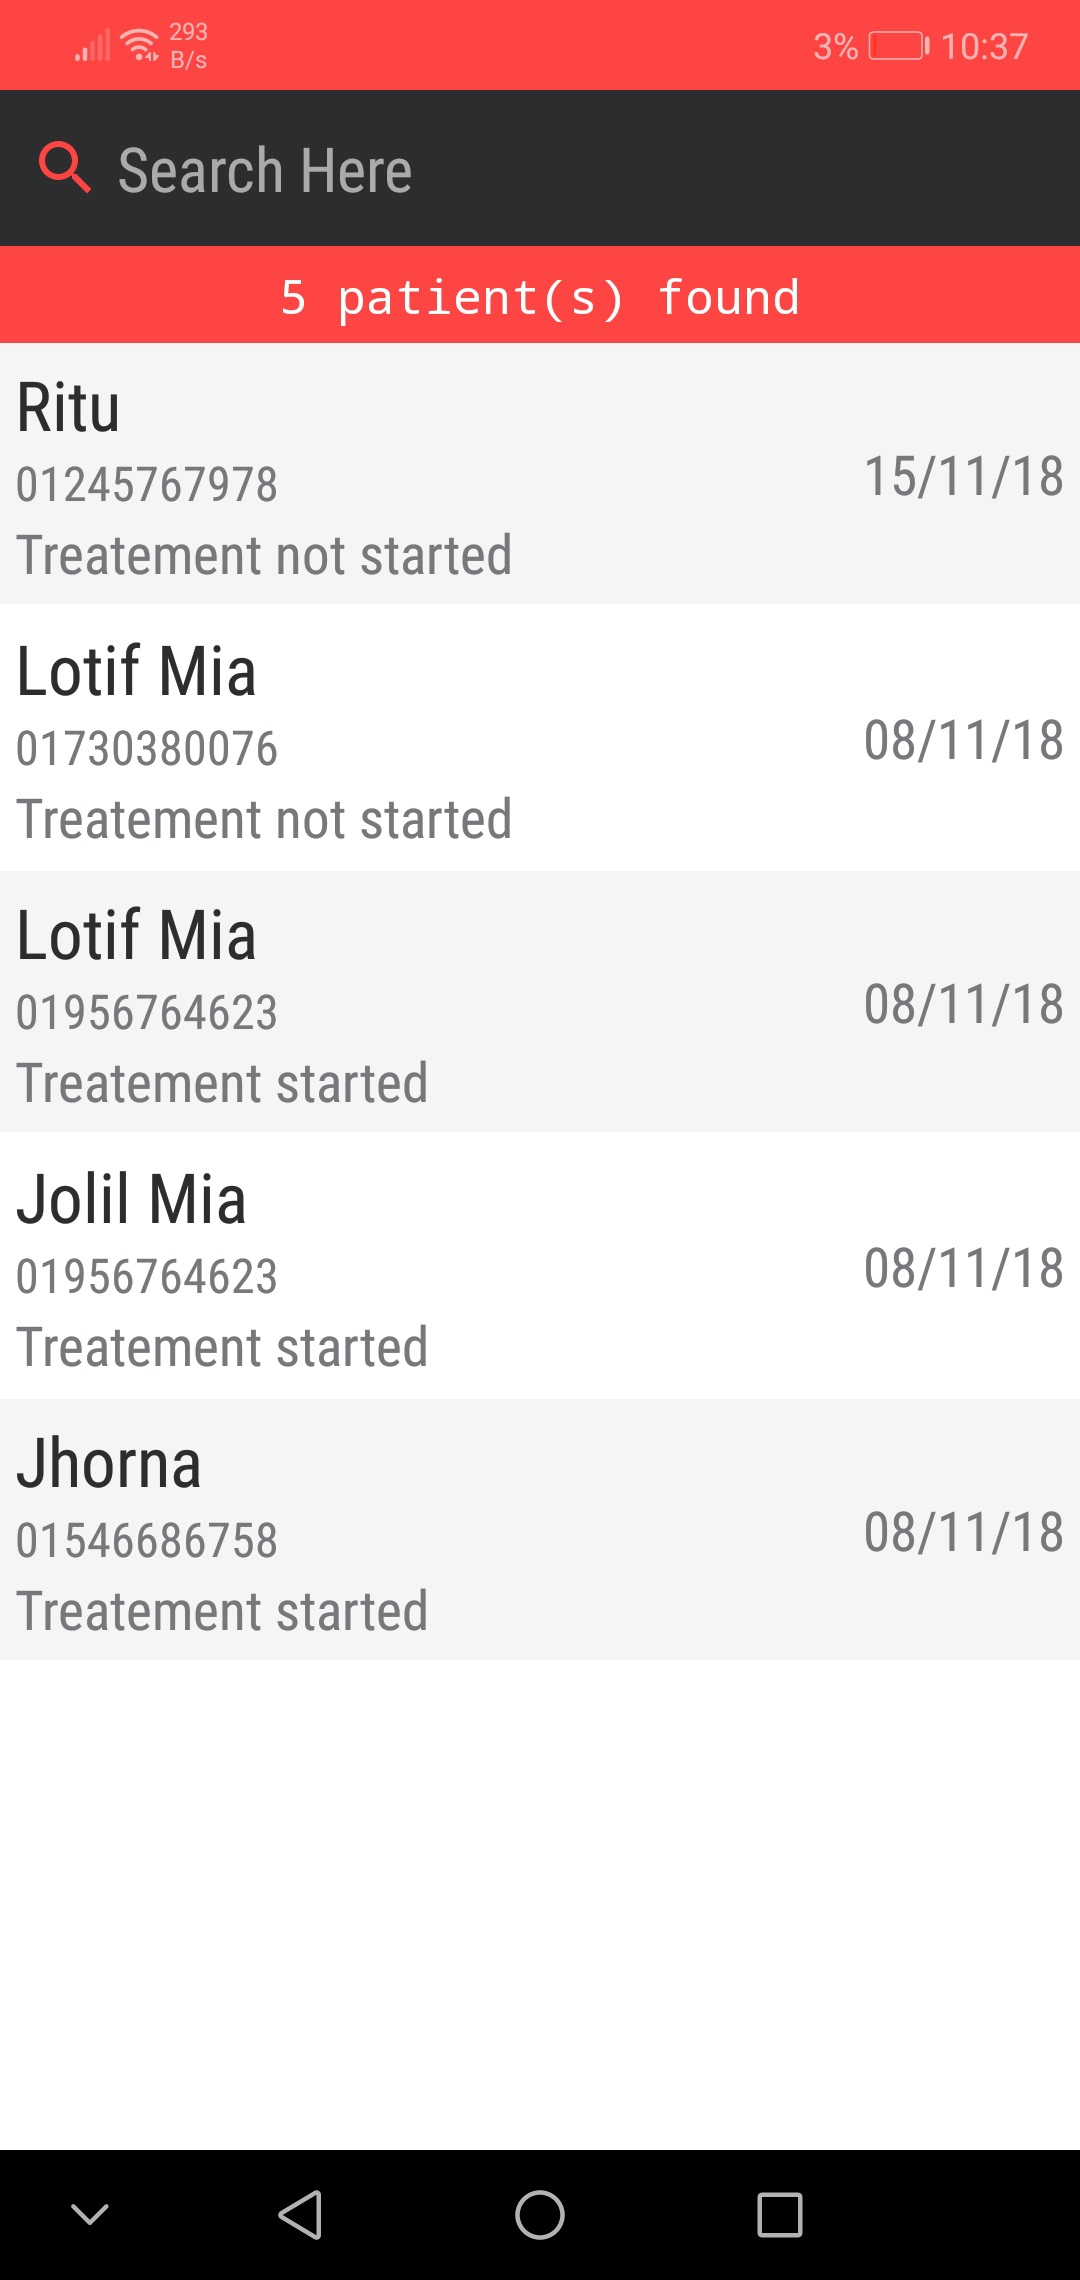
Select the one one you want to see. A page with that particular patient details will open.
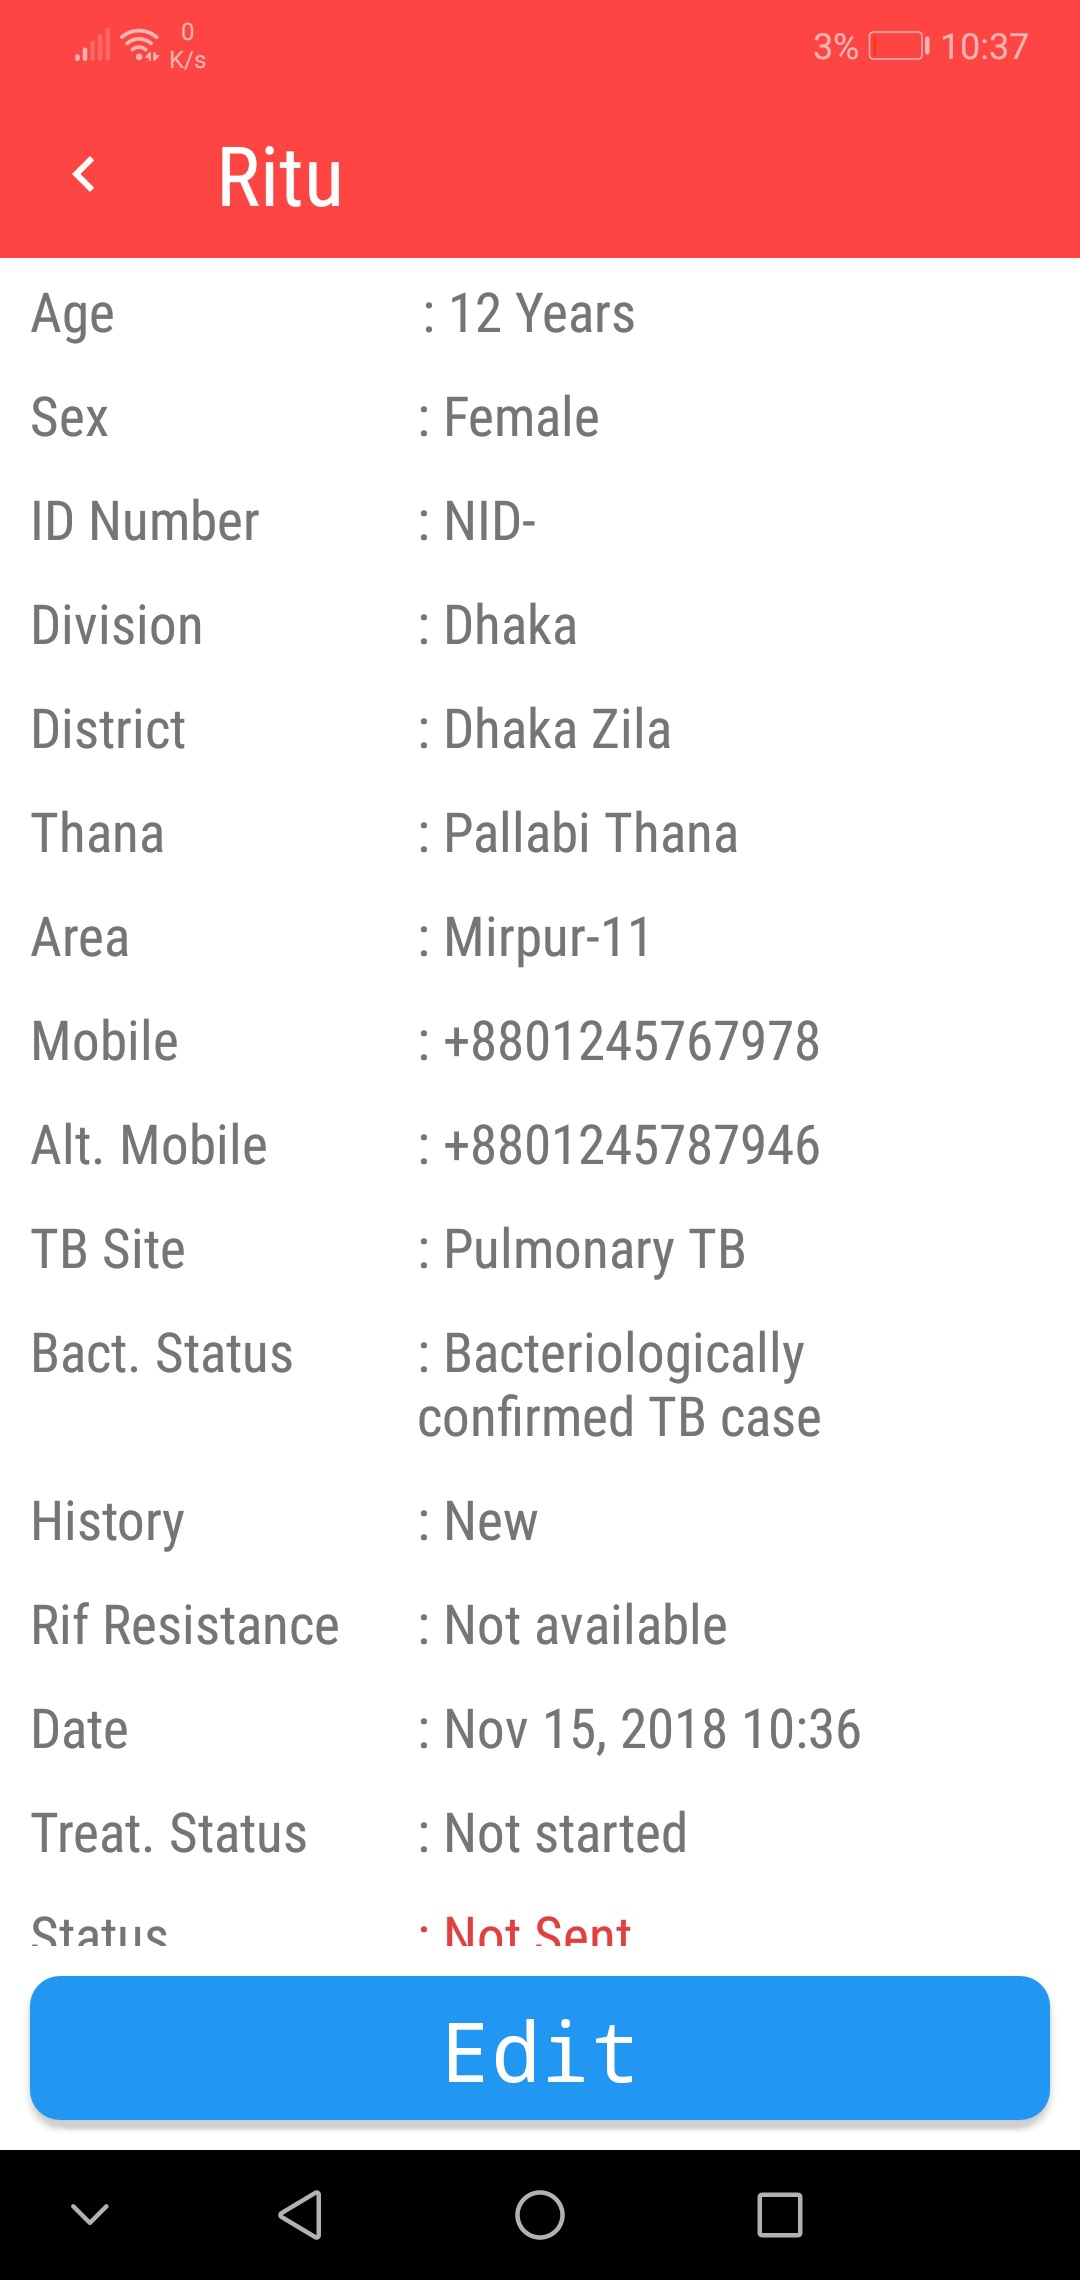
Open the specific patient page like before. If your data is not already been synced to server, you will be able to see an Edit button below the screen. Hit that button, another page will appear where you can edit those data you entered previously. To edit a specific item click on the red edit icon beside that specific item and type or select your new data. After you have edited the data please check if all the data are ok and press Update
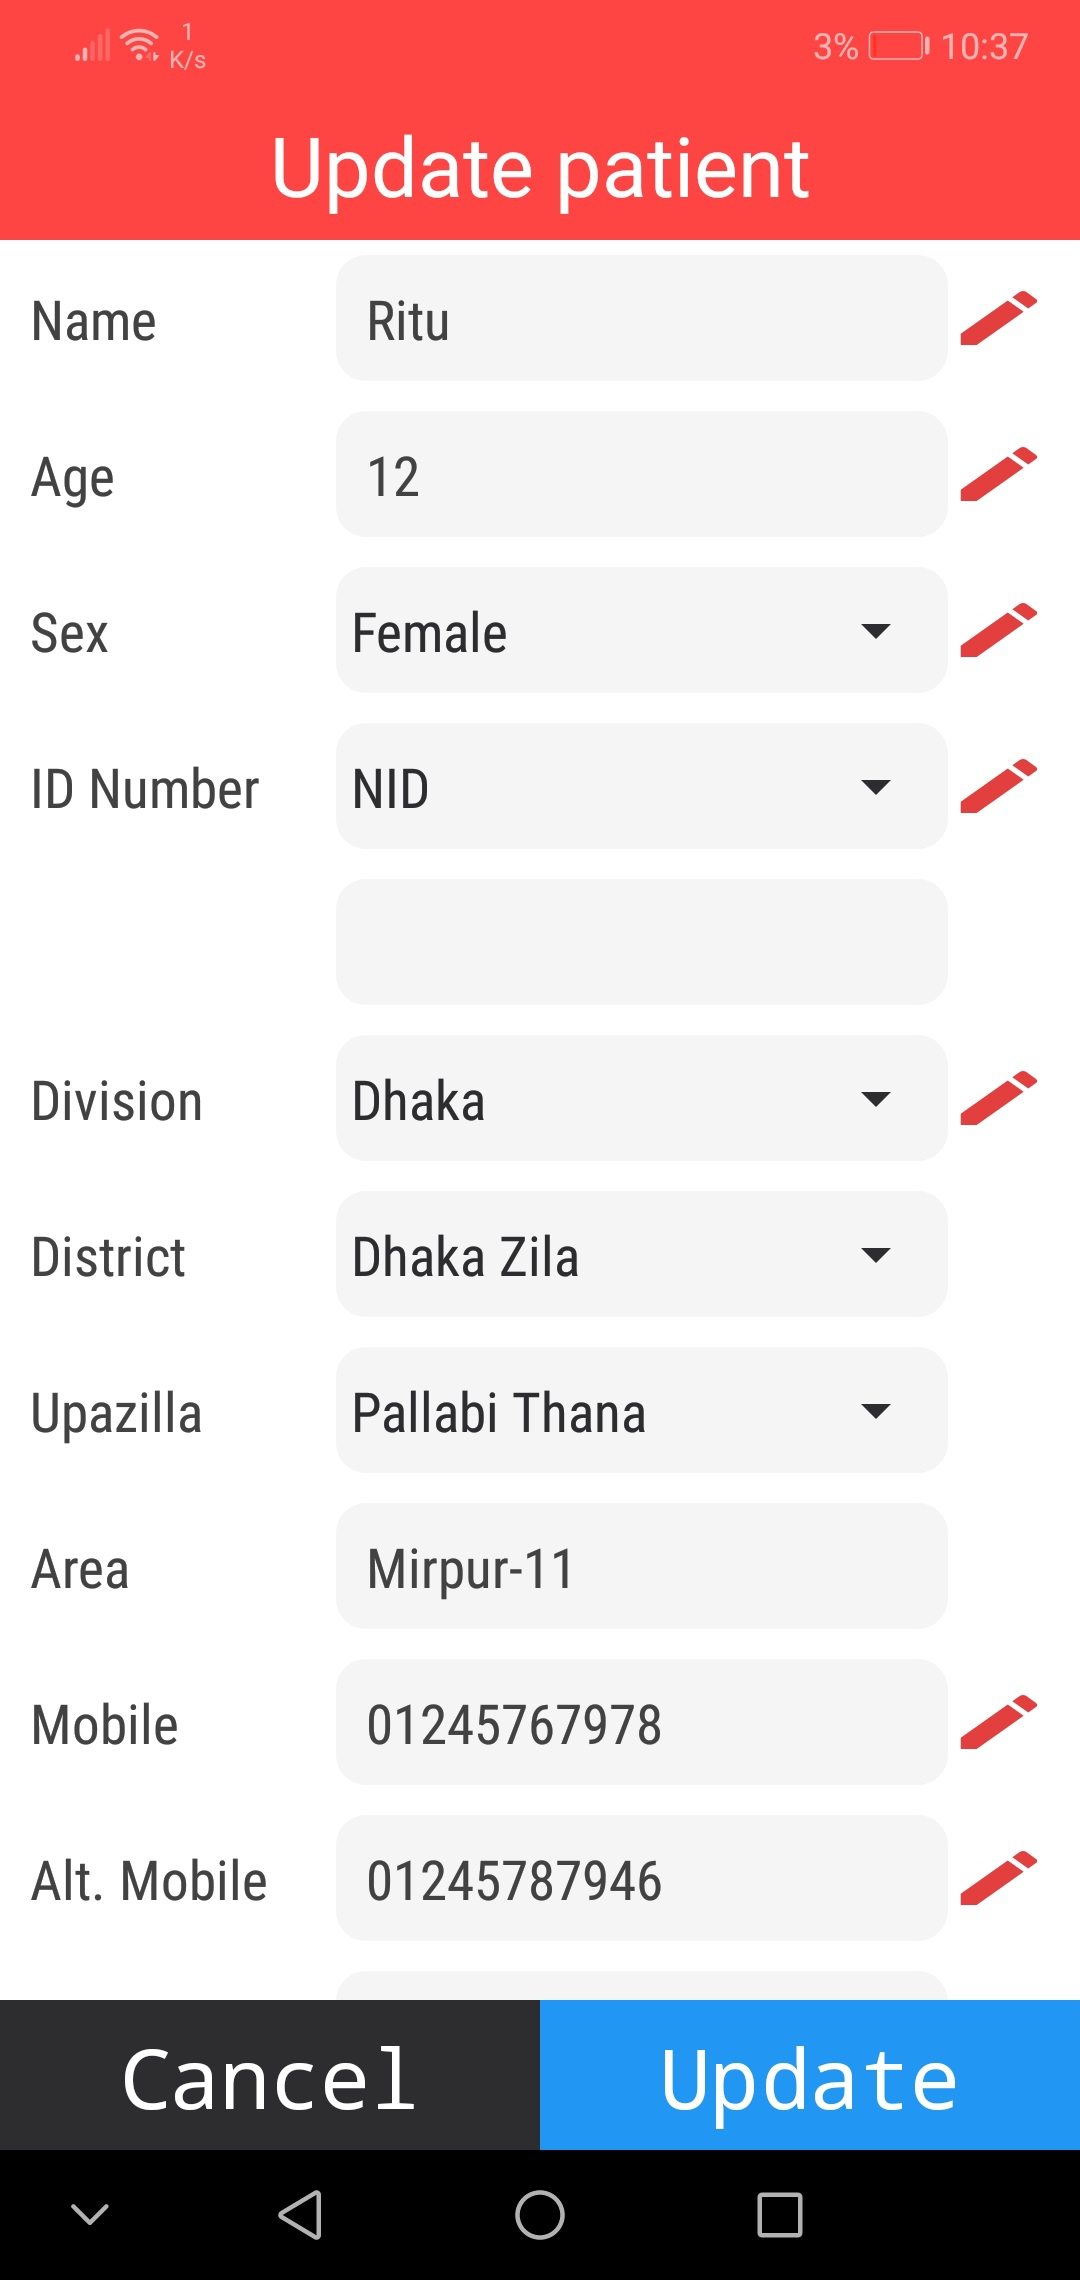
In your home screen, select the lower right option which says User Panel. Click on that and a patient data summary that was entered by you appears.
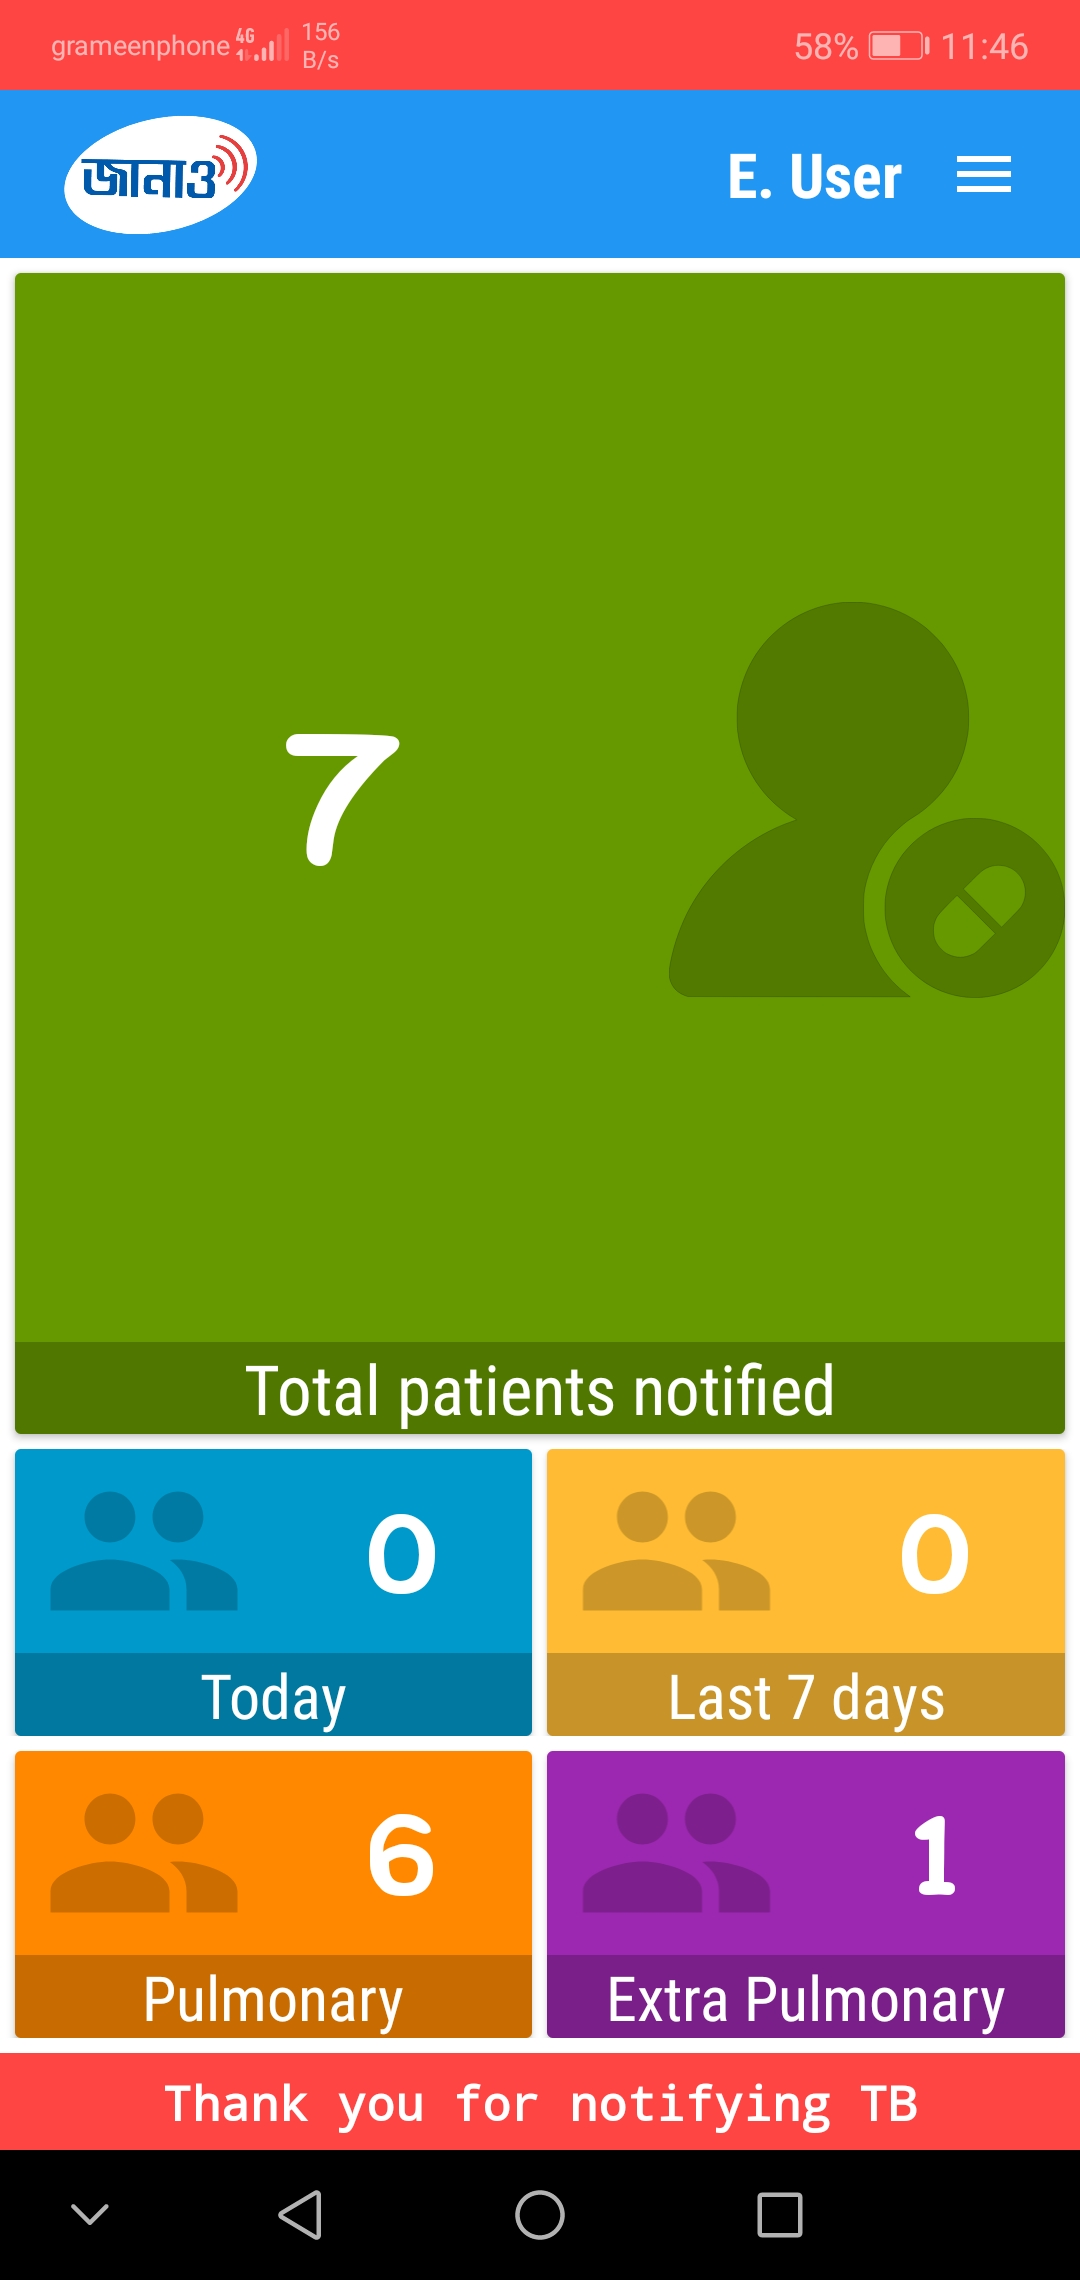
Make sure you have an internet connection. Fill in the login form with your phone number and PIN. Press Login. All your data will get synced automatically with your application.
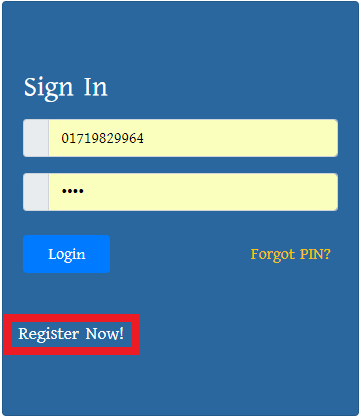
Go to the link here. You will see a login box like this picture below

If you are registered to our system, enter your phone and PIN in the login form and hit Login button.
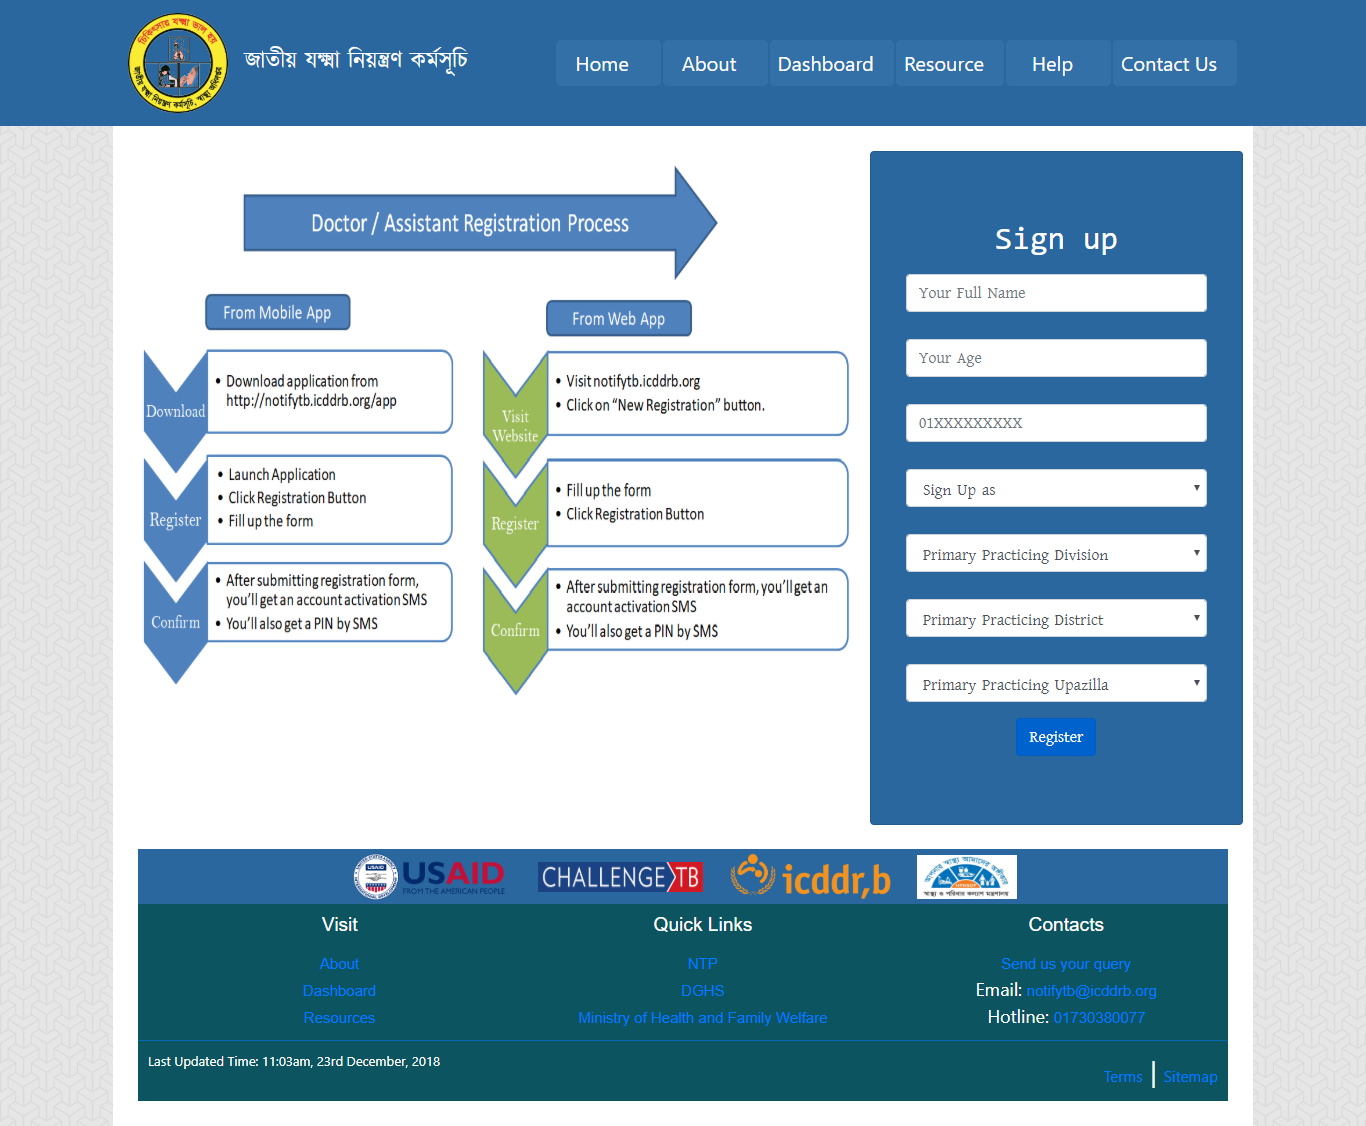
If you are a new user, click on New registration. A sign up form will appear. Fill in the form with correct information and click on Register now button. If you are authorised you will have a PIN through SMS in your phone.
If you are successfully logged in, you will see a screen like below that shows a record of your previous activity.
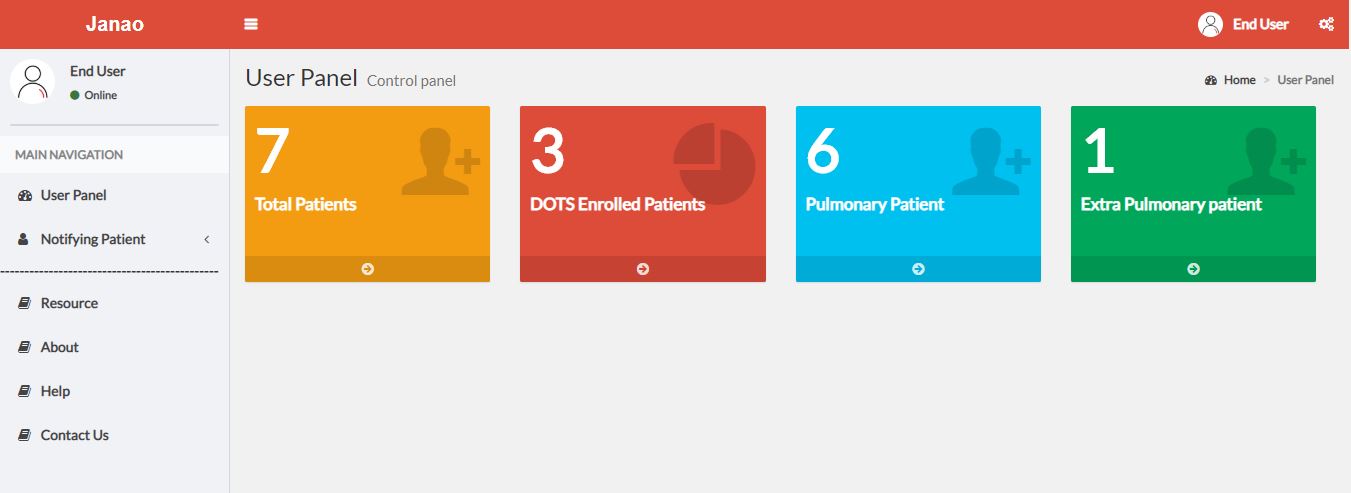
In the left side of your dashboard you can see a menubar. Click on Notifying Patient -> Add new. A form like below will appear.
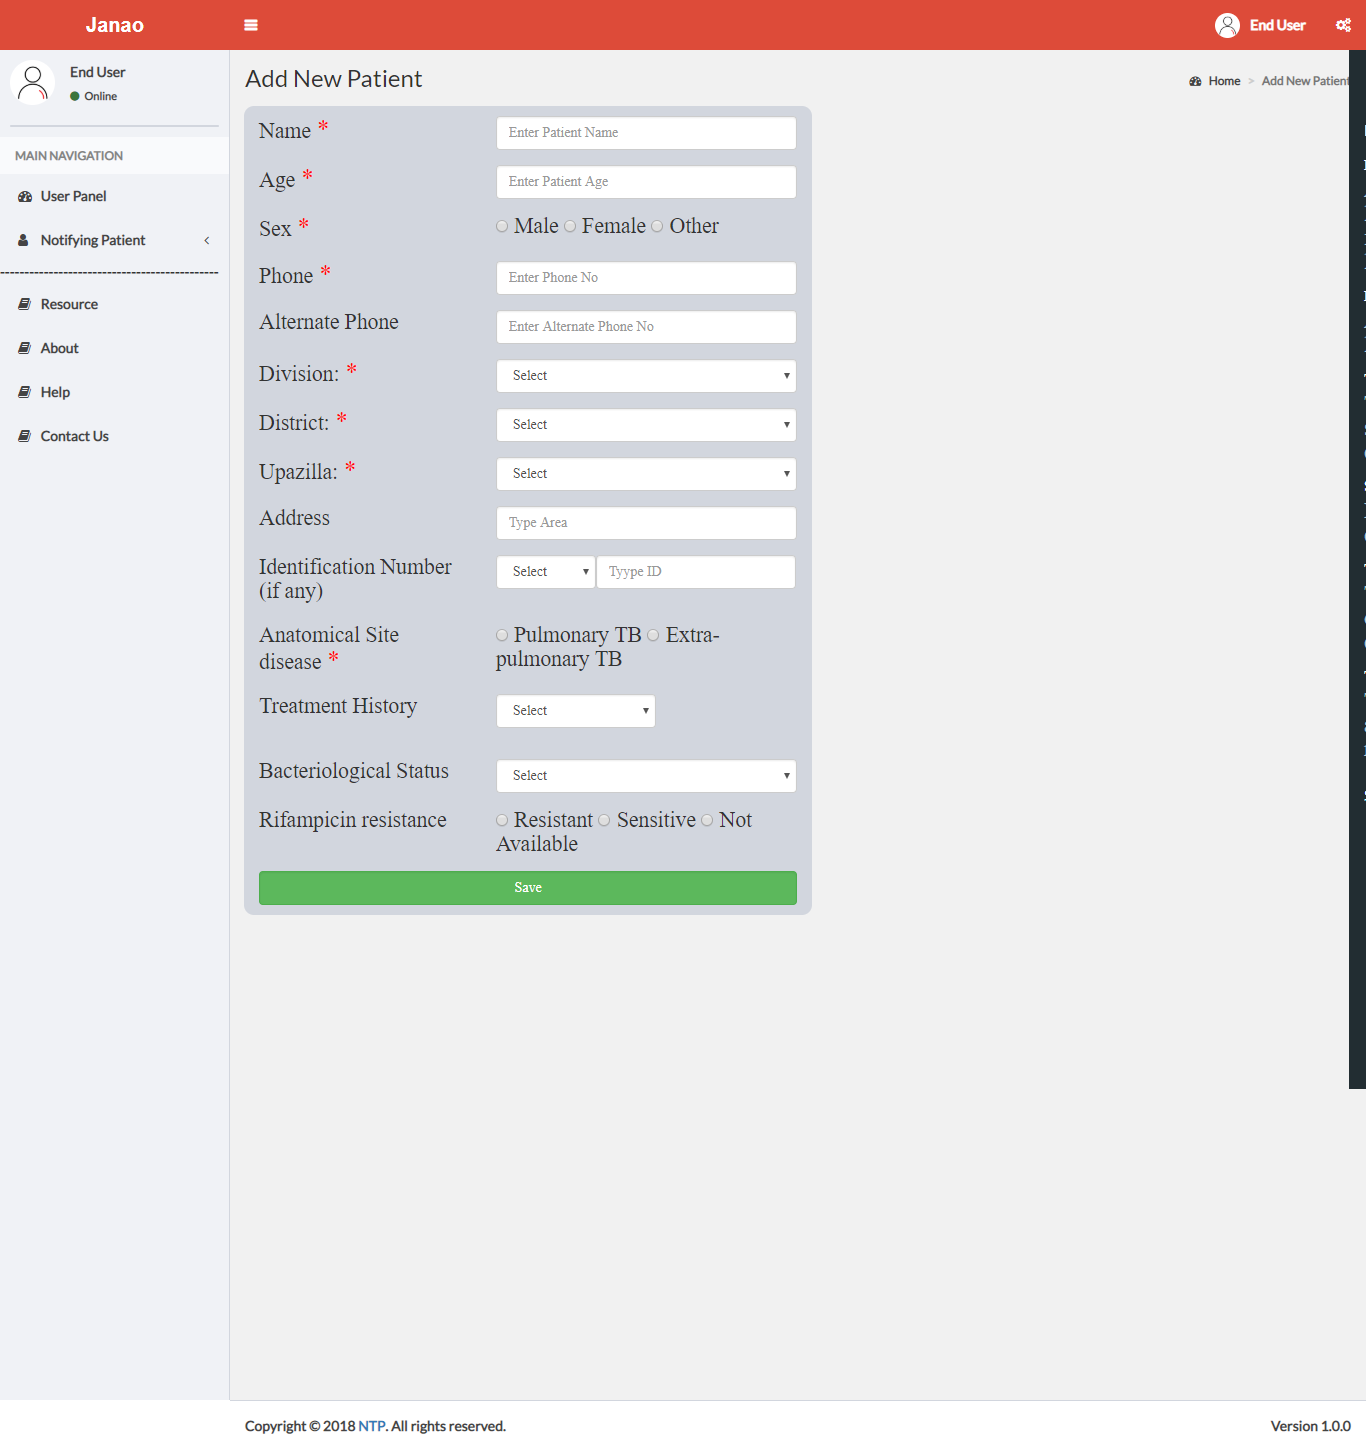
Fill in the form with required information. Press Submit. You have notified successfully. Congratulations!
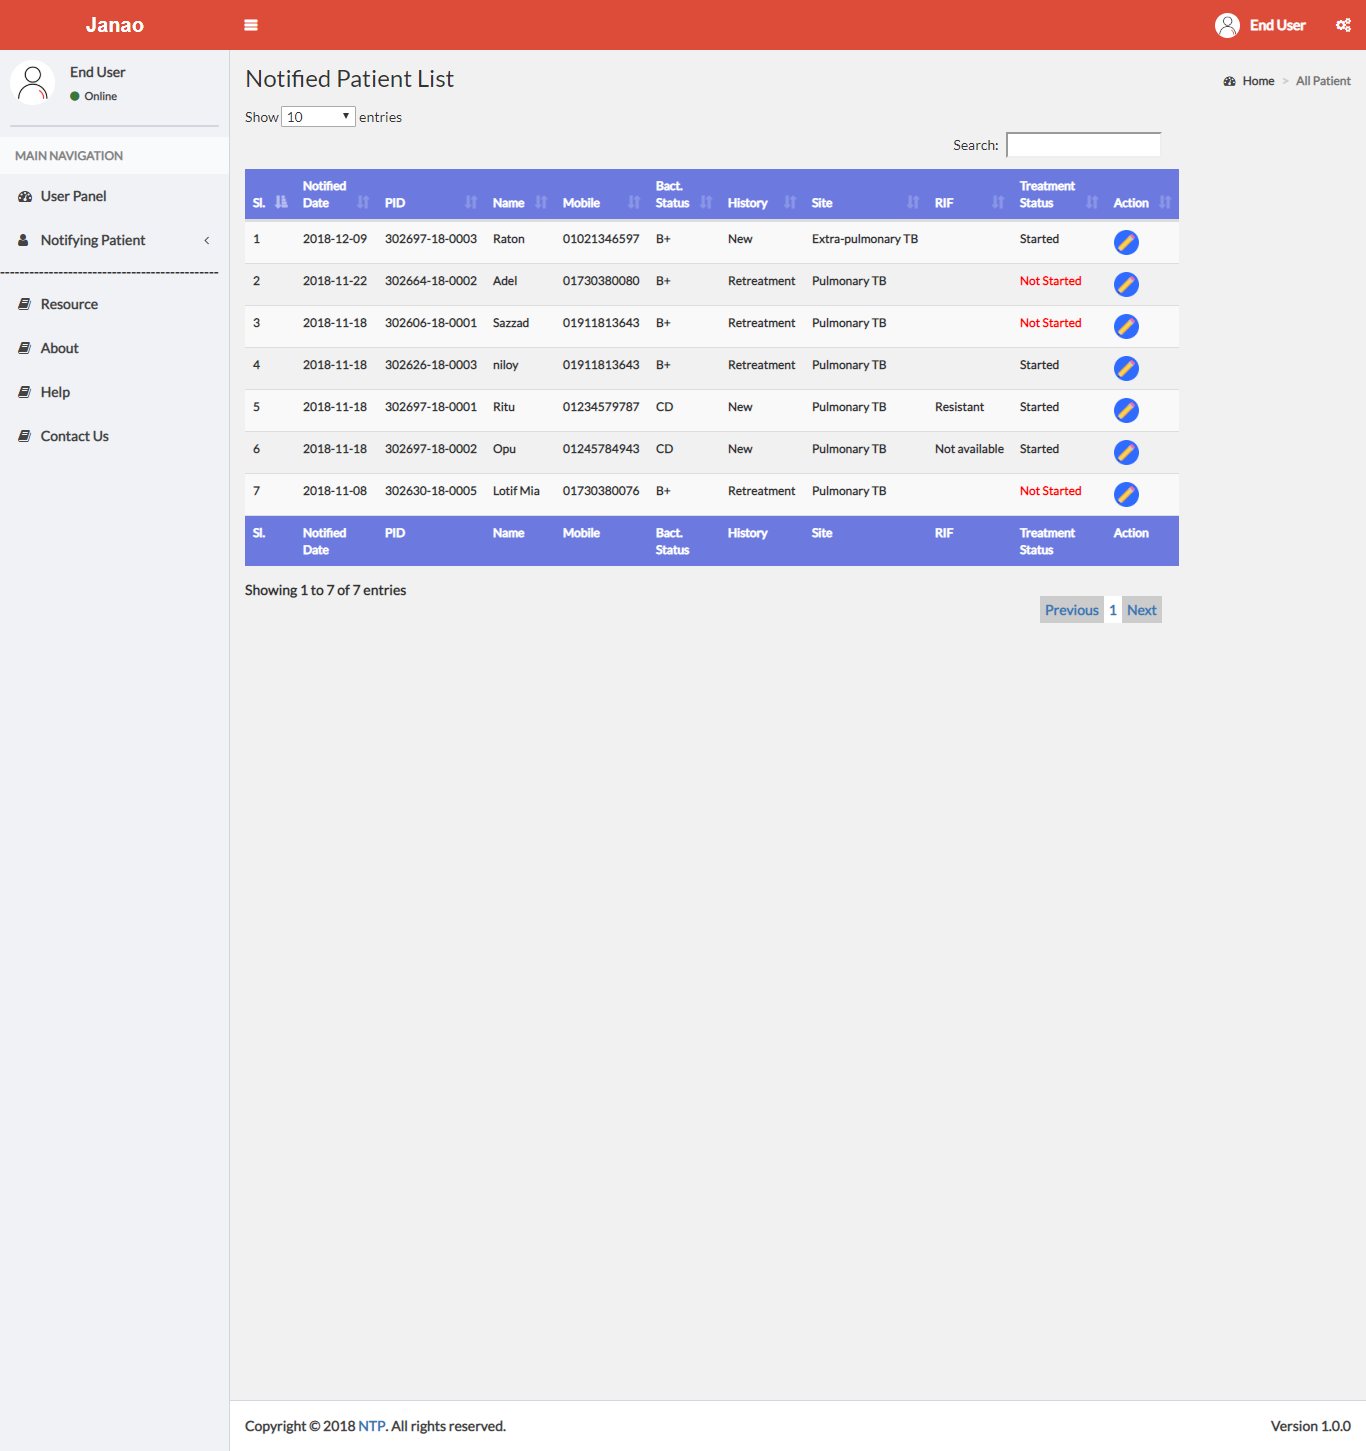
In the menu bar, go to Notifying Patient -> Patient list. You will see a list of patients you have notified to NTP.
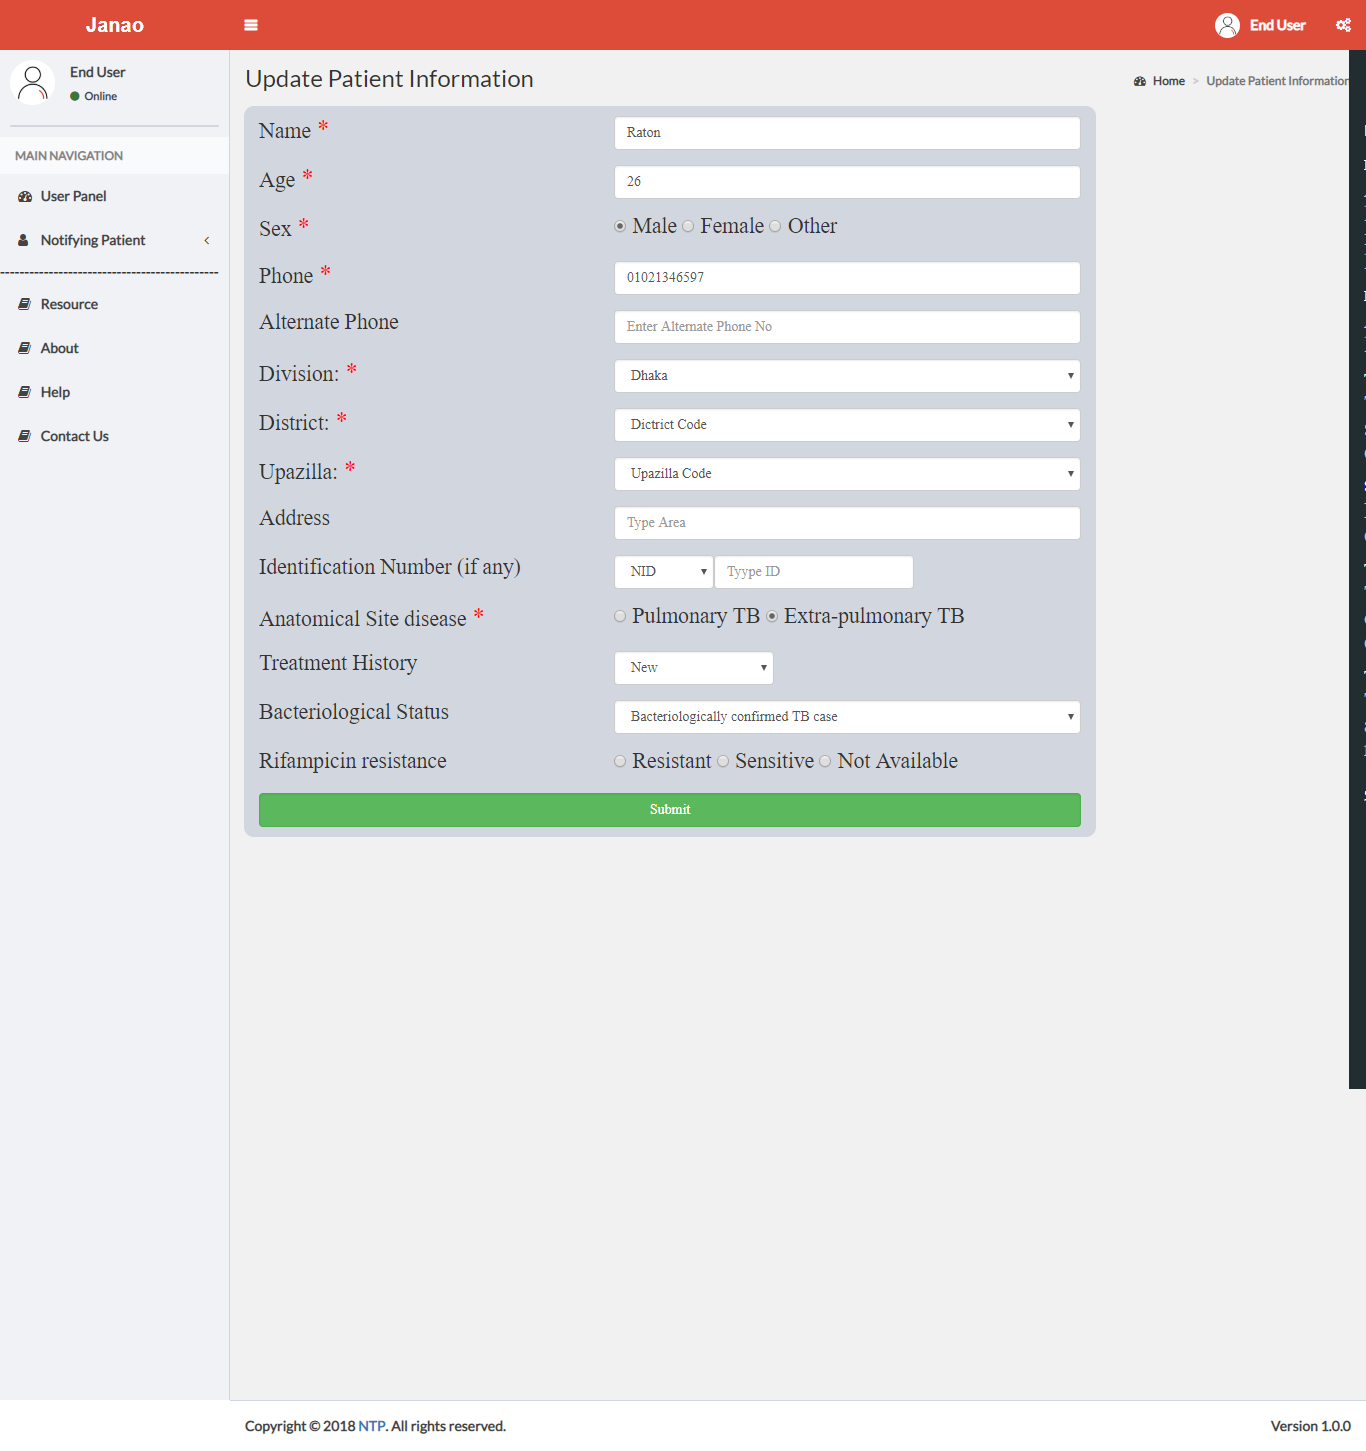
Go to patient list(Follow previous step). Click on the edit icon on the right side of the list item. Edit the data. Press Submit
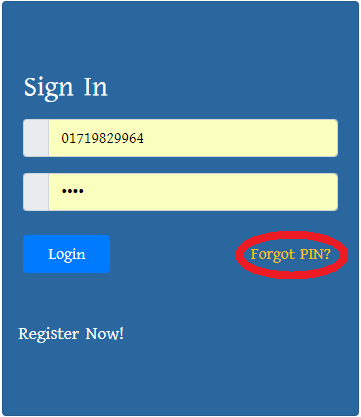
If you have forgotten your PIN, You can recover that from your PC too. In your login page, you will see a Forgot PIN? option just below the login box. Click on that. A different box will appear with a phone number field.
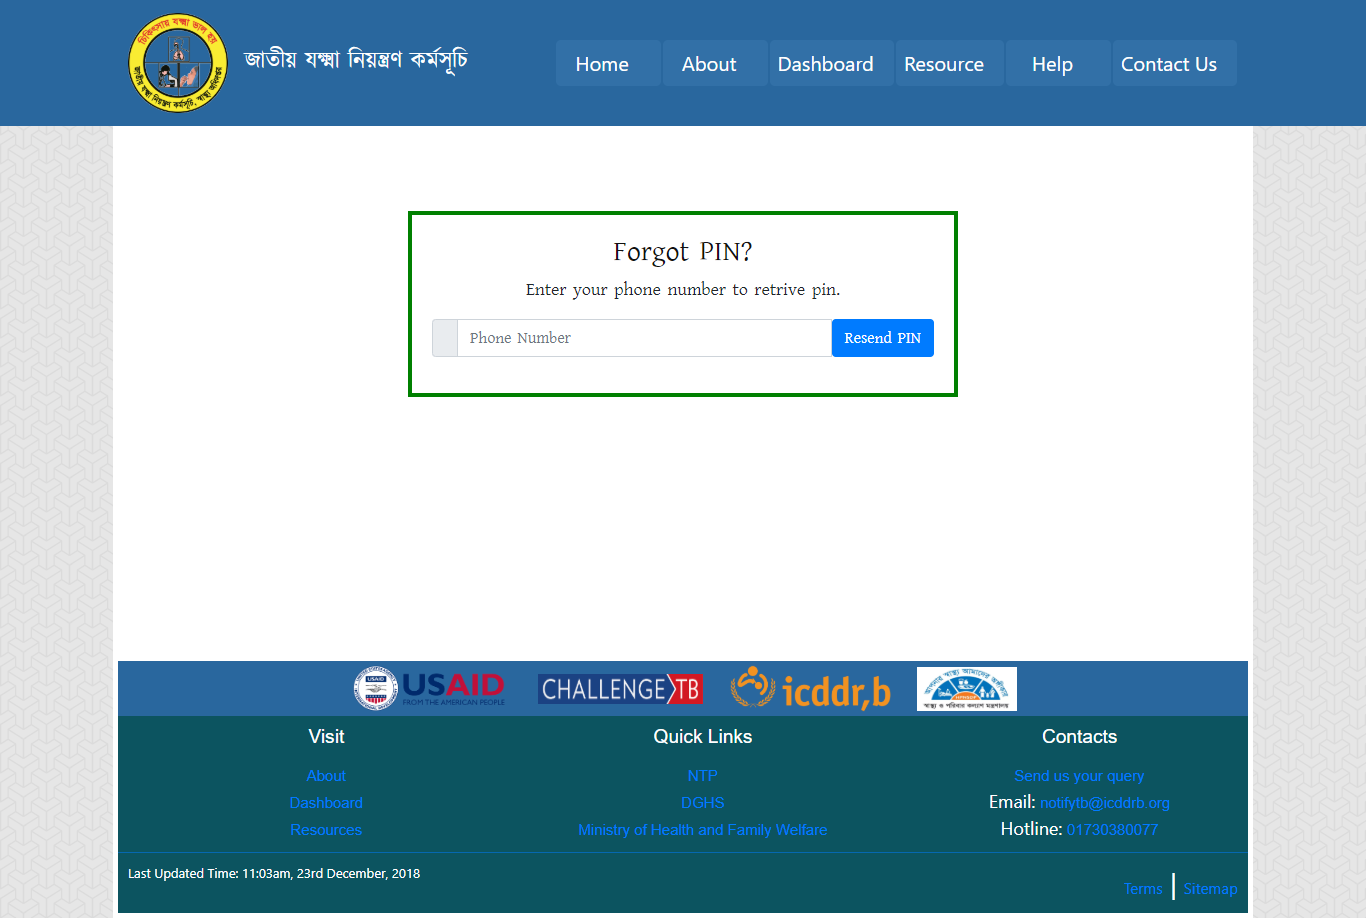
Enter your phone number and hit Resend PIN. If your number is correct, you will get your PIN as SMS shortly.
Staff has the privilege to
Patient Management
Provider Management
Facility Management
Update DOTS info
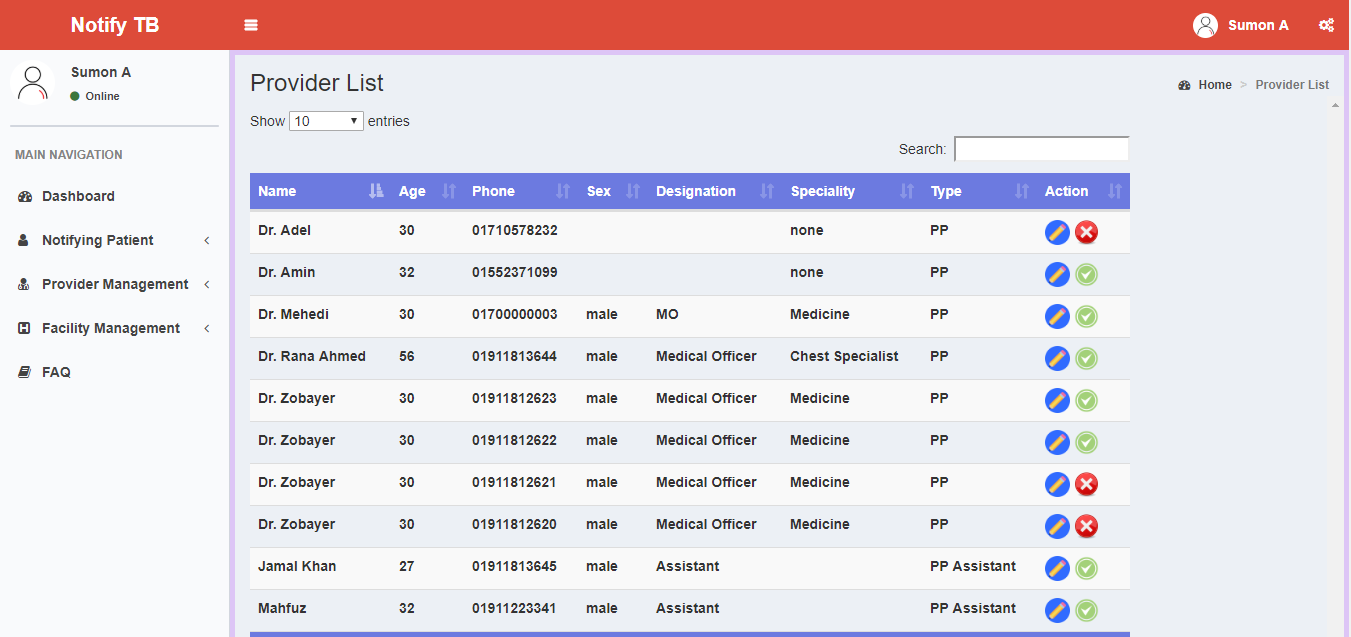
From the menu bar, go to Provider Management -> Add new. Fill in the form and hit Submit.
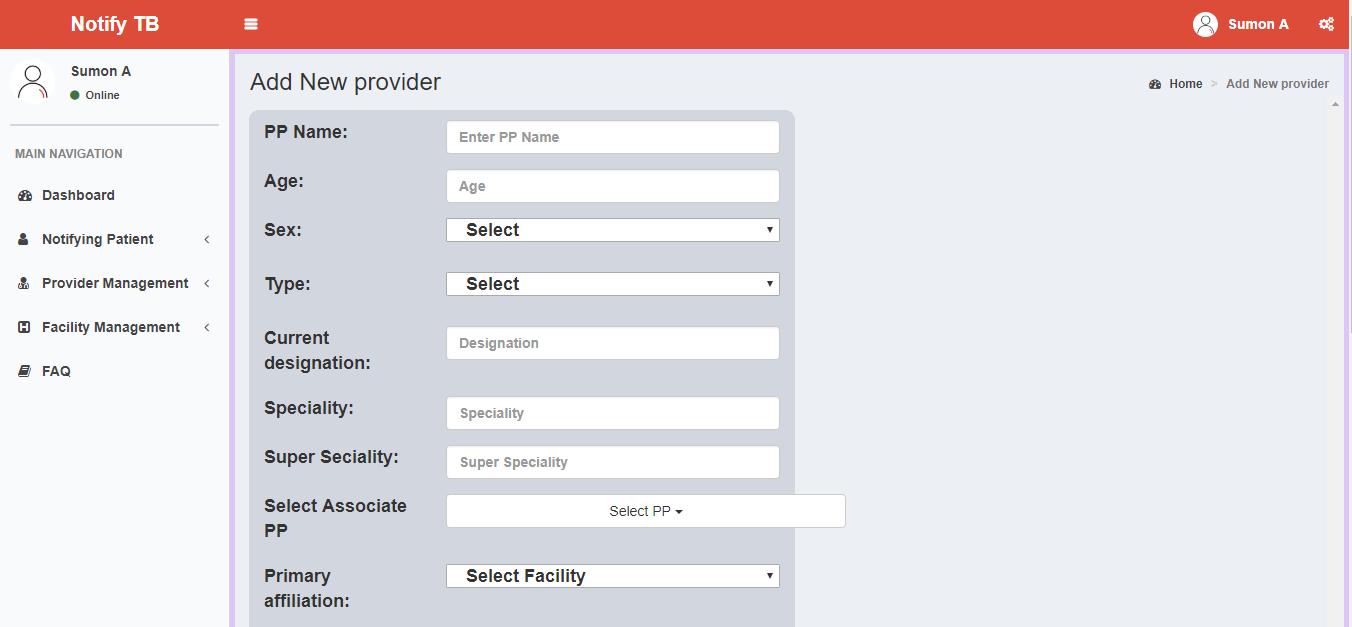
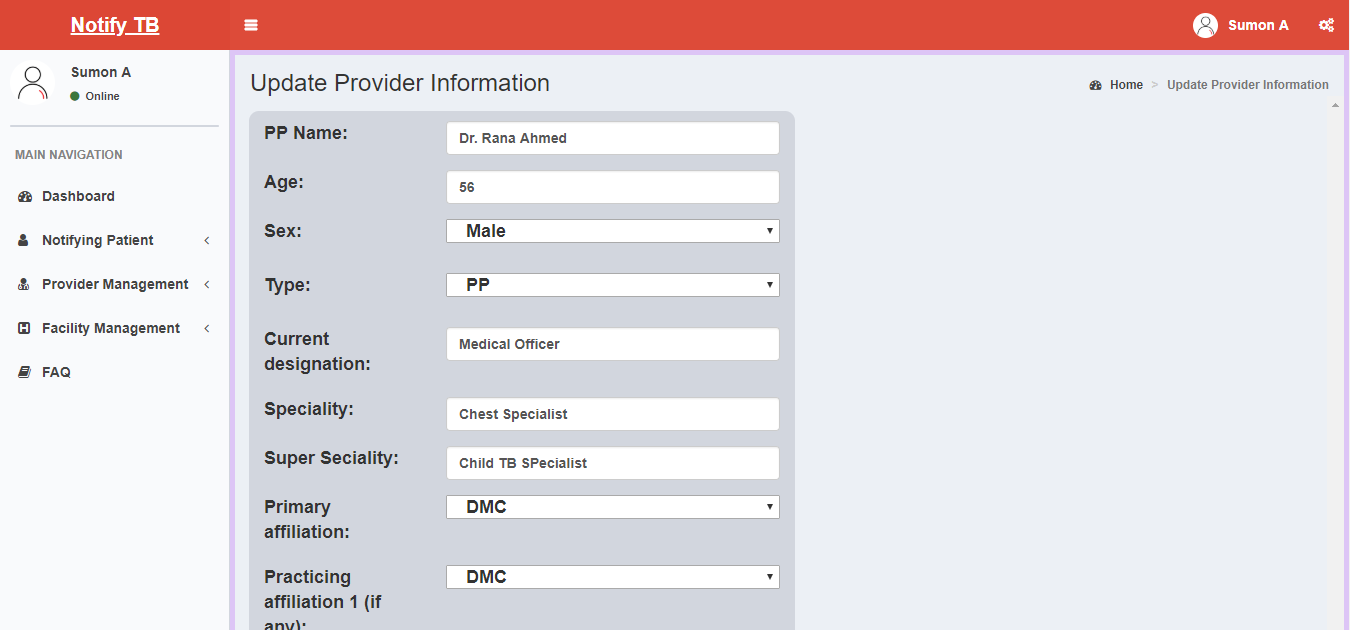
From the menu bar, go to Provider Management -> View list. Click on the edit icon. An edit window will appeare.
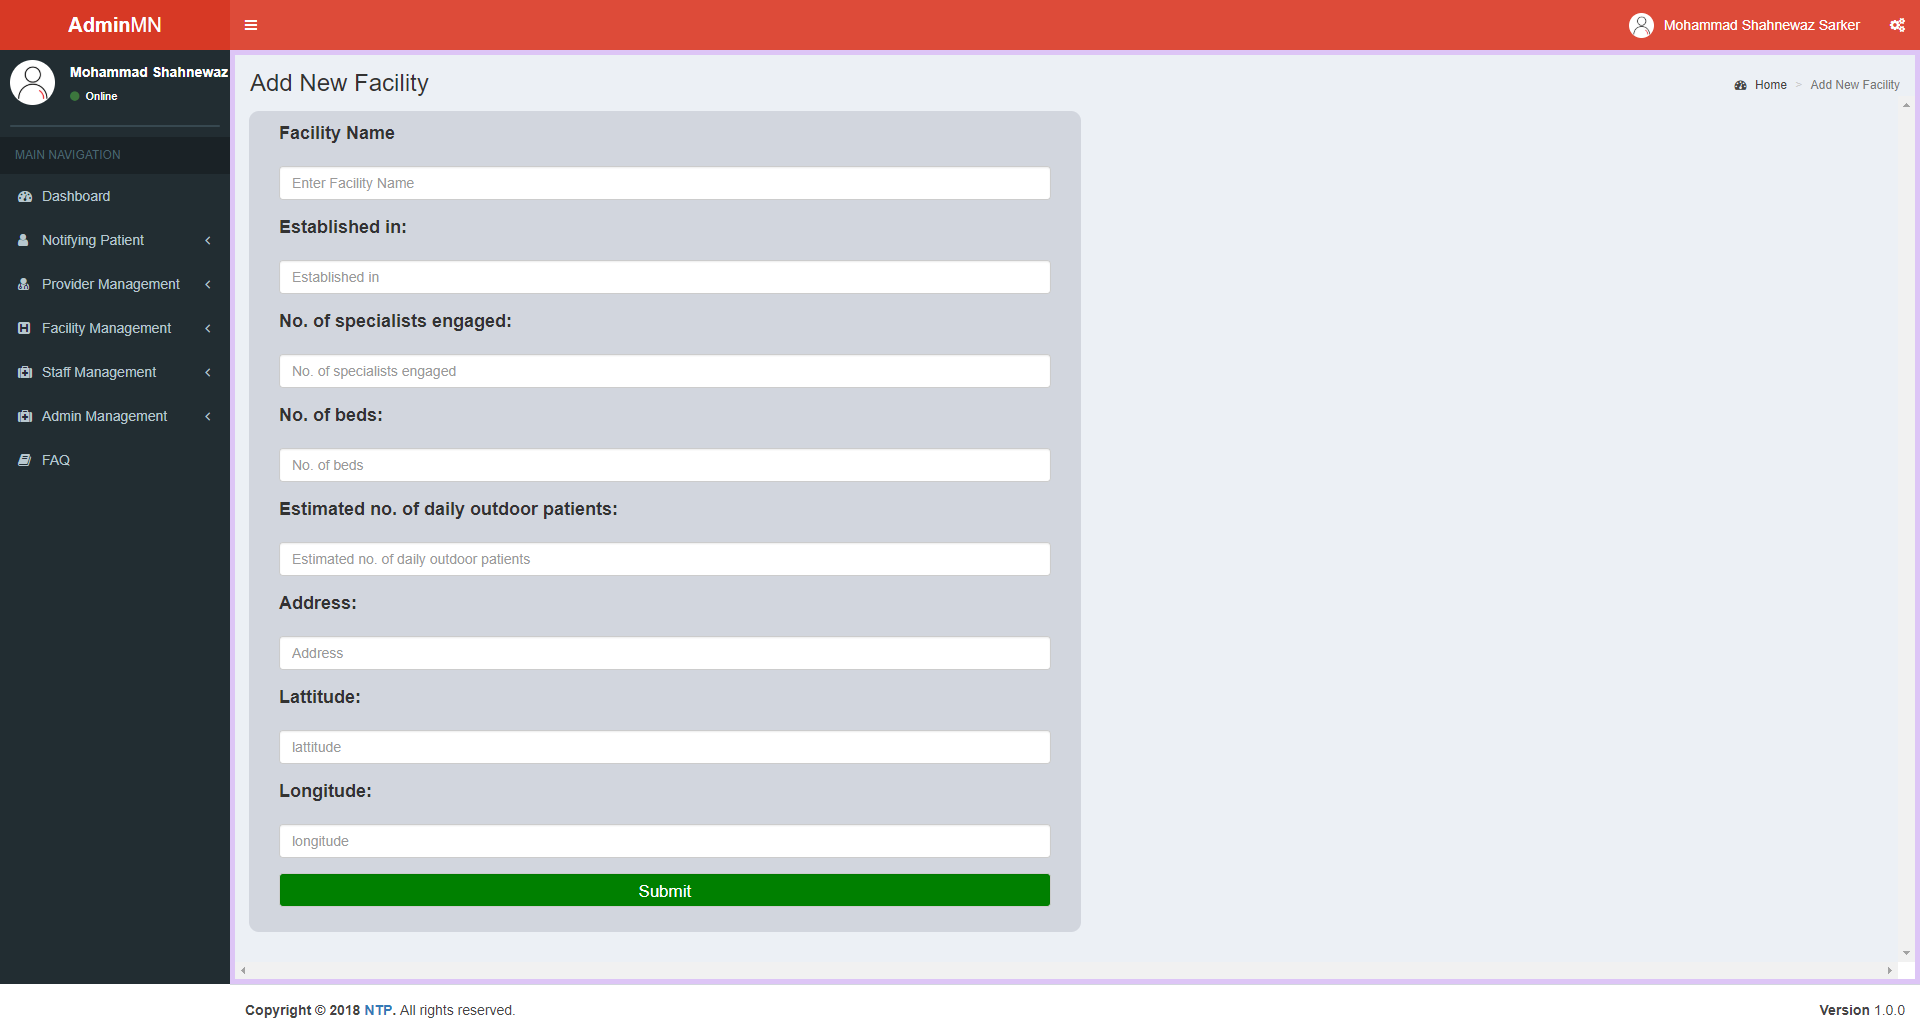
From the menu bar, go to Facility Management -> Add new. Fill in the form and hit Submit.
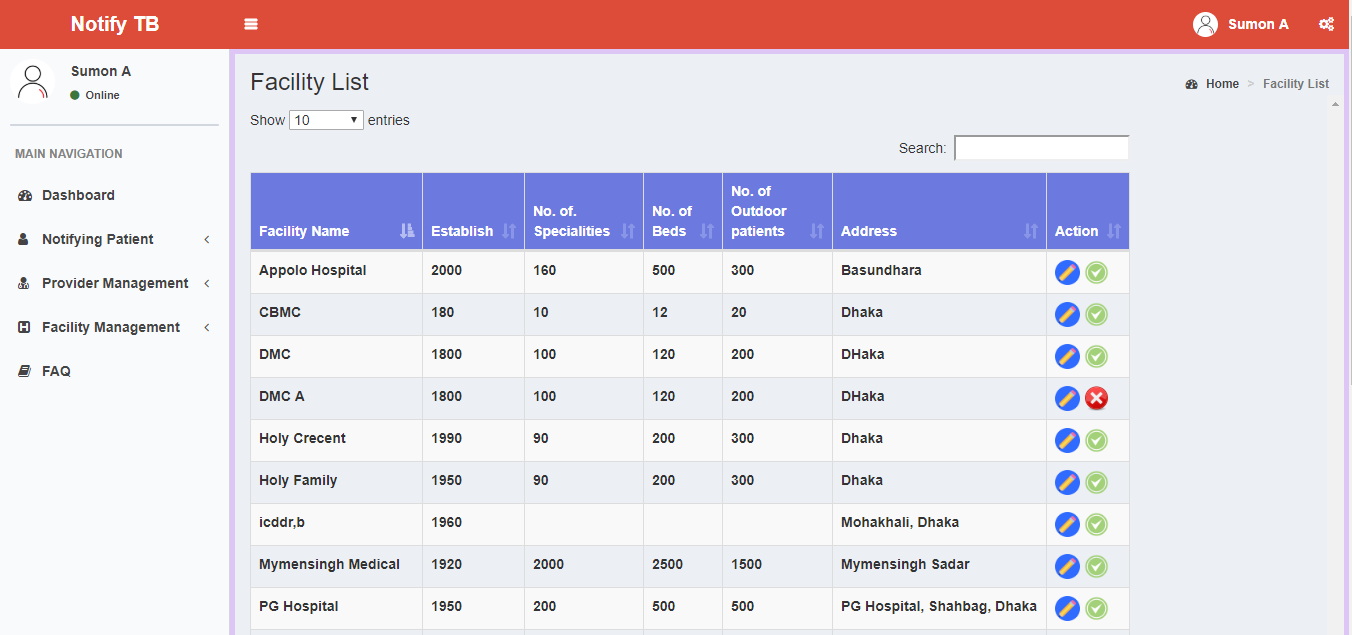
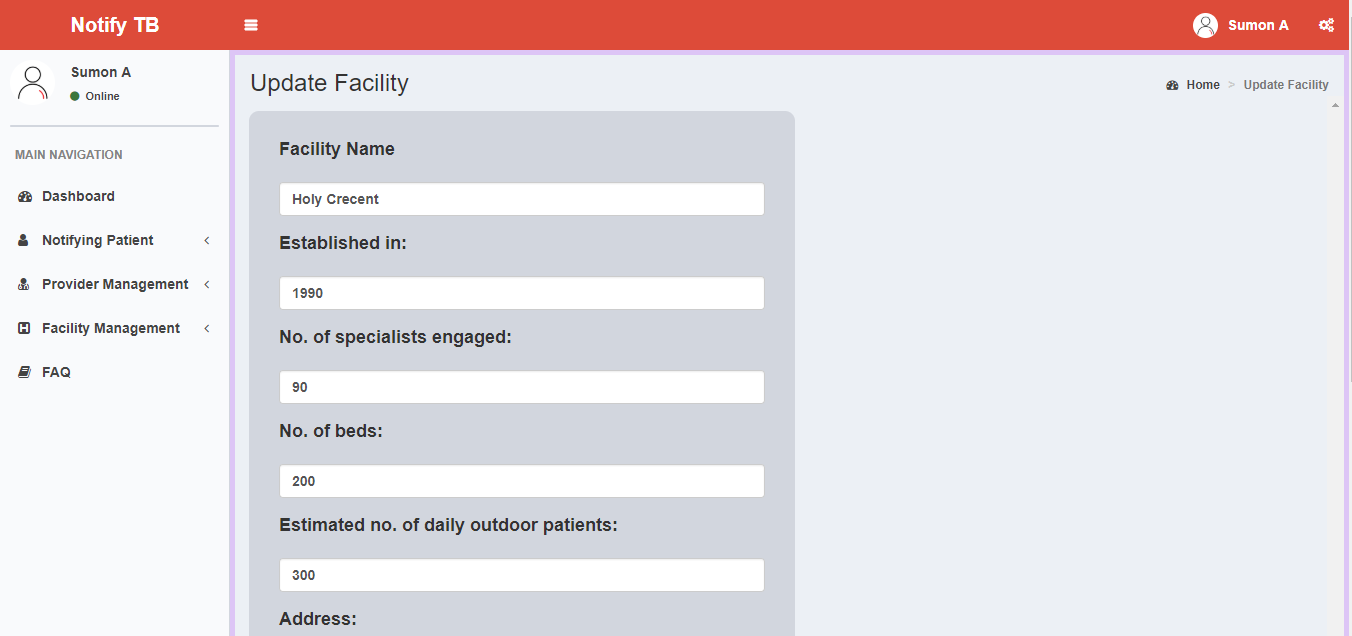
From the menu bar, go to Facility Management -> View All Facility. Click on the edit icon on specific item. An edit window will appeare. You can change status to active or to inactive by clicking on the cross or tick icons.
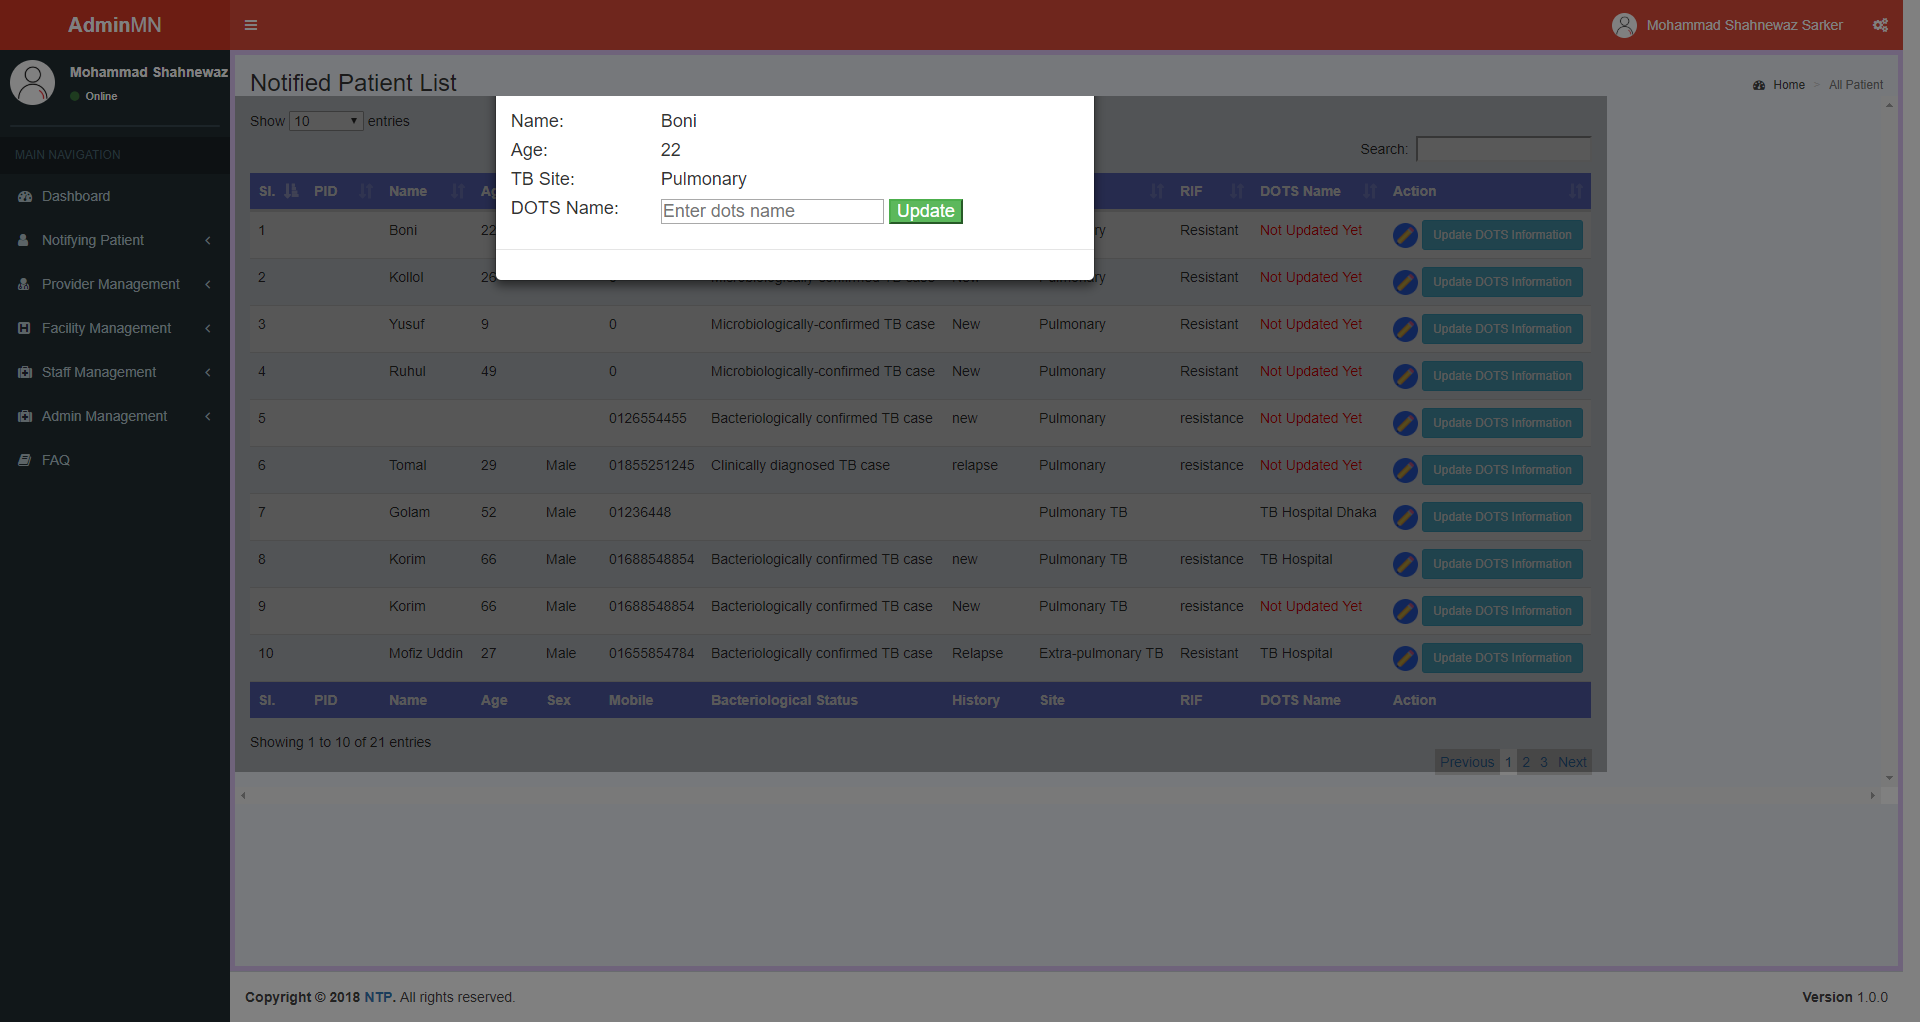
Go to DOTS Management -> View DOTS list. Press the button Update DOTS Information from the list for the item you want to update. A pop up box will appear like below. Enter the DOTS name and hit Update.
DOTS has the privilege to
View nearby patients
Enroll patients
Refer patients to other DOTS
Declare patient as private
Login to the app using DOTS username and password. A list of suggested patients will appear if available. Swipe right to view enrolled patients and next the list of private patients.

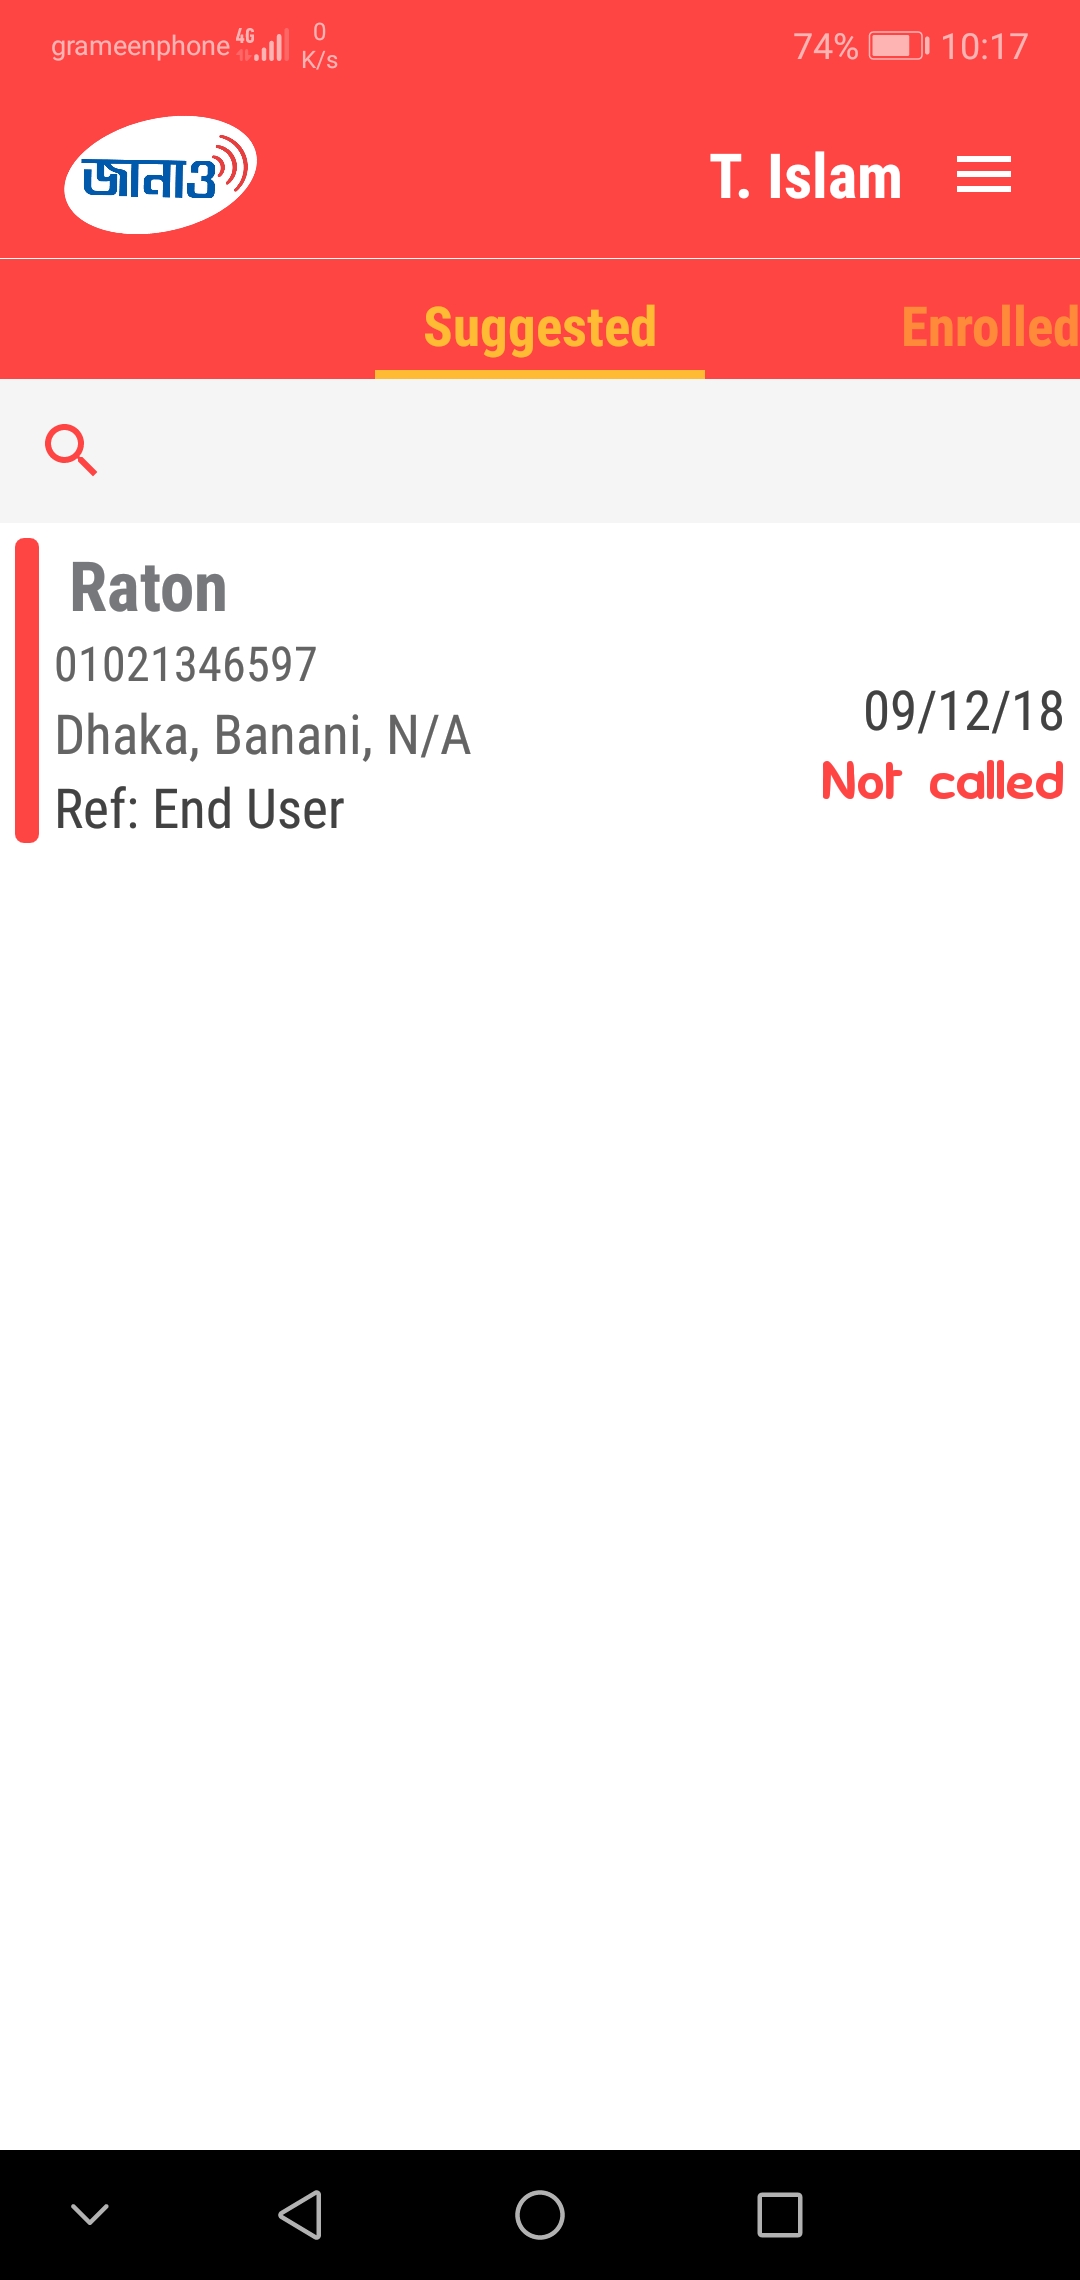
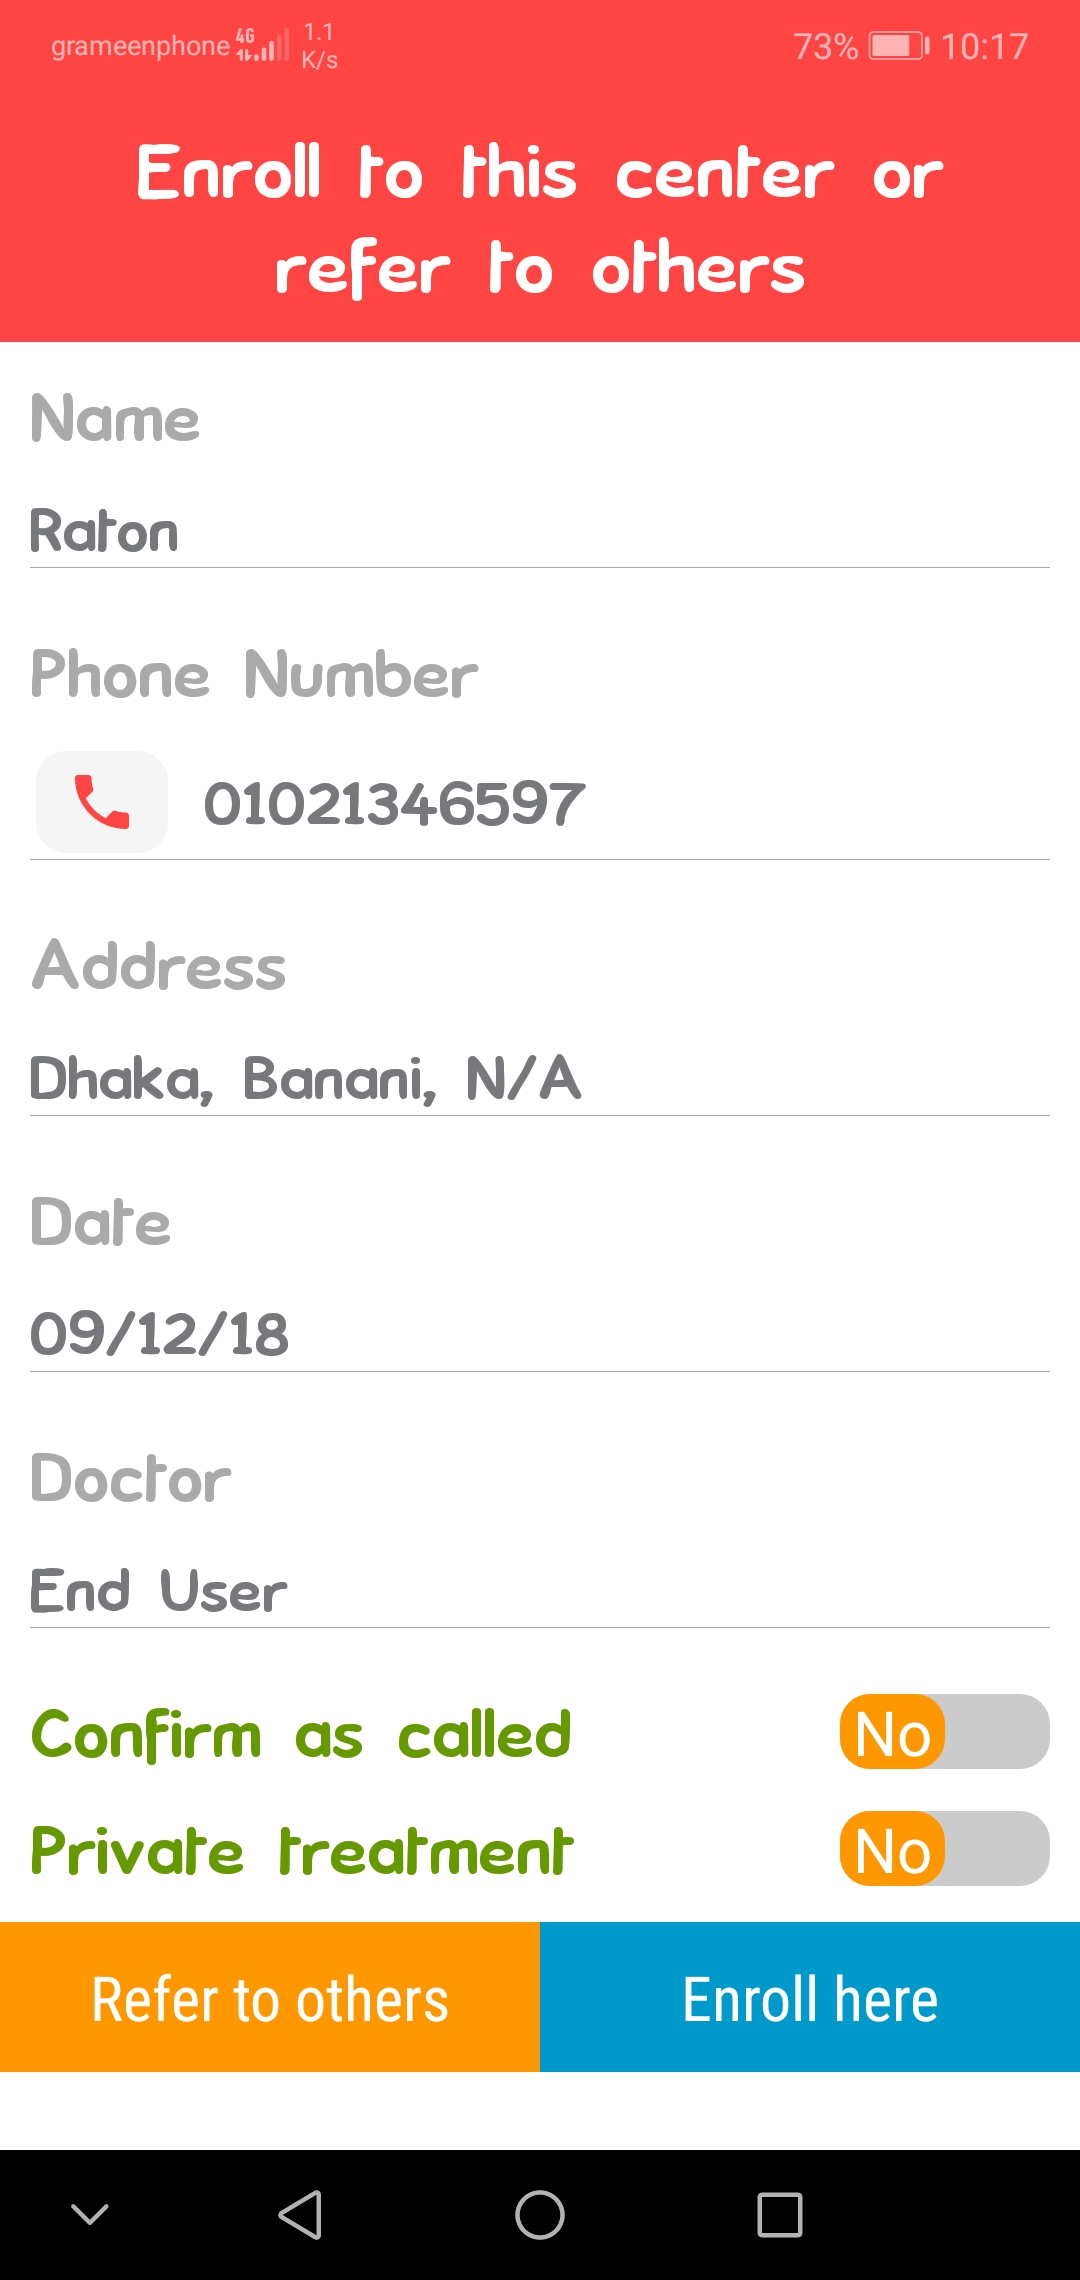
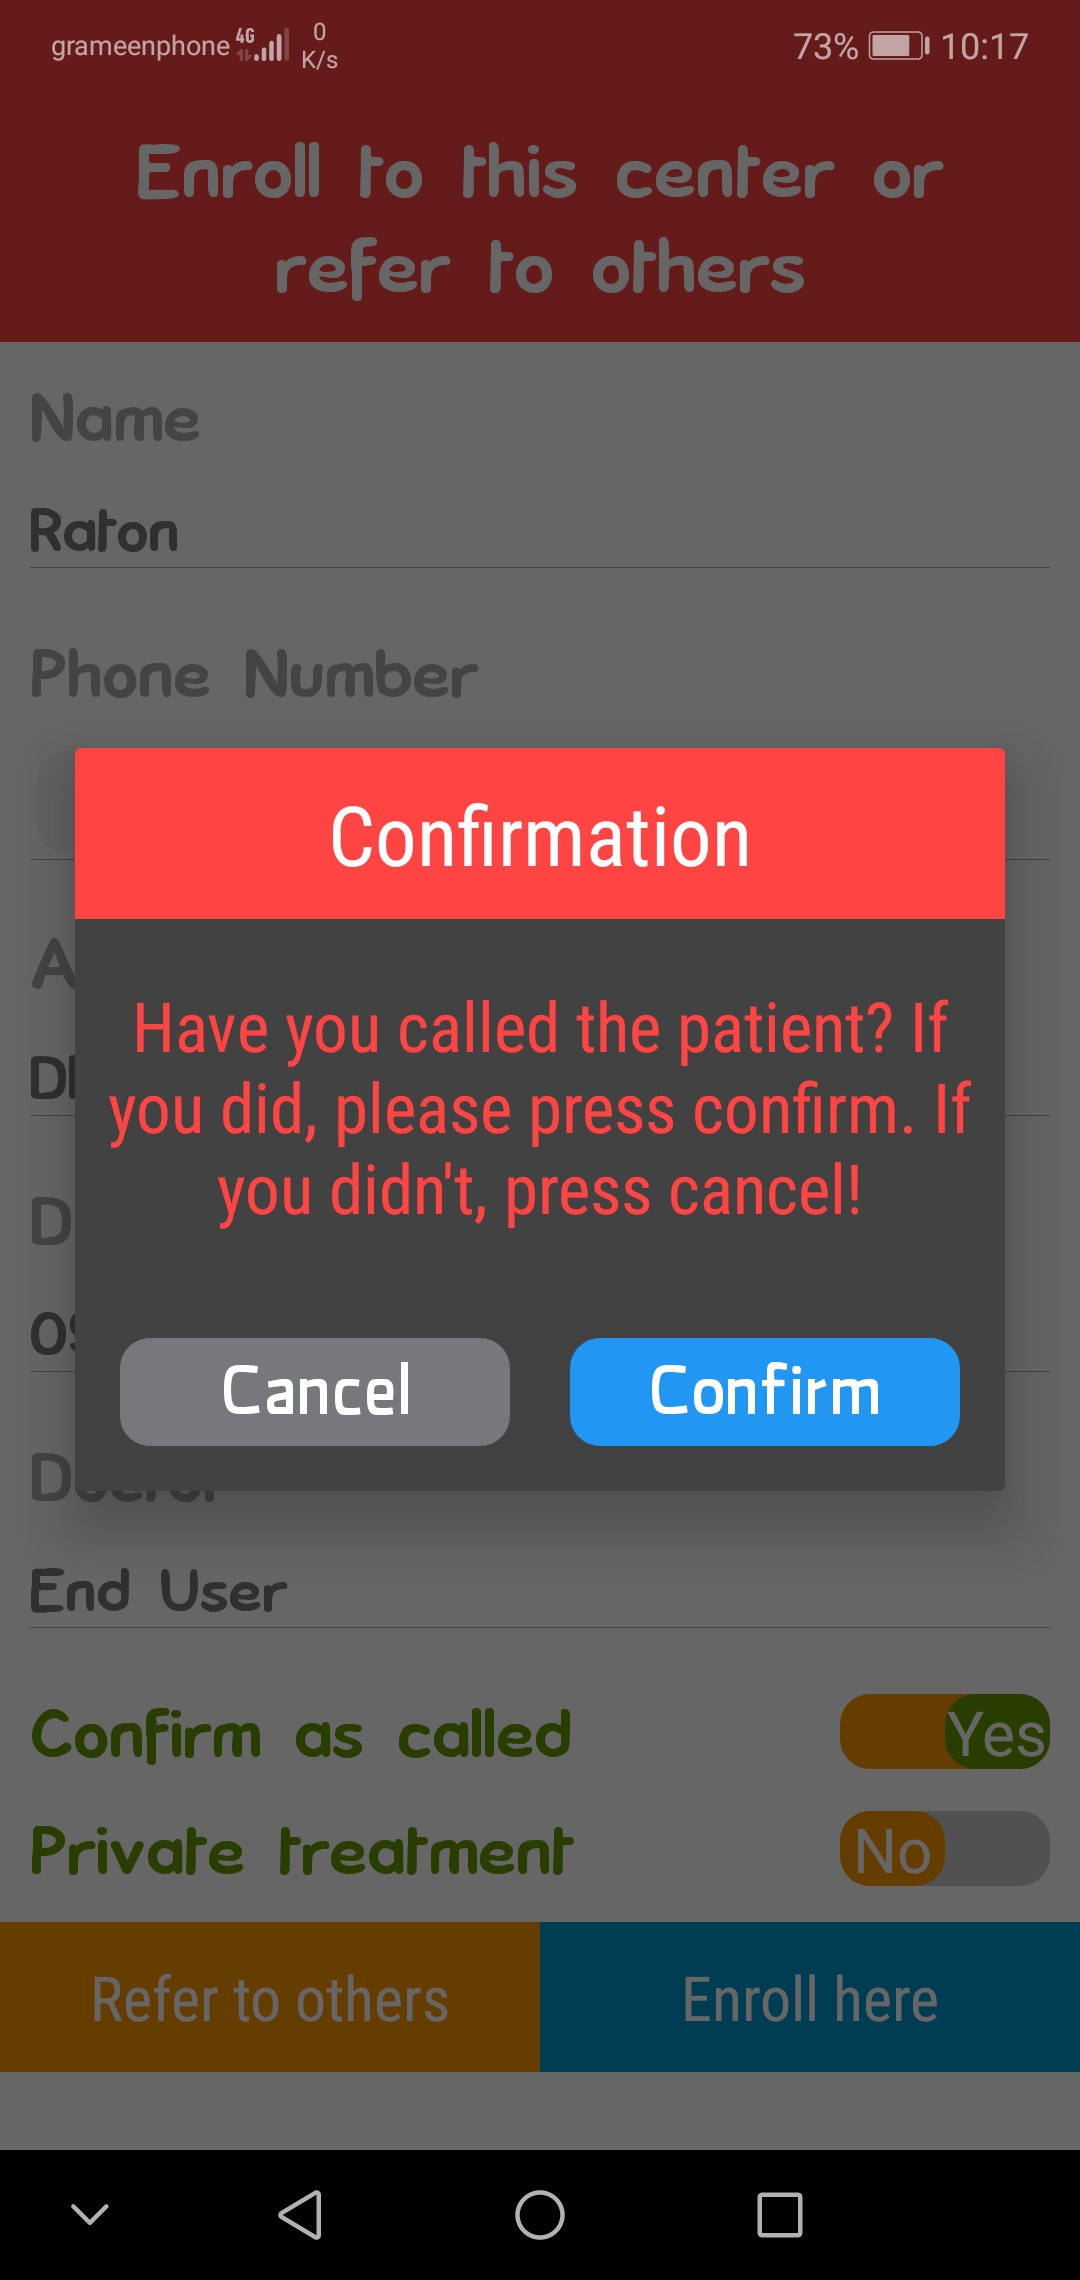
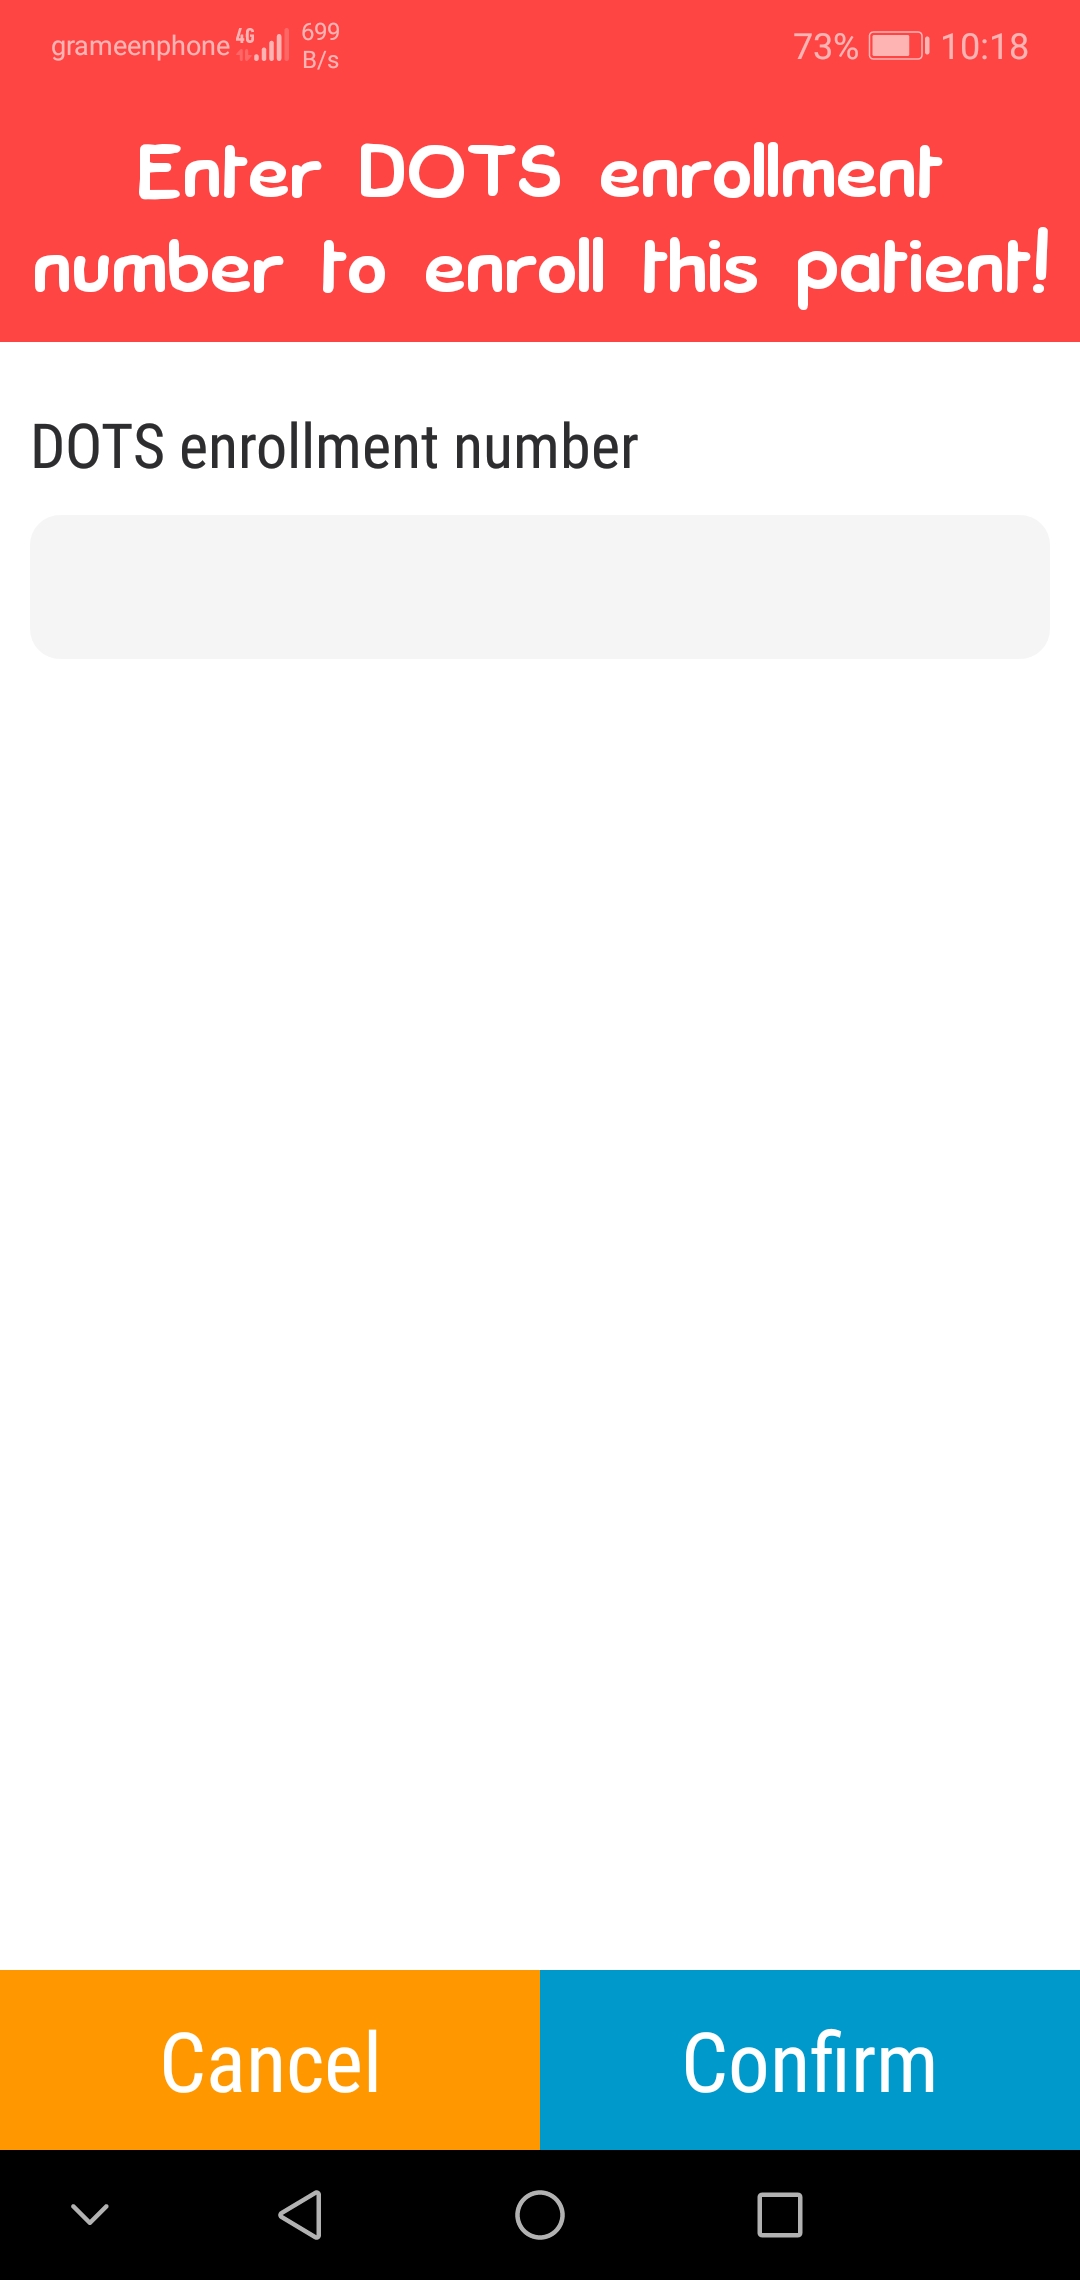
To enroll a patient to the DOTS, it is required to be marked as called. Click on the patient from suggested list. Click Confirm as called to "Yes". A pop up will appear, click Confirm. If confirmed, then the patient can be enrolled. Click on the Enroll here button, enter the DOTS Enrollment Number and press Confirm.

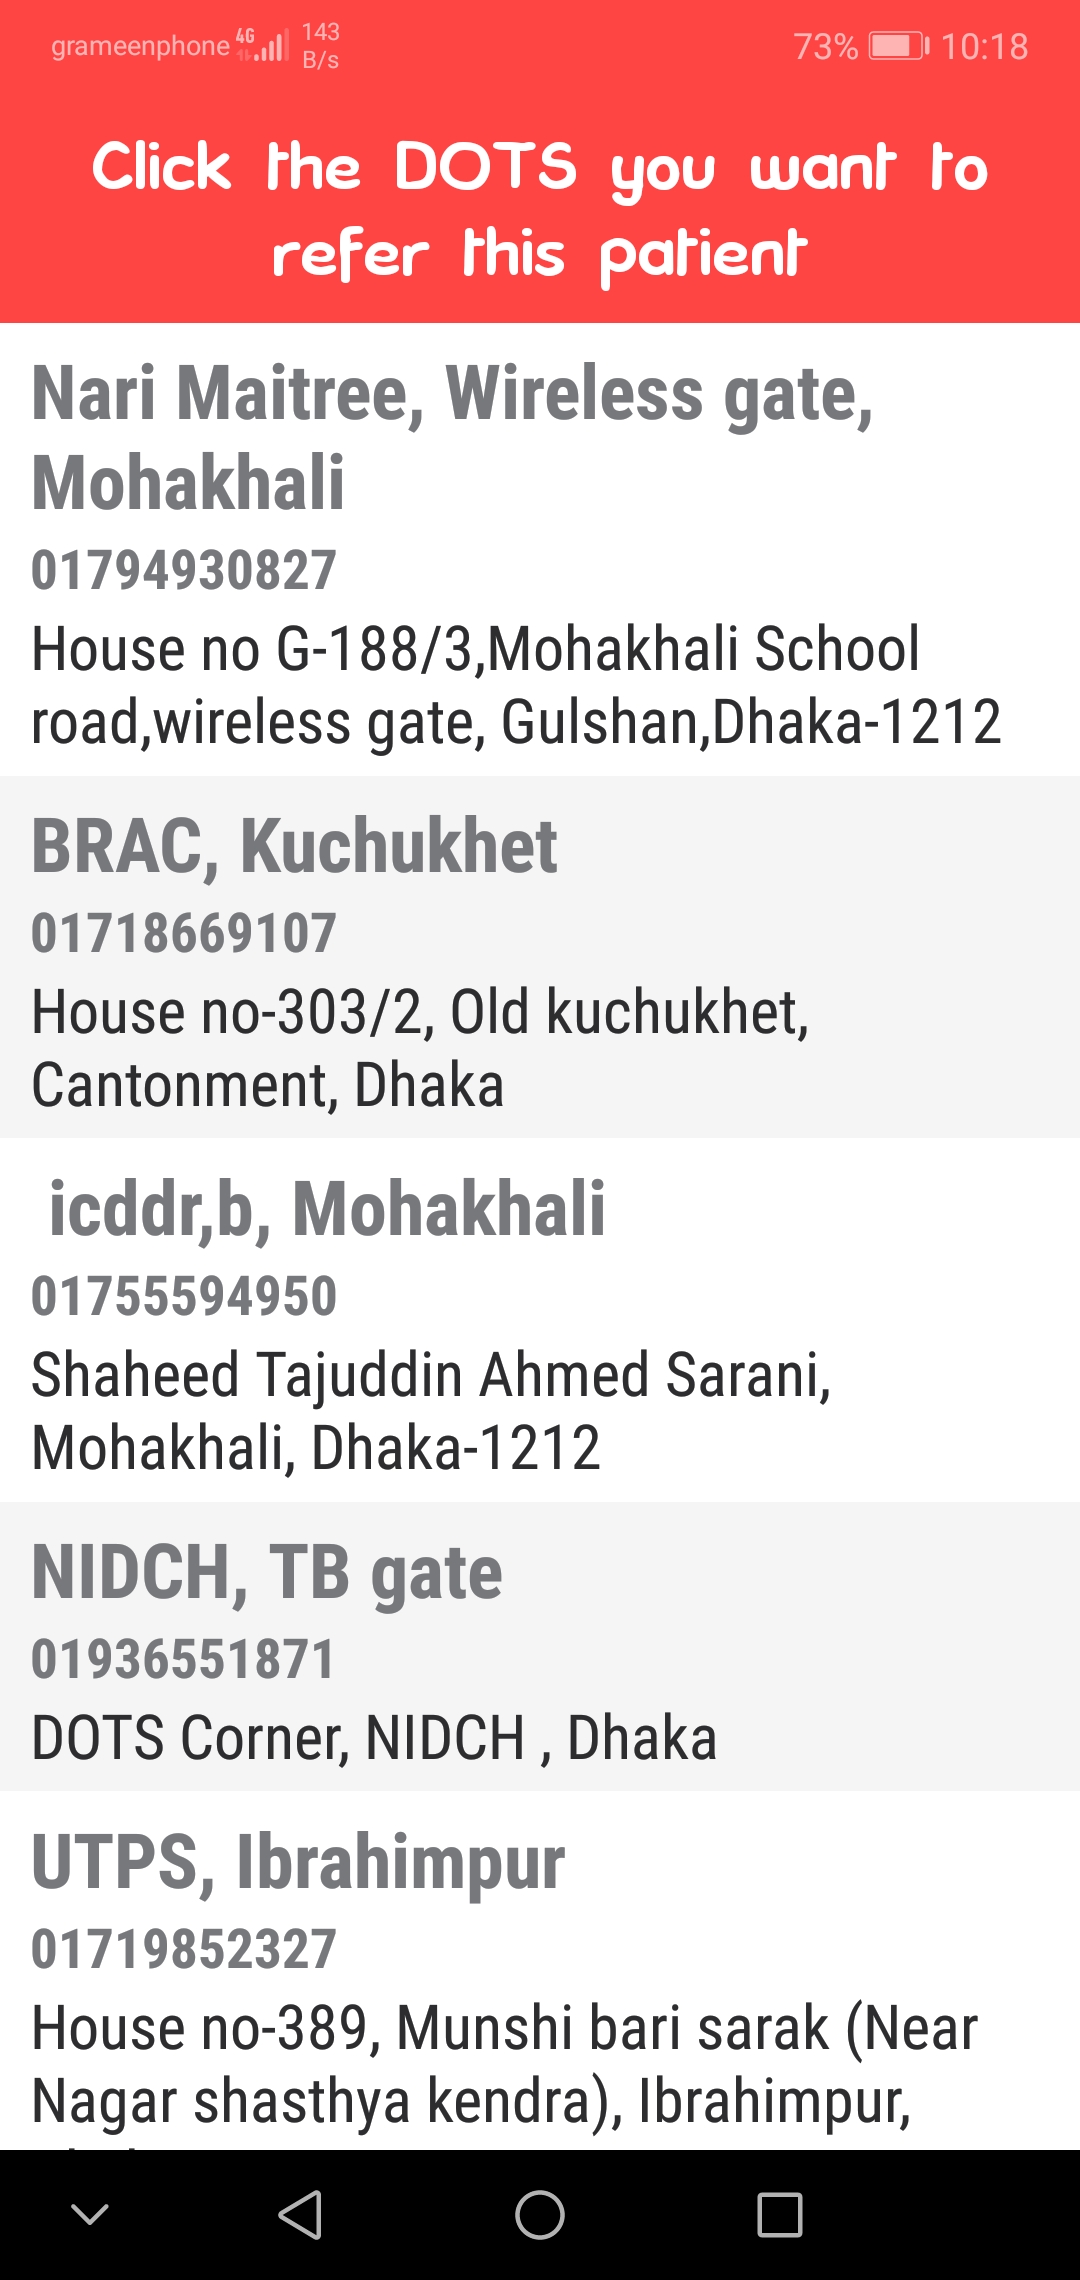
If you want to refer some patient to other DOTS who was suggested to you, click on the patient from suggested list, Confirm as called and press on Refer to others button. A list of nearby other DOTS list will appear, click on the specific DOTS you want to refer to, and press Confirm.

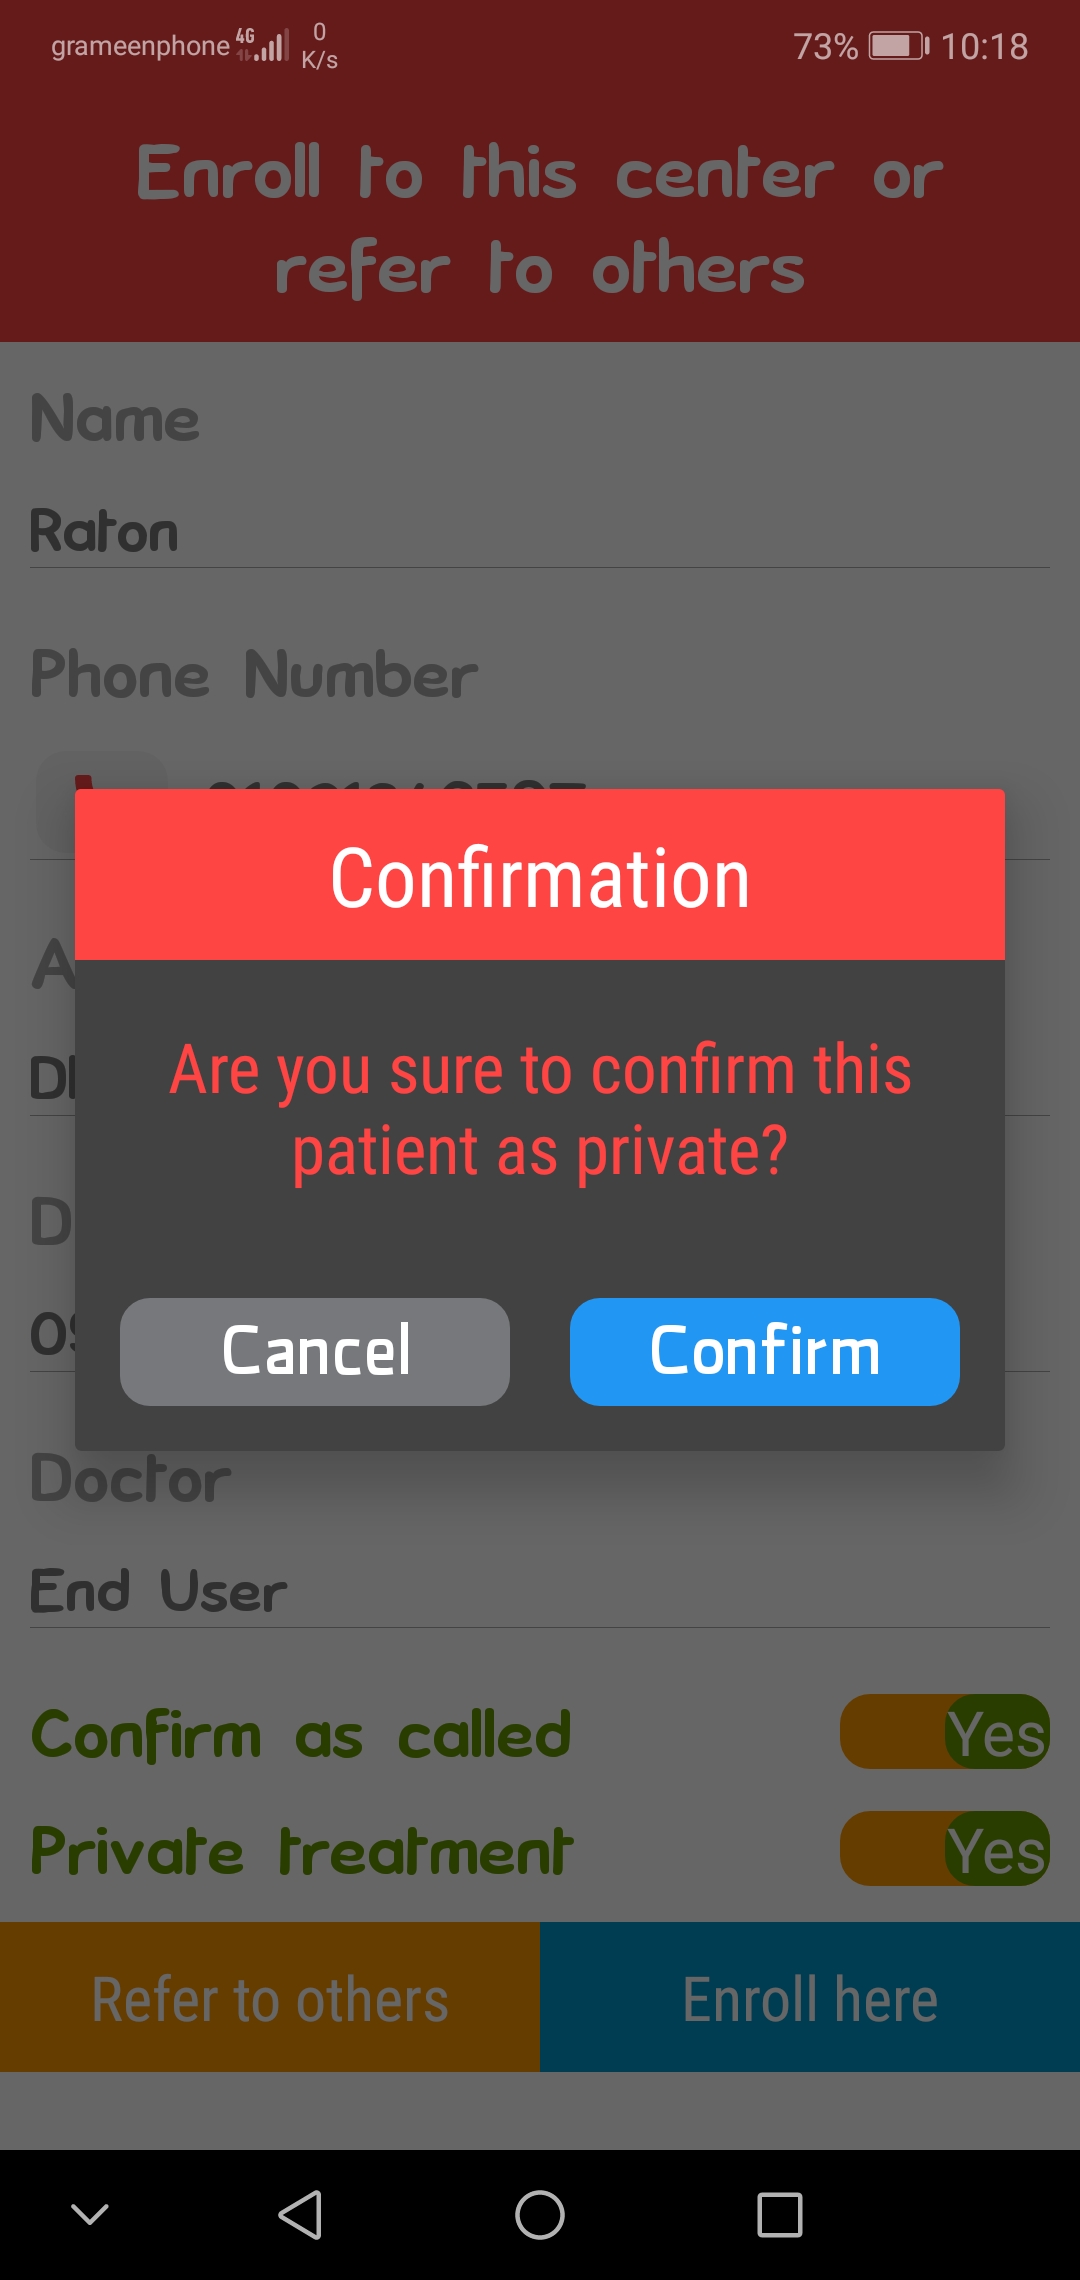
To mark a patient as private, click on the patient from suggested list, Confirm as called, and then make private patient option to "Yes".

Users can
Notify patients with basic information.
Enroll patients to DOTS
Refer patients to other DOTS
From your phone, write SMS in below format:
Patient name(First name/last name only) [Space] Phone number [Space] Age in years [Space] TB Type
Example : Rahim 01XXXXXXXXX 24 EPTB
Send to 01730380078
N.B. TB types can be of two forms: PTB or EPTB
From your phone, write SMS in below format:
EN [Space] Patient ID [Space] DOTS Enrollment number
Example : EN YYYYYY-YY-YYYY XXXX
Send to 01730380078
From your phone, write SMS in below format
REF [Space] Patient ID [Space] DOTS ID
Example : REF YYYYYY-YY-YYYY 0123
Send to 01730380078
From your phone, write SMS in below format
PC [Space] Patient ID
Example : PC YYYYYY-YY-YYYY
Send to 01730380078